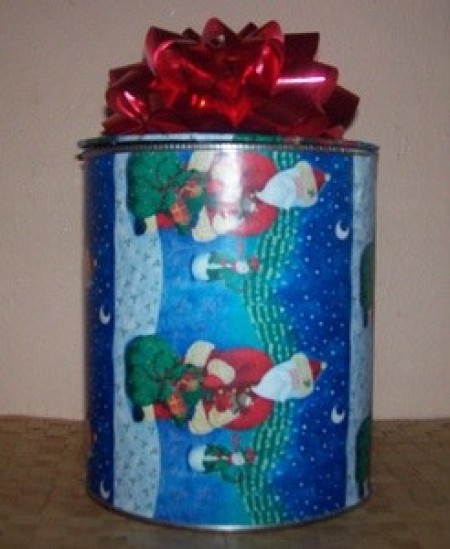
As most of you know, I work in the cafeteria of my local school. Well, the other day the lunch lady was throwing a bunch of the big industrial cans from ketchup and fruit away. I took one look at the nice big cans and thought "I bet I could make something with those" So I promptly pulled them out of the trash.
I took them home and washed them out with some nice hot soapy water with a little bleach. They cleaned up really beautiful. Now the cans I had the labels were on there so good I could not figure out how to get them off so I decided to cover them with wrapping paper. That made me think about how nice these big cans would be to hold gifts under the tree and the best part would be that I could use them over and over. Now I love Christmas but I really hate wrapping gifts. I never was very good at it and my gifts always looked like a child had wrapped them. So we always used the gift bags. These cans are large enough to hold a T-shirt, crocheted slippers, or a bunch of CD's. You to can get cans for free. Hit up your local school they probably would be glad to save them or your favorite restaurant. Here are the directions for making my Industrial Strength Gift Cans.
Tools:
Wash out the cans thoroughly with hot soapy water and give them a bleach rinse. Make sure that all food residue is gone. Now turn your can over on to your cardboard and draw around it. With your razor cutter carefully cut around the circle. You want this to be nice and smooth. Now cut a piece of wrapping paper that is 6 3/8 by 19 1/2 inches. Spray can with spray glue. Carefully wrap the paper around the can. Cut a piece of wrapping paper a little larger than your circle. Glue down your circle to the center of your wrapping paper. Now cut into the paper almost all the way to the cardboard circle so that you can smooth tape down the flaps to the underside of the circle. Cut out another circle of wrapping paper and glue to the other side of the circle to cover the flaps.
With a drill, drill small holes in the can. Now line up these holes and make small holes on the lid. I used an awl that worked really well. Cut small pieces of wire and wire the lid to the can Now, with the white glue mixed with a small amount of water, paint on the glue. This will act as a sealer for the paper. Let this dry. Or you can just spray it with a clear spray paint your choice. You can glue on whatever extra trims that you would like. I just added a big bow.

About The Author: Debra Frick is a mother of 5 and a grandmother to 8 grandsons and one granddaughter. She is a published author and poetress. Recycling and saving money are her passions. She also loves crocheting and cooking. She is also a pet rescue volunteer and has many pets of her own.
Add your voice! Click below to comment. ThriftyFun is powered by your wisdom!
Nice to know the art of dumpster diving is not lost.
I too am a pro dumpster diver.
What an excellent idea. You can also use it for cookies as well, this would save on buying those paint cans. Here's an idea to add above, cut the inner circle about 1/2 in to an inch smaller, the lid will fit even better without slipping.
Wonderful idea! A person could also do this with regular size cans or tuna cans. for very small items.
There was wallpaper border at a $ store that had a row of houses & another that had a row of little shops I covered cans with to use as mailing tins for friends.(very durable & basically crush resistent)I was told the mailman was so thrilled with how cute it looked & how sweet etc...
That's a great gift idea. As a variation, you could also make these into mini kitchen/patio gardens. First, use a can opener to make holes along the lower edge of the can sides. Then, fill it with soil and include some herb or flower seeds.
Add your voice! Click below to comment. ThriftyFun is powered by your wisdom!