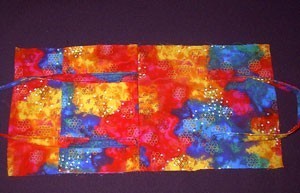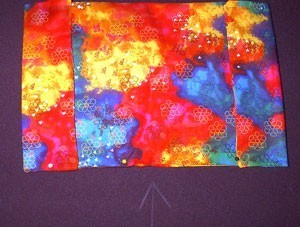
This is a nice gift and takes about an hour to create.
You will need:
- less than a yard of fabric
- a sewing machine (or a needle and thread for people blessed with patience)
- a paper bag
- pen
- scissors
- an iron would be helpful.
- and of course you will need the book you will cover
Instructions:
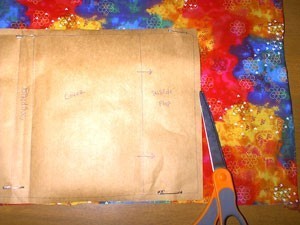
- The hardest part is making the pattern. Lay out a brown paper bag (cut to be flat) on a table. Place the book (closed) on paper and trace one side. Carefully roll (making room for binding) to other side and trace, connect lines (binding). Add half the book width to right and left sides (mine was 23 inches): these will be the flaps to hold the book to the cover.
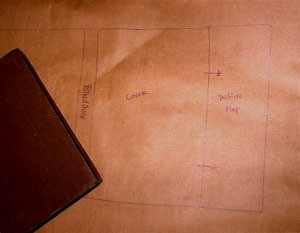
- Cut an inch from lines. Wrap around book and make sure it is the right fit, folding over edges and creasing can perfect it. Cut 1/4 inch (or whatever you usually sew) from lines. Okay, now you have the pattern!
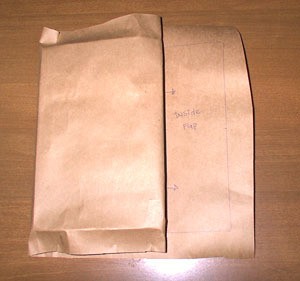
- Pin the pattern to fabric and cut 2. If you want straps you are going to need to cut the desired length with a few inches width (to sew with edges folded in, similar to bias tape). You could also make straps with ribbon and fabric glue.
- To sew on handles, take one piece of cut fabric and wrap around book, with flap tucked: determine where you want the handles to be and pin. Take it to machine, sew. Do the same thing to other side, be sure cover is in the right place!
- Handles are sewn on, now for the easy stuff! Safety pin handles to the center of fabric: this is so you don't accidentally sew them to the side.
- Place right sides of cut fabric together, pin and sew a 1/4 inch seam around edge leaving an opening on top: 2 inch opening is good.

- Flip it inside out. Be sure to push out the corners and seams all the way: this is where the iron is so helpful.
- Now (again) wrap the book with "almost done fabric cover". MAKE SURE BOOK IS CLOSED, and finger press on left and right edges(or whatever works for you) and pin to that measurement.

- Now that it's pinned you want to bring it to the machine and stitch the bottom straight across, as close to the edge without going over. This will be: starting at the bottom corner of one flap and going in a straight line to other flaps' lower corner.

- You will do the same to the top, but before you do: fold the opening in so when you sew across it will seal it shut.
Success! It is finished! Though you may find your own way through trial and error, I wish you the best of luck!
Once you have the pattern, you can make these in 20 minutes or less, no handles: 10 minutes! These are super fun because they are quick and you get to use that fun fabric you have been saving!
By Starchild in VT from Lamoille County, VT
Editor's Note: Special thanks to Starchild for working up these terrific directions and pictures in response to the request.

Add your voice! Click below to comment. ThriftyFun is powered by your wisdom!

April 8, 20070 found this helpful
Thanks so much! I look forward to making these for my sisters.

September 15, 20140 found this helpful
This is a really cute idea.

October 17, 20210 found this helpful
Great idea! I would love to make one with handles to carry my Bible around! Thanks for the idea!
Add your voice! Click below to comment. ThriftyFun is powered by your wisdom!
I would like to make fabric book cover/carriers with straps for gifts. Does anyone have a pattern or directions?
Bobbye from Homosassa, FL
Answers:
Fabric Book Covers
hey, starchild here. I will try and list a how-to this week, It's too hard to explain, I need to make one so I have pics too! (04/04/2007)
By Heather
Fabric Book Covers
I sent them the tutorial, on april 5th. I am sure they are still trying to make sense of what I sent! I hope it helps!
Editor's Note: We'll post it on Monday. (04/07/2007)
By Heather


