Jess
Silver Post Medal for All Time! 267 Posts  The sweet and spicy filling makes these bite-sized apple pies the perfect recipe for any fall celebration. If you serve them warm, they are especially delicious.
Total Time: 20 minutes prep, 20 minutes bake.
Yield: I got about 24 cookies, depending on the size.
Source: I saw a recipe for these on my Facebook feed recently and thought it was such a good and easy idea. When I had a last minute request for a Bake-Off entry, I immediately decided to try them. This was the recipe I found online and modified: http://www.ohbiteit.com/2012/11/apple-pie-cookies.html The cookies were a big hit and were chosen as the favorite recipe at the Bake-Off.
Ingredients:
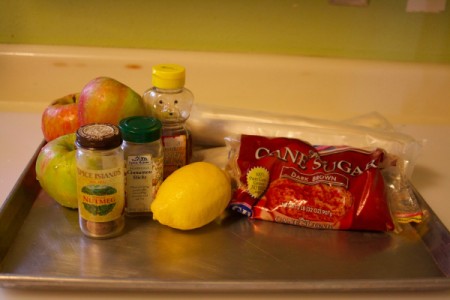
- 4-5 medium apples, finely diced*
- 1/2 lemon (juice and peel)
- 1 Tbsp brown sugar
- 1 Tbsp cinnamon
- 1/2 Tbsp nutmeg
- 1/2 cup honey
- 2 boxes refrigerator pie crust (or homemade)
- butter and flour (to grease the cookie sheets)

*The original recipe called for canned apple pie so I made my own. You could easily use a chunky style applesauce or a variety of other fillings. I'm going to try them with a whole berry jam next time.
Steps:
- Sauté diced apples in a large saucepan for a few minutes, then add the brown sugar, lemon (juice and peel), cinnamon and nutmeg. I grated the spices and lemon peel, using my microplane but dried spices would be fine too. Let this cook down for 10 - 15 minutes or until soft and most of the liquid has evaporated. Adjust to taste with additional lemon juice, honey or spices as desired.
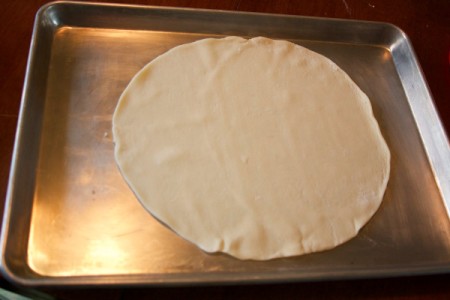
- Preheat the oven to 350 degrees F. Grease and flour your cookie sheet. Roll out one refrigerated pie crust into the center of each cookie sheet, reserving the additional top crusts for later.

- Pour the honey onto the crust, spreading it to the edges. It should be a thin smear.
- When the apples are cooked, spread 1 - 1/2 cups of filling on each bottom pie crust. You may have extra filling, which you can save for another purpose (ice cream topping, perhaps?). You will want the topping to go very close to the edge of the crust and be in a thin even coat.
- Place the top crust carefully onto the filled bottom crust. You want them to line up as closely as possible. Press the top crust down in the center and then at the edges so that the two parts are securely joined.
- Using a small glass or round cookie cutter, cut out as many circles as you can. When you hit the edges, continue cutting out partial cookies until the entire crust has been filled up. Cut slits in the center of each cookie to allow the steam to vent.
- When I baked my first batch, I moved the cookies individually to another cookie sheet. This was time consuming and mangled the bonus crust and filling. For the second batch, I simply placed the finished pie crust directly into the oven. It took a little longer to bake (20-25 minutes), but the cookies were very easy to remove and the cookie scraps were much more palatable.
The original post I saw had a lattice crust on the top layer and I had intended to make one but I ran out of time. It would be worth the extra trouble for a special event. My cookies were still pretty cute, they resembled sand dollars. Next time, I plan sprinkle them with cinnamon sugar before I bake them.
Add your voice! Click below to comment. ThriftyFun is powered by your wisdom!

December 18, 20190 found this helpful
I may never make a traditional pie again. I know I'm going to love this method.

Jess
Silver Post Medal for All Time! 267 Posts December 19, 20190 found this helpful
They were a hit. Hope yours are too. Thanks for the reminder, I might make them for Christmas this year.
Add your voice! Click below to comment. ThriftyFun is powered by your wisdom!

 The sweet and spicy filling makes these bite-sized apple pies the perfect recipe for any fall celebration. If you serve them warm, they are especially delicious.
