 I just put this in the fair, so keep your fingers crossed!
Total Time: With glue curing time, 36 hours
Yield: 1
Source: I have seen countless versions but this one if all mine.
Supplies:
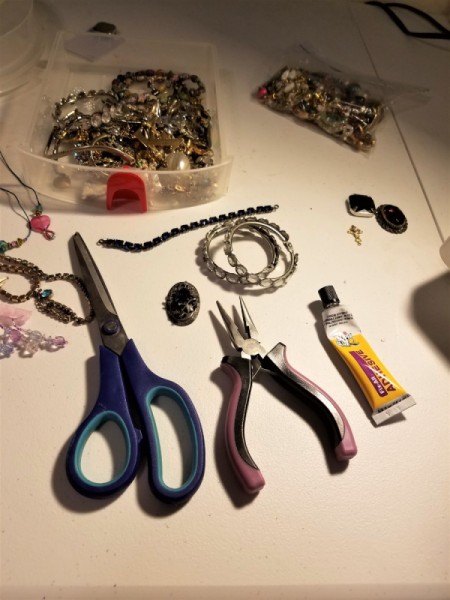
- 1 mirror of your choice and size ($.49)
- 1 oz E-6000 or your choice of glue
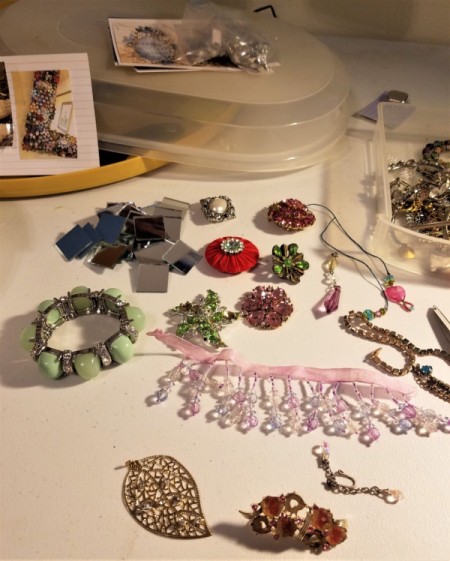
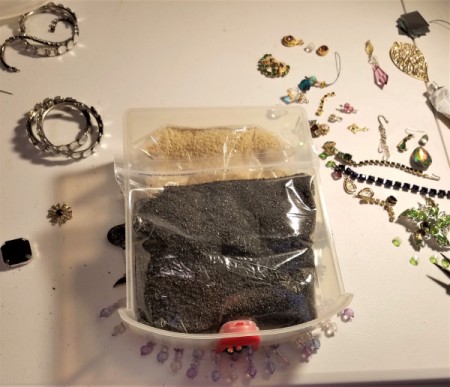
- multiple pieces of broken or miss matched jewelry
- 6 in ribbon scraps ($010)
- 3 jewelers tools ($0.00)
- 3 in duct tape
- scissors ($0.00)
- 2 Bags Dollar Tree sand, or something to weigh the gems down
- 1 Strip ribbon beads ($.25-.100)
- square mirrors about 1" in size ($.50)
Steps:
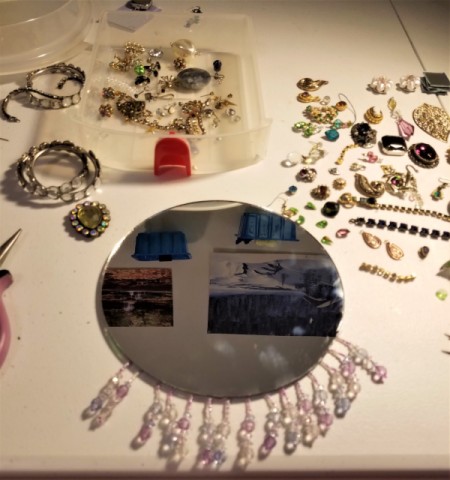
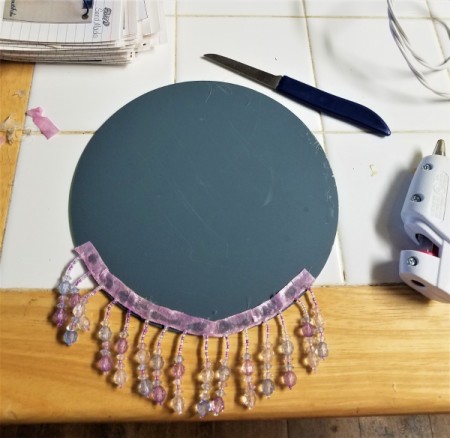
- I didn't do this so it was harder than I expected. But turn the mirror over and put the hanging ribbon on first. I used hot glue and duct tape. I also provided the fair with an easel should the ribbon not hold. I will put the hanger on first from now on.
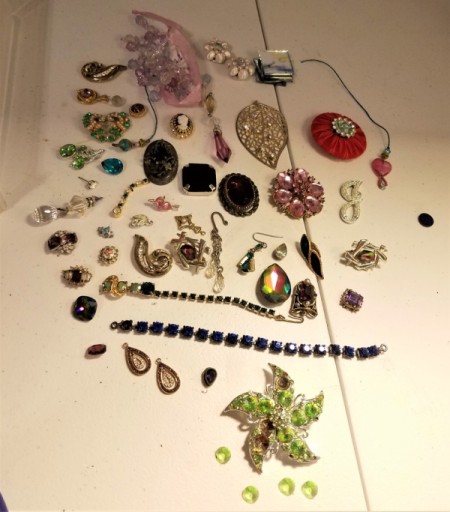
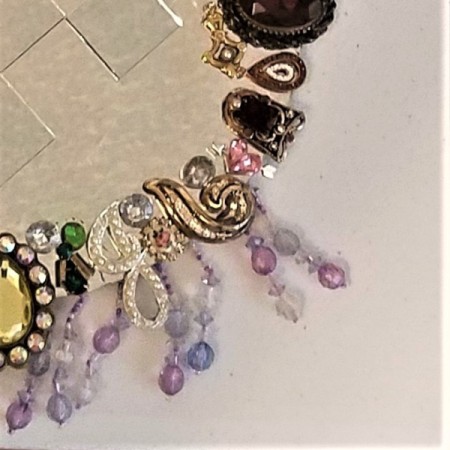
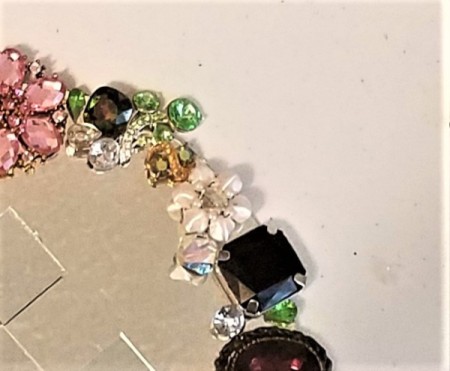
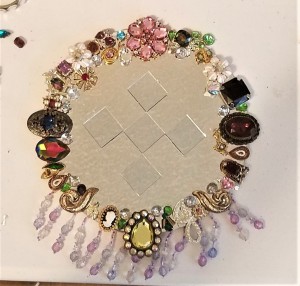
- The first thing I did was to sort out the jewelry and make sure any gems or finding I needed off were "deconstructed". Then you can choose the ones you want to use.

- I then glued the "ribbon fringe" on the back. Because you can't "curve" a straight piece of ribbon, I made little notches in it so it would glue in a round shape.
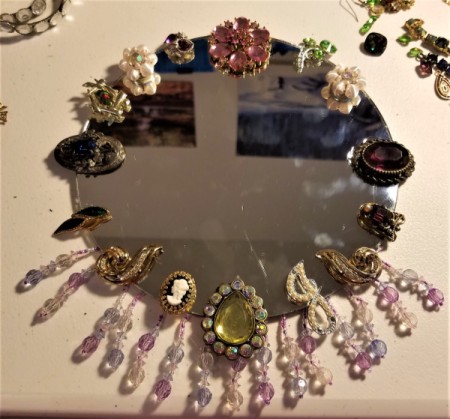
- Once the largest pieces were where I wanted them, I glued them on. Then I sat a little drawer on and weighted it down with some Dollar Tree sand. You don't want to lay anything on the gems that the glue might stick to. That is why I used the little flat drawer.
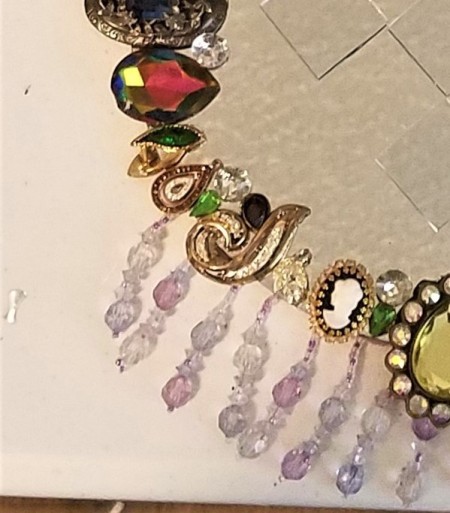
- 12 hours later, I set the next bit of gems in. I found that the first round was the largest, then the second needed to be the medium sized one. I had some that were matching sets, so I placed those across from each other, equally distancing them from their "twin". This only shows on the last round.
- With the next 12 hours done, I set in the last smaller pieces. Now I would love to say that all my gems were flat but they sure weren't. I got away with having some beveled gems because they were small enough to fit in the "crevices" of the medium gems. If I were doing this for a client, I would be a lot more picky. But this was my first one and the fair is a great way to "test" things you submit.
- I put on some square pieces of mirror for a final touch. Then, all the glue strings and fingerprints need to be cleaned off. You are now ready to "N-JOY" your new mirror!!
Add your voice! Click below to comment. ThriftyFun is powered by your wisdom!
15mhhm15
Diamond Post Medal for All Time! 1,298 Posts August 19, 20180 found this helpful
Beautiful! Loved how your mirror turned out.

August 20, 20180 found this helpful
Thanks so much!! Even if I don't win a ribbon it will look stunning on my wall!!
September 15, 20180 found this helpful
Looks like a winner to me!
Very pretty and inexpensive but does not look that way.
I have a "shut-in" friend that I think would really like to try something like this.
Thanks - you make such fun things.
Add your voice! Click below to comment. ThriftyFun is powered by your wisdom!