social

Canning Kiwi in a Hot Water Bath

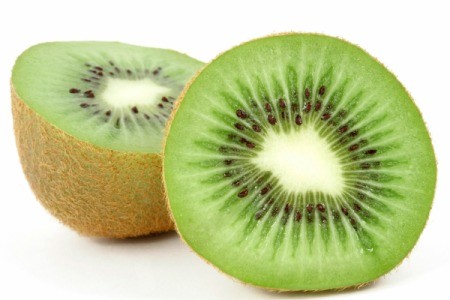
Kiwifruit is your first consideration when canning the kiwi. To check the fruit that you might want to can, you need to "sloop" the kiwi. Sloop is a word made up in the kiwi world for slicing and scooping. With a sharp knife, slice the kiwi lengthwise and then scoop out the sweet fruit. It should be firm and ripe. It should taste good. The kiwi will taste a bit milder once it is canned. Its color will also be lighter.

Advertisement

Supplies:

  • water bath canner
  • set with funnel, tongs, lid lifter, and headspace measure.
  • jars
  • lids and bands
  • Fruit Fresh (prevents darkening of fruit) or lemon juice
  • thick towel

Preparing Jars

To prepare the jars, they can be washed in a dishwasher if it has a sanitized cycle. The jars can be left in the dishwasher on a heat cycle. The lids need to be washed and left in the hot water. The canner needs to be filled so that there will be an inch of boiling water over the top of the jars.

Simple Syrup

You will want to make a light simple syrup for canning. Use 2 cups of sugar and 4 cups of water. Heat the water until it is simmering. Add the sugar a little at a time and let it dissolve. Keep it gently boiling for 2 to 3 minutes and then keep it hot for the canning.

Advertisement

Preparing the Kiwi

The kiwi needs to be washed and peeled. It can be sliced as you desire. You may want slices or a cut lengthwise.

Canning the Fruit

  1. Once the kiwi is cut, sprinkle lemon juice or Fruit Fresh over all the cut sides of the fruit. Slip the fruit into the syrup and cook for a few minutes. Keep the syrup at a gentle boil stage.

  2. Take the prepared jars and fill them with kiwi. If you want to work with the kiwi to make a pattern of the fruit in the jar and make it pretty, do that. Add the syrup to the fruit in the jar. Check for air bubbles with a plastic spatula or the utensil for measuring headspace. Leave ½ inch for headspace even after you add syrup to the jar.

  3. After wiping the jar top to clean off any syrup, place the lid on the top. Add the band and tighten so it is snug. Not as tight as you can make it but snug. Place the jars into the canner with the jar grabber. Be sure the tops are covered with boiling water and process for about 20 minutes. When processing time is up, remove jars from canner and place on thick towel on counter. Keep the jars from touching. Let them cool. Store in a dark, cool place.
Advertisement

By Mary Belk

sliced kiwi
 

Add your voice! Click below to comment. ThriftyFun is powered by your wisdom!

 
November 15, 20170 found this helpful

I did not see the size of the jar used in this process


Silver Post Medal for All Time! 267 Posts
November 16, 20170 found this helpful

You can use any size jar you wish. I would probably go for the same size you would use for jam and jelly, maybe half pint or pint.

Let us know how it turns out.


Add your voice! Click below to comment. ThriftyFun is powered by your wisdom!

 
In This Page
< Previous
Categories
Food and Recipes Canning FruitMay 9, 2013
Pages
More
🍀
St. Patrick's Ideas!
🎂
Birthday Ideas!
💘
Valentine's Ideas!
Facebook
Pinterest
YouTube
Instagram
Categories
Better LivingBudget & FinanceBusiness and LegalComputersConsumer AdviceCoronavirusCraftsEducationEntertainmentFood and RecipesHealth & BeautyHolidays and PartiesHome and GardenMake Your OwnOrganizingParentingPetsPhotosTravel and RecreationWeddings
Published by ThriftyFun.
Desktop Page | View Mobile
Disclaimer | Privacy Policy | Contact Us
Generated 2024-02-05 09:48:35 in 5 secs. ⛅️️
© 1997-2024 by Cumuli, Inc. All Rights Reserved.
https://www.thriftyfun.com/Canning-Kiwi-in-a-Hot-Water-Bath-1.html