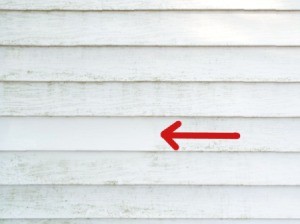
 In another post, I mentioned having used equal parts household chlorine bleach and white vinegar to remove green mold growing on the vinyl siding facade on the north side of my home. It is quite effective. But, I've found something much better.
While the bleach/vinegar solution does a good job, using it is not necessarily a good idea. It does release a noxious gas and should be used only in well ventilated areas. While I suffered no ill effects from cleaning my vinyl with it, I have no idea what impact its use might have on the environment.
I keep a small spray bottle filled with 3% (10 volume) hydrogen peroxide by the kitchen sink. I spray the faucet, faucet base, and handle with this peroxide after cleaning the sink. I wait a minute and then rinse.
Mold has a tendency to grow on the faucet, particularly around the base. If a heavy film is allowed to accumulate, you will see a lot of foaming when peroxide is sprayed on it. It kills the mold, and the foaming/boiling action dislodges the mold so it can easily be rinsed away. By spraying the faucet daily, there is no chance of mold buildup and new growth, too small to be seen, is quickly eradicated.
Peroxide is deadly to living tissue. (It should never be used full strength on open wounds). It occurred to me that the mold on the vinyl consisted of living organisms and should respond to being treated with peroxide.
I poured a half cup of peroxide into a small glass bowl and added a couple drops dish detergent as a surfactant. With a wide (4 inch) paint brush, I painted a thin film of the solution on the vinyl. I waited 5 minutes and then sprayed the treated area with a garden hose at full force. With no scrubbing, the treated area was clean.
While my way would be ideal as a spot treatment, I see no reason why large areas couldn't be cleaned by applying the solution with a hose end sprayer. I would suggest applying all safety precautions regarding your person and foundation shrubbery, etc.
This idea just came to me 'out of the blue'. I'm sure I'm not the first to think of it, but I am sure I will soon be putting it to use. The north side of my home is getting greener by the day. I want a green lawn, not a green house (maybe wedgewood blue, but not mold green).
Glad you like the tip. I've been using peroxide on faucets for years. It's good to see the foaming, knowing it's killing germs even if the faucet looked immaculate before you sprayed.
A very dilute H2o2 solution can safely be used as a debriding agent on certain wounds (not fresh, open, raw wounds). I still do not advise its use, even in this manner, unless you know what you are doing.
Whatever you use to clean wounds, remember this: If it's strong enough to kill a bug, it's strong enough to kill living tissue.
What you say sounds logical, but
I use to paint my interior walls at least every two years. I always washed them thoroughly before painting. I wondered which would be best, starting at top or bottom. I read several articles written for magazines by professional cleaners. They all said start at the bottom and gave sound reasons, though I've forgotten most of them. Mind you, this was on interior walls and a small section of wall was washed at a time. Starting at the bottom worked best for me.
You are right in that if you start at the bottom, when washing the top, dirt from the top will flow over the previously cleaned bottom. For me, the dirt flows over the cleaned area and keeps on flowing. It does not 'dirty up' the cleaned area. A water stream flushes it away.
Interior walls are a bit different in that the dirty water can run down onto the yet uncleaned surface causing dirty streaks that are much harder to clean.
The surface of vinyl siding is nowhere as porous as interior painted sheet rock walls, so dirty water running down over yet uncleaned surfaces may not pose as much a problem.
I start at the bottom on the inside (with good reason), and I guess that's why I start at the bottom on the outside. Truth be known, when it comes to cleaning exterior vinyl siding (especially with a power washer), it really might not make that much difference where you start.
Cars? I usually start at the top, too, but I wont wash a car with any grit on it. I splash soapy water over it and use a strong water stream to rinse grit away before I use a rag or mitt.
Flattery will get you everywhere.