Becky Miles
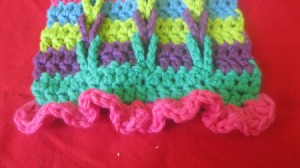
Bronze Feedback Medal for All Time! 158 Feedbacks  I wasn't sure what to call this pattern. I saw a picture on Pinterest of the most beautiful crochet pattern, but there were no instructions. I wasn't even sure what to call the pattern to try and find it. So, I made one up and I'm amazed that it turned out okay. My daughter picked out the colors. There's a good amount of counting in this pattern, but once you are used to it, it's not too bad.
Total Time: Depends on how big your scarf is.
Yield: 1 scarf
Source: A picture on Pinterest
Supplies:
- yarn in your choice of colors
- size H crochet hook
I used Sugar and Cream yarn I found on sale. The colors I used are Hot Pink, Hot Blue, Hot Green, Black Currant, and Mod Green.
Steps:
- This is a pattern for a scarf, but you could easily make it larger for a blanket, pillow case, etc.
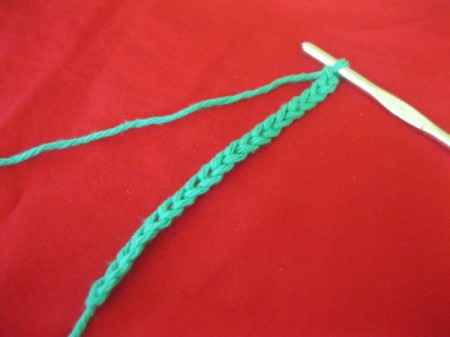
- Start with first color, chain 20 times.

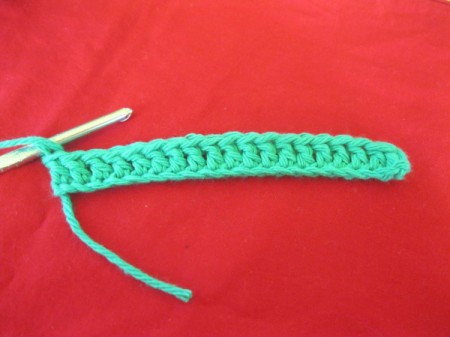
- Skipping first chain, double crochet (DC) in the 19 spaces in your row.

- Turn. Chain 1. 4 DCs. Slip stitch in next opening. Chain 12 times. Slip stitch into same opening. (This step is only done on the first row. It looks better when you go to pull the loops). 4 DCs. Repeat to the end.
- Now you are going to change colors. I hate having to weave in those little ends when you change colors. It seems like it takes longer than making the piece. I found a way to work the ends in: Before you do your last DC in your row, add your next color. Leave it there while you do your DC. Turn over. Pull your first color back and make 1 chain with the new color. Pull those 2 extra yarn strands while you do 3 DCs. Once you finish the 3rd DC, snip the strands of yarn, being careful to not cut into your scarf! Do your 4th DC. Chain 1. DC into your next group of 4 DCs. Repeat to the end.
- Turn over, chain 1. 4 DCs. When you finish the 4th DC, chain 12 times. Take that last chain and DC into the next group of 4 DCs, skipping the one in the middle. Repeat to the end. Continue adding rows to your scarf, until it's as long as you would like.
- For the fun part, you have to connect all those loops you made. Hold the top loop, thread in the loop underneath it. Pull down. Pull the next loop through. Do this til you reach the end.
- I added a ruffle to the ends. For the bottom, I tied on a contrasting color. 5 DCs in the first empty space. Add 5 DCs in each empty spot, creating a ruffled effect. For the top, add your last next color. Do the same thing as the bottom, 5 DCs in each space. When you reach a loop, slip stitch it into the space and then do your 5 DCs. Continue to the end.
Add your voice! Click below to comment. ThriftyFun is powered by your wisdom!

melissa
Silver Post Medal for All Time! 293 Posts March 9, 20150 found this helpful
This is beautiful and unique, love it!

October 23, 20160 found this helpful
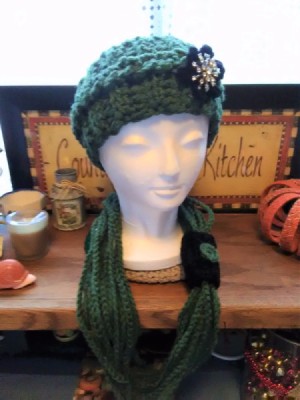
I love this pattern - It's my new favorite go to when I need a gift. Works up so quickly, and I love the textured look. I also made a hat to match. Thank you for sharing!

March 5, 20170 found this helpful
That turned out great! I too had to make up my own over the Holidays. I made my grandson's girlfriend a headband and it turned out very nice .
I even added a pin she can take off and wear on something fancy if she would like.

Add your voice! Click below to comment. ThriftyFun is powered by your wisdom!

 I wasn't sure what to call this pattern. I saw a picture on Pinterest of the most beautiful crochet pattern, but there were no instructions. I wasn't even sure what to call the pattern to try and find it. So, I made one up and I'm amazed that it turned out okay. My daughter picked out the colors. There's a good amount of counting in this pattern, but once you are used to it, it's not too bad.

