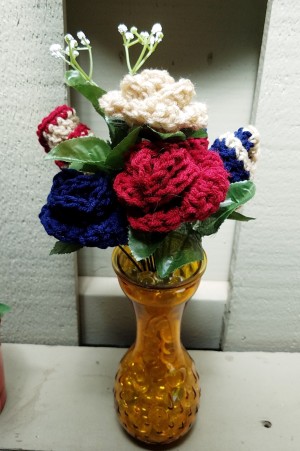
 This is a labor intensive craft, but I am glad I stuck it out. With three yarn colors of burgundy, tan, and navy and some faux rose stems, I made two different styles. I hope you like them.
Total Time: 5 hours
Yield: 6
Source: Two styles of rose patterns. One has a link but the other is my own spin on several tries.
Link: Naztazia
Supplies:
- 1 oz burgundy yarn
- 1 oz tan yarn
- 1 oz navy yarn
- size J hook
- scissors
- darning needle
- 6 faux rose stems
- hot glue gun and 1 stick
- 1 vase
- wire cutters
Steps:
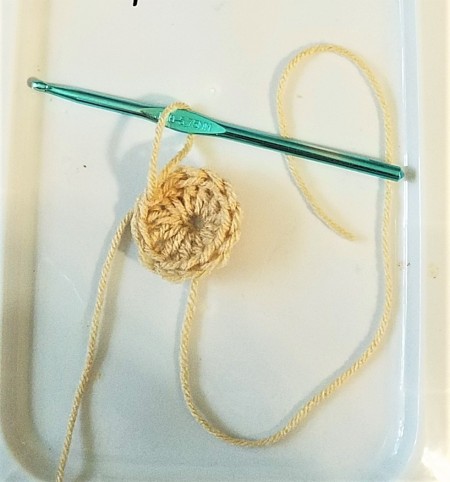
- For the first pattern, you crochet a 3 row circle like you were doing a hat. Chain 3 (not counted as a double) and make 12 doubles in the first chain. Join with a slip stitch and chain 2, (not counted as a double).

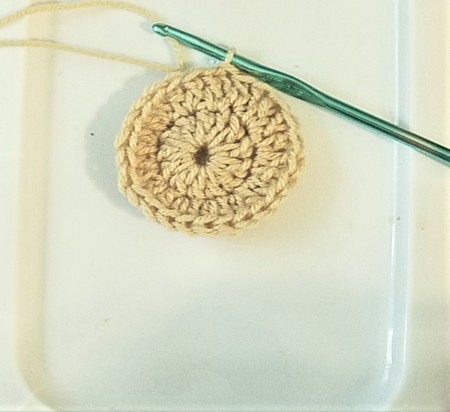
- Make 2 doubles in each of the previous row, for 24. Join and chain 2 (not counted as a double).

- Make 1 double in one, and 2 doubles in the next around for 34. Now the math won't work, but you are essentially leaving a gap or a notch. Tie off your yarn. Add your border color. Mine was burgundy to tan. Making a single crochet in each one around, then leave a 4" tail. Make two more in your other colors.
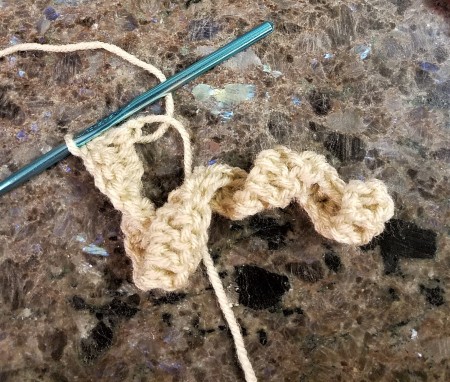
- For the next style, chain 43. The last 3 chains will count as your first double crochet this time. Make 42 more doubles in the remaining chain. Chain 3 and turn.

- The pattern now is 3 5 stitch treble crochet petals, then 3 5 stitch double crochet petals, and 3 5 stitch double crochet petals. With your first chain 3, make 4 more trebles in the 4th stitch of the hook. This is your 2nd treble. Make 3 more and repeat this 2 more times. Then make 3 more just like this, but with double crochets and the last 3 with half doubles. This gives you some large, medium, and small petals as you are going into the flower's center.
- To construct the first roses, you will need to roll them from the non-notch side toward the notch. At this point, you will hold it at the notch and then pull one half of the roll onto the other. This isn't easy at first, but it's worth it. Once it is folded, one edge will fall over the other one, so you have a chance to do the hot glue, or you can sew it. As you can see, this fold over creates the look of a rose bud of sorts. You can then insert the stems from the faux roses into the base of the bud, hot gluing it if you want to.
NOTE: When I make these again, I won't do the borders. Because I wanted the outside of the work to be the outer edge of the flower, it made the borders back show. Live and Learn - Pull the faux roses off the stems, but not the leaves. Insert the stem into the rose and glue the bottom of the rose to the leaves, bringing them up to secure the rose in place. You can also put a bit of glue on the stem before it's inserted into the rose.
Add some baby's breath if you have some, and you are set. N-JOY!!
Add your voice! Click below to comment. ThriftyFun is powered by your wisdom!

 This is a labor intensive craft, but I am glad I stuck it out. With three yarn colors of burgundy, tan, and navy and some faux rose stems, I made two different styles. I hope you like them.

