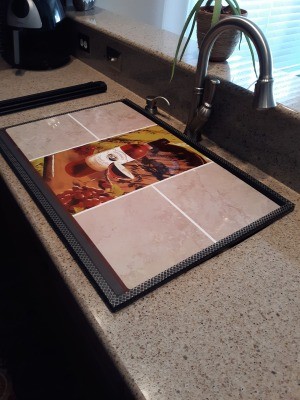
 I ran across an item called a "noodle board" one day online when I was looking for an idea to cover my kitchen sink to provide temporary counter space. You know those times- everyone is coming to your house for a get together, but space is at a premium to set up a buffet.
Having champagne taste on a beer budget, I was not willing to part with upwards to $125 to pay for a noodle board, especially since it's kind of a unitasker. It looks very easy to construct from wood, but I live in a condo and my power tools are in my rear view mirror. Enter my next favorite construction material, foam core board!
I glued three 20 x 30 inch boards from Dollar Tree on top of each other using clear craft glue. I used black ones on the outside and sandwiched a white one on the inside, as it was slightly thicker and I wanted a black exterior. Then let them sit on a flat surface weighed down by books overnight. Later I finished the edges with black tape, applied a backsplash sticker (also from Dollar Tree) and some washi tape that I had on hand. On the back, I glued a piece of rug grip material, also something I had on hand. This is an optional item, but it helps keep your board in place. The sky is the limit as to how you want to decorate your board, or leave plain!
The 3 boards laminated together are very strong, yet very light and easy to store. Noodle boards are also used on stoves, and mine fits perfectly there too. Just be careful to make sure your stove is completely cool and don't make the mistake of turning on your stove or oven while in use there.
Hope you enjoy this! Happy crafting!
Total Time: 2 days, including dry time
Yield: 1
Source: My crafty self
Supplies:
Steps:


Cool idea! But, what is a backsplash sticker? I never heard of one. Are those tiles on either side of the picture that you added? Or is it all part of that backsplash thing?
Dollar Tree has these big stickers (dont remember the size, but they nearly cover the 20 x 30 board). They are meant to be put up as an inexpensive backsplash.