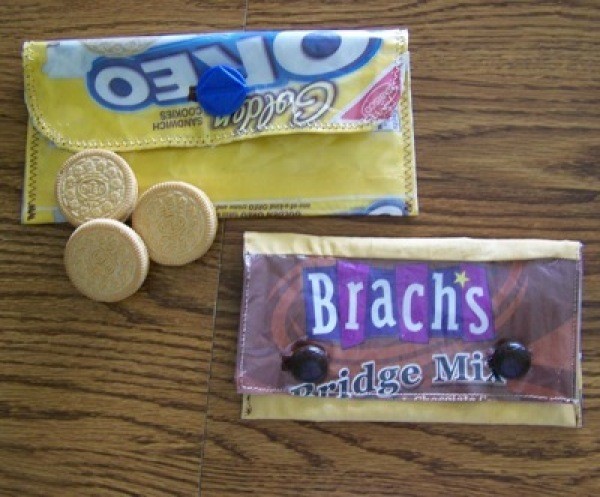
I just couldn't resist those bright bags, they were calling me to do something with them. I had the 3MM plastic and fabric from my quilting stash so I thought this would be fun. They should make a good make-up bag. Being plastic inside will keep any lipstick from getting outside the bag.
Approximate Time: 1 hour
Carefully cut the cookie bag open and enjoy eating the cookies, don't forget theglass of cold milk.If the bag rips put tape on the inside over the tear it will be on the inside and won't be noticeable. There won't be any stress on it.
Wash the bag and square it up so all edges are even and the corners are 90-degree angles. Cut a piece of the heavy plastic and lining the same size. If your plastic is wrinkled you can carefully press it with a cloth between your iron and the plastic. But be very careful, constantly be moving your iron, have it on a low setting and check your plastic every few seconds. It will melt and shrink very easily.
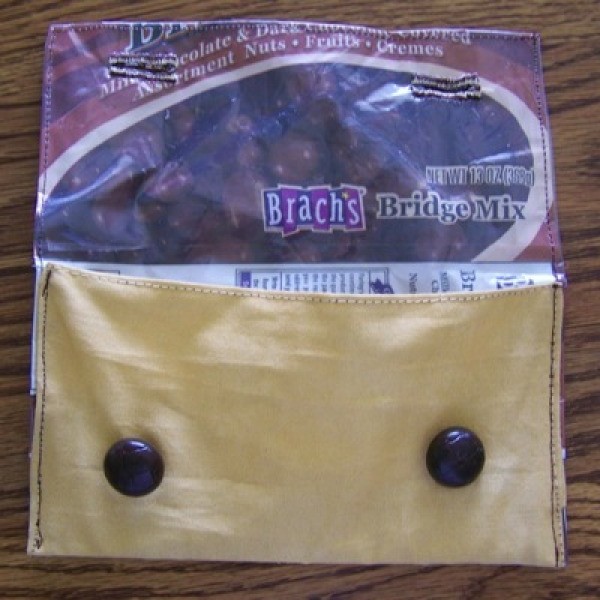
If you want to put pockets in your purse use your lining for a measurement. We are making trifold purses so fold your lining in thirds bringing the bottom third up and the top third down, mark those folds. Cut a piece of fabric for your pocket one-third the length of your lining fabric by the width of the lining. Make two quarter inch folds along one long edge and sew this edge close to the edge. Press one-quarter inch across the bottom toward the back. Line the pressed under edge along your bottom one-third-fold line and sew close to the edge of your pocket. Pin the ends of your pocket in place for now they will be sewn in with your side seams. If you want the pocket divided into two sew a seam from top to bottom of your pocket dividing it in two.
If you don't care if the bag is upside down as mine is just lay your heavy plastic on the front of your cookie bag and align with your fabric right side of the lining fabric and the heavy plastic facing each other. I chose to make the corners of my flap rounded and used a glass to mark both corners.
Sew a good one-quarter inch seam around the outside edge leaving a 4-inch gap to turn the purse right side out. Put your fabric down so the feed dogs will pull it as your sew. The plastic will not feed through the machine evenly, also the plastic will tend to pull up so go slowly and work extra lining fabric in as you go.
Carefully turn the purse, be very careful or you will tear your bag. It's better to leave a bigger opening than to tear the bag. After you have straightened the corners and flattened the edges fold under your opening and pin the opening shut.
Fold your purse in thirds so your pocket is inside your purse, starting where the flap starts sew down around your purse up around the flap and back to where you started with a topstitch. This secures the pocket and closes the gap you left to turn it with. Now you have to decide where your button or buttons will go. Sew on your buttons and make your buttonhole or use what ever closure you like.
If you want the flap of your purse right side up like the Bridge Mix purse proceed as follows. Layer the heavy plastic and candy bag pining edges. Now lay those two pieces and the lining end to end, pin and sew right sides together. Pin the other end and sew those ends together right sides together so you are making a tube. You now need to turn your tube you just made right side out. Roll the top of the bag so when you fold the tube in thirds the candy sack will be the flap and your lining fabric will be the purse body. Finish as above.
By Ann Winberg from Loup City, NE
I love your recycleable small purse! I am wondering what kind of plastic you are referring to in your instructions? Ziploc freezer bags or what?
These are so cute, Ann! I love your creativity!
The plastic I used comes on a roll and I purchased it at our Menards store, any lumber store should carry it. A heavy weight dropcloth plastic would work. I think you could use a good brand of plastic bag as you said.