social

DIY Unicorn Headband


Diamond Post Medal for All Time! 1,246 Posts
June 14, 2017

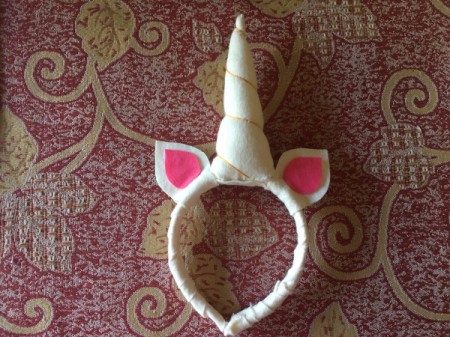
DIY Unicorn HeadbandMy best friend was having a unicorn themed birthday party, but could not find unicorn horn headbands anywhere! I went out to look for some for her and found they were all terrible plastic pieces of junk. I decided to make some for her. She loved them so much, she actually squealed. Success!

Advertisement

Total Time: 1 hour

Yield: 1 unicorn headband

Supplies:
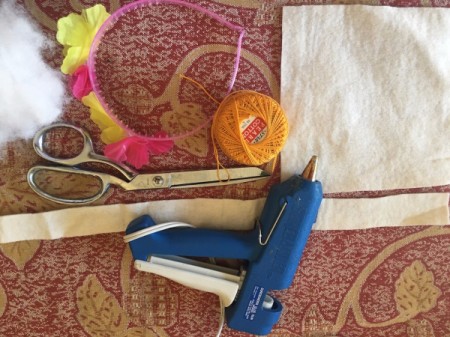
  • 1 plain headband
  • felt or fleece in white and pink
  • fiber fill or cotton
  • gold cord
  • scissors
  • scratch paper
  • needle and thread or sewing machine
  • glue gun with glue
DIY Unicorn Headband - supplies
 

Steps:

  1. I used a 35 cent headband that had flowers on it so I removed the flowers in order to have a plain plastic headband. Start by cutting your white felt or fleece into 1 inch wide strips. I used 1 inch wide by 20 inches in length. Dab some hot glue on the inside bottom of the headband leaving some overhang. Start wrapping the material around the headband, overlapping the layers, securing with hot glue here and there along the way. When the headband is completely wrapped, fold the ends up to the inside edges and secure with hot glue.
  2. DIY Unicorn Headband - begin glueing felt to inside of headband
     
    DIY Unicorn Headband - wrap felt overlapping, and adding a bit of glue as needed
     
    DIY Unicorn Headband - wrapped headband
     
    Advertisement

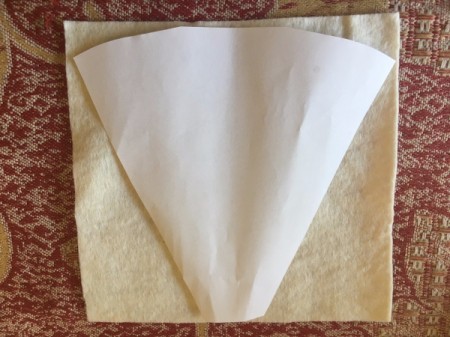
  3. Cut a piece of your scrap paper so it is 5 inches by 5 inches. Cut one end so it is rounded, then cut the sides off to create a cone, but with a flat top, not a point, as shown in this image. This will be the pattern for your horn.
  4. DIY Unicorn Headband - cut paper pattern for horn
     
  5. Place the pattern over your white felt and cut out the horn. Beginning at one side, roll the material toward the opposite side to form a horn shape, then sew it shut. You will have a hollow horn.
  6. DIY Unicorn Headband - cut out fabric and begin rolling into the horn shape
     
    DIY Unicorn Headband - hollow horn sewn shut
     
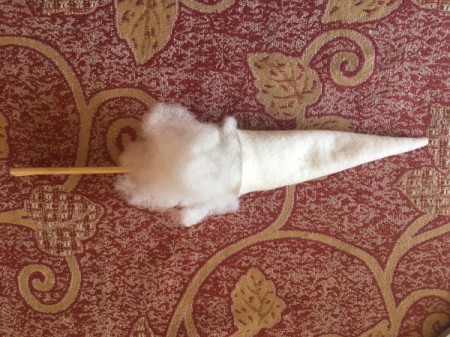
  7. Fill the horn with the stuffing. Be sure to fill all the way to the top of the horn.
  8. DIY Unicorn Headband - stuff the horn
     
    Advertisement

  9. At the top of the horn, stitch on some gold cord. Start wrapping the horn with the cord all the way down in a spiral motion. Every now and then, secure the cord on the seam with a stitch to keep it in place. I pulled the cord rather tight to make the horn look pillowy!
  10. DIY Unicorn Headband - beginning at point stitch on some gold thread and start wrapping down to larger end
     
    DIY Unicorn Headband - slip stitch the thread to the seam to hold in place
     
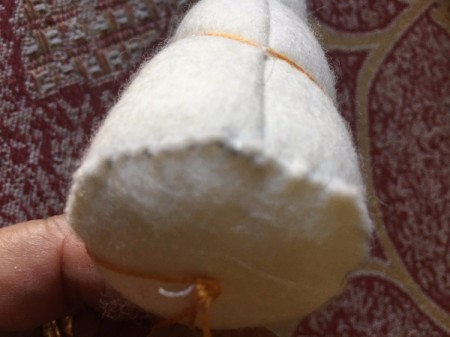
  11. Prop your horn up onto a piece of white felt and trace a circle to cut out. Sew this circle to the bottom of your horn to close it up.
  12. DIY Unicorn Headband - trace around the horn to create a felt circle, sew to bottom of horn
     
  13. Start sewing the horn onto the headband with needle and thread through both sides of the base. I went through many times to make sure it stayed put. Cut out a piece of felt in an oval shape and hot glue it to the area where the thread is exposed to keep it hidden and safe from unraveling against your head.
  14. DIY Unicorn Headband - sewing horn to the headband
     
    DIY Unicorn Headband - view of stitching
     
    DIY Unicorn Headband - cut an oval of felt to cover the stitching
     
    Advertisement

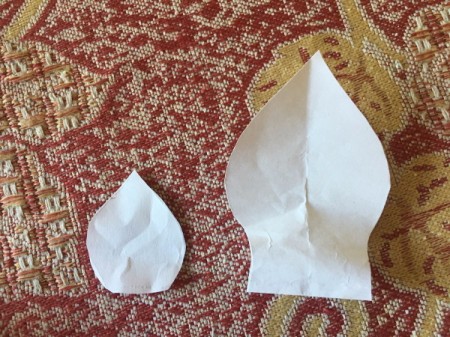
  15. Draw a 2 1/2 inch tall ear shape onto a piece of paper. Fold the paper in half at the base of the ear, leaving about 1/4-inch between the bottom of the ear drawing and the fold. Cut out the ear shape and unfold. Trace this pattern twice onto some white felt. Cut them out to make two ears.
  16. DIY Unicorn Headband - draw ear shape on paper
     
    DIY Unicorn Headband - fold paper in half
     
    DIY Unicorn Headband - race twice onto felt
     
    DIY Unicorn Headband - cut out ears
     
  17. Draw a smaller ear shape for the inside of the ear on a piece of paper. Trace onto pink felt twice. Cut them out.
  18. DIY Unicorn Headband - draw a smaller ear shape on paper and cut two out of pink felt
     
  19. Fold the white fleece ears around the headband on each side of the horn, then secure with hot glue.
  20. DIY Unicorn Headband - fold ears around headband and glue in place
     
    DIY Unicorn Headband - ears glued on
     
    Advertisement

  21. Glue the pink bits onto the front of the white ears.
  22. DIY Unicorn Headband - pink inner ear pieces glued in place
     
  23. The ones I made for this tutorial are pictured in white. I made myself a smaller purple and blue one without ears and wrapped stars around the base. These were a hit at the party!
  24. DIY Unicorn Headband - white headband on woman's head from side
     
    DIY Unicorn Headband - view from front
     
    DIY Unicorn Headband - blue and purple horn with out ears, but with gold stars wrapped around bottom
     
Comment Pin it! Was this helpful? 7

Comments


Silver Post Medal for All Time! 408 Posts
June 17, 20171 found this helpful

Very cute!

Reply Was this helpful? 1

Diamond Post Medal for All Time! 1,246 Posts
June 18, 20170 found this helpful

Thanks, Benetta!!! :)

Reply Was this helpful? Yes
May 14, 20180 found this helpful

Very Nice work.

Reply Was this helpful? Yes
In These Pages
Categories
Crafts Crafts For Kids HatsJune 28, 2018
Pages
More
📓
Back to School Ideas!
🌻
Gardening
😎
Summer Ideas!
Facebook
Pinterest
YouTube
Instagram
Contests!
Newsletters
Ask a Question
Share a Post
Categories
Better LivingBudget & FinanceBusiness and LegalComputersConsumer AdviceCoronavirusCraftsEducationEntertainmentFood and RecipesHealth & BeautyHolidays and PartiesHome and GardenMake Your OwnOrganizingParentingPetsPhotosTravel and RecreationWeddings
Published by ThriftyFun.
Desktop Page | View Mobile
Disclaimer | Privacy Policy | Contact Us
Generated 2023-07-16 03:13:07 in 3 secs. ⛅️️
© 1997-2023 by Cumuli, Inc. All Rights Reserved.
https://www.thriftyfun.com/DIY-Unicorn-Headband-1.html