social

Making a Drinking Straw Marble Maze


Bronze Post Medal for All Time! 131 Posts
December 21, 2016

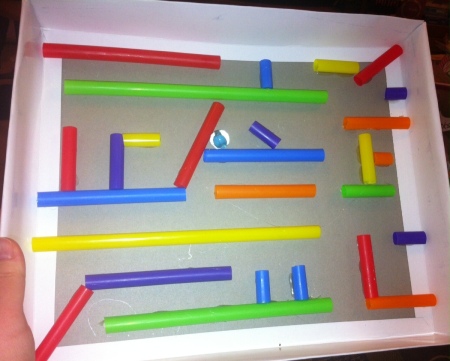
Easy Marble Maze - completed larger maze with marblesI have to admit that I had a lot of fun making these mazes! They would make a fun addition to any Pre-K or Kindergarten classroom. You could incorporate it into the manipulative or quiet centers, as well as make it an art activity. Children can help make their own mazes with just a few items. Let them choose how the pathways should be spread out and then they can test it after! I even think kids in upper elementary or junior high would enjoy making these, perhaps on a larger scale.

Advertisement


Total Time: 25 minutes

Yield: 2 (1 large and 1 small)

Supplies:
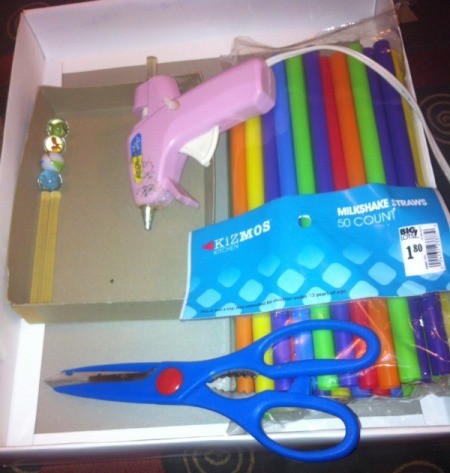
  • 1 + small marbles
  • 10 + plastic milkshake straws
  • hot glue gun with sticks
  • 2 box lids (I used one from a greeting card box and a Christmas lights box.)
  • scissors
Easy Marble Maze - supplies
 

Steps:

  1. Cut your straws into various sizes, including halves, thirds, fourths, and smaller. For the larger maze, you will also use some full length straws. I chose to use milkshake straws because they are larger and provide a sturdier path for the marbles.
  2. Easy Marble Maze - pieces of brightly colored plastic straws
     
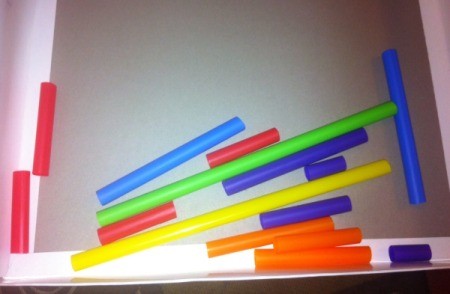
  3. There are numerous ways to create a maze. For the smaller maze, glue a straw piece horizontally in the middle of the box. For one like my large maze, hot glue a piece of straw in one corner of the box lid. Place it diagonally facing upward. Now take a longer piece of straw and glue it at the top of your initial piece, horizontally. You can play around with the straw pieces now before you glue them down. Make sure your pathways are wide enough for the marbles to pass through.
  4. Easy Marble Maze - placing first straw for smaller maze
     
    Easy Marble Maze - initial straw placement for larger maze
     
    Advertisement

  5. Continue gluing down straw pieces for both mazes. You can do this by placing a few straws parallel side by side, diagonally, L-shaped, or U-shaped. You can make an easy maze like my smaller one, or something more intricate like the larger.
  6. Easy Marble Maze - adding additional straws to small maze
     
    Easy Marble Maze - continuing to add straws to large maze
     
  7. After you have placed straws all over the box lid, fill in any holes using the smaller pieces. You want to create a few places where the marbles can become temporarily trapped or cornered. Allow the glue to fully dry.
  8. Easy Marble Maze - intricate larger maze
     
  9. Place one or more marbles in the maze and maneuver the box lid to get them through the pathway!
  10. Advertisement

Comments

December 23, 20160 found this helpful

How delightful!


Bronze Post Medal for All Time! 131 Posts
January 3, 20170 found this helpful

Thanks! I know kids would enjoy constructing and playing with this because I did! Haha

 
In This Page
Categories
Crafts ToysJanuary 4, 2017
Pages
More
🎉
New Years Ideas!
Facebook
Pinterest
YouTube
Instagram
Categories
Better LivingBudget & FinanceBusiness and LegalComputersConsumer AdviceCoronavirusCraftsEducationEntertainmentFood and RecipesHealth & BeautyHolidays and PartiesHome and GardenMake Your OwnOrganizingParentingPetsPhotosTravel and RecreationWeddings
Published by ThriftyFun.
Desktop Page | View Mobile
Disclaimer | Privacy Policy | Contact Us
Generated 2024-12-26 18:34:47 in 4 secs. ⛅️️
© 1997-2024 by Cumuli, Inc. All Rights Reserved.
https://www.thriftyfun.com/Easy-Marble-Maze.html