After a couple years of reliable use, my Homelite Mighty Lite gas powered trimmer began to have trouble running when I turned the choke off after starting it. If you own one of these, or other similar two-stroke engines, you are familiar with the process of starting one up - have the choke on full to begin with, then after it stops, switch it to half-choke and let it run until the engine is warm up. Then you can switch it to "Run" mode and that turns the choke all the way off.
Mine would only work if I had it on half choke and I could tell I wasn't getting full power. After a while I couldn't get it to run at all, unless the choke was all the way open. Obviously that doesn't do much good as the trimmer won't engage and the engine doesn't run for more than a few seconds at a time.
Since the engine turned over fine, I figured the problem was a lack of fuel getting to the spark plug. It turns out that is exactly the case. Over time, these engines often develop a diminished fuel flow that will cause the engine to stall. Fortunately, this problem is relatively easy to fix.
There are 2 screws that control the fuel flow. Unfortunately, these screws don't have heads and are slightly recessed. The trick is to cut into the top of them, so you can use a flathead screwdriver to adjust their height.
To start with, remove the circular plastic air filter that is also the choke adjustment knob. This held on by a nut with a washer so it is easy to remove.
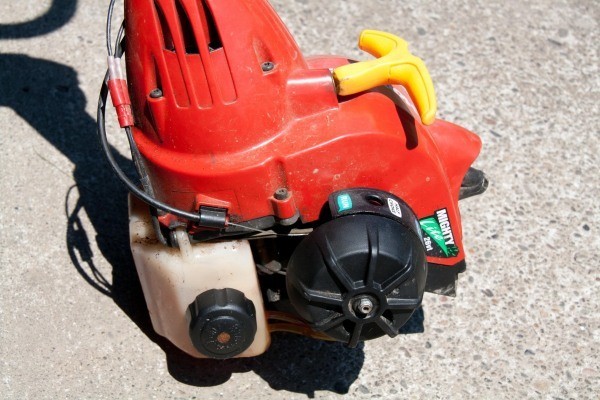
Next, you will need to locate the screws you need to adjust. When you remove the air filter, it looks like this underneath. The screw in the very center of the photo is the idle adjustment screw. This screw is always accessible through the hole in the plastic cover that serves as the choke adjustment guide. This is not the screw we are looking for but it is a good reference point.
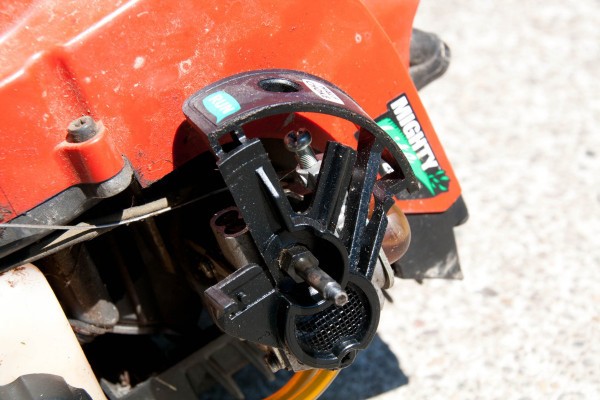
Look just below the idle adjustment screw and you will see this. That small aluminum housing with the two flat machine screws is what we are looking for.
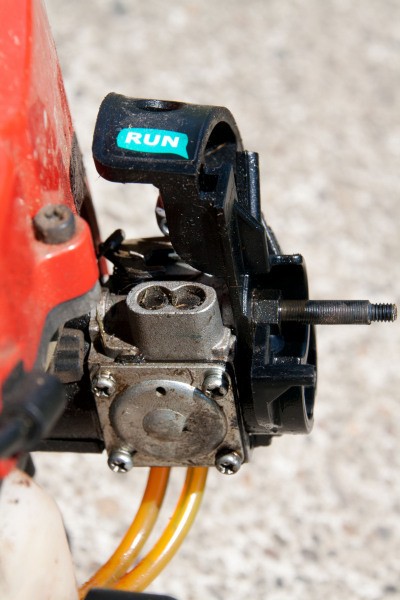
A Dremel tool works best for this step but I am sure a narrow hacksaw could do the trick. Using the Dremel, cut straight across the top of the screws and the housing until it looks like this (well yours might be prettier but you get the idea).
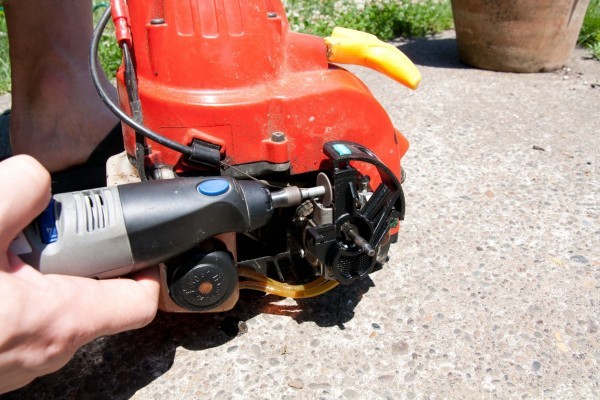

Then, using a narrow flathead screwdriver, tighten the screws all the way down by turning the clockwise. That should about 1 1/2 turns, as that is the factory setting for the screws. Once they are tightened down, unscrew them (counter clockwise) 2 full turns. That will open up the fuel flow to the engine.
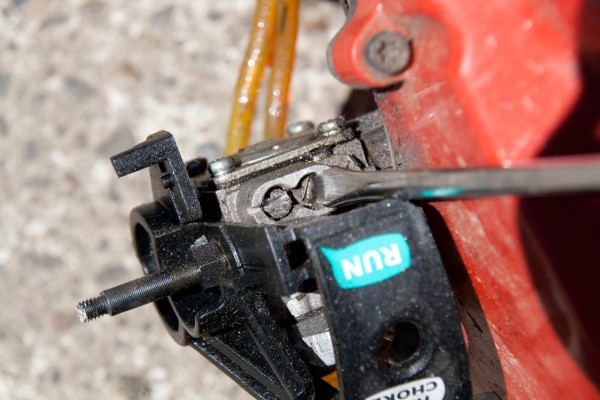
Put the air filter back on and start it up. It should run just fine now. Mine was still sputtering just a bit so I went back and unscrewed them another quarter turn and now my trimmer runs great. With the additional fuel flow you may want to adjust the idle down a bit now, but only if necessary.
By Jess from Hillsboro, OR
Add your voice! Click below to comment. ThriftyFun is powered by your wisdom!
This worked great for me. My trimmer hadn't run well since the first season I had it (five years ago). The adjustment screws on mine had a slightly different setting from the factory (about 3 turns in - likely a different pitch screw), but I just backed out about a quarter turn past the factory setting and now the trimmer runs better than it did new. Had to adjust the idle down a touch, but dialed in. Thanks!
Add your voice! Click below to comment. ThriftyFun is powered by your wisdom!