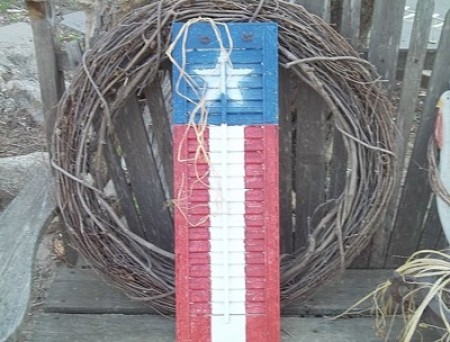
Recycle an old window shutter into a painted flag decoration for the Fourth of July and other patriotic summer holidays. This project is quick to create and because it is painted in a primitive style, mistakes and imperfections add to the finished result. To make this craft even more frugal, I used left over house paints that I had picked up for pennies at yard sales. You could substitute house paint with acrylic craft paints.
Approximate Time: 2 to 3 hours, including drying time
Supplies:
- wooden shutter
- screwdriver
- measuring tape
- pencil
- drill and 1/8-inch bit
- white house paint
- large stencil brush
- newspaper
- blue house paint
- masking tape
- red house paint
- 5-inch star stencil
- white spray paint
- black acrylic paint
- fine, liner brush
- baling wire
- wire cutters
- needle nose pliers
- raffia
Instructions:
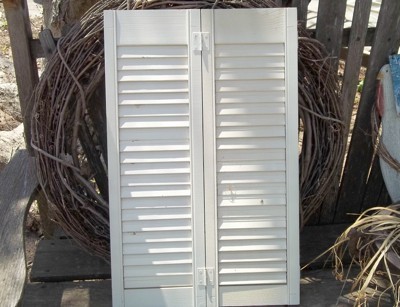
- Remove the hinges that connect the shutters together, and any handles or hooks. If the shutters are dusty, spray off with a garden hose and allow them to dry in the sun.
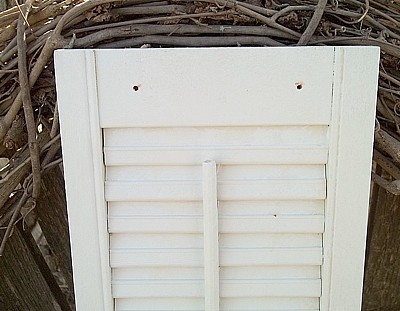
- Lay a shutter with the front facing up. Measure down 1 inch from the top edge. Center and make two marks with a pencil approximately 4 1/2 inches apart. Drill through the shutters at the marks using a 1/8 inch drill bit. These holes will be used later when attaching the hanger.
- Paint the front and the side edges using white house paint. Because of the slats, and in keeping with the primitive style I wanted to achieve, I pounced the paint on using a large stencil brush for this project. Allow the paint to dry.
- Measure the width of your shutter. Mine was 8 1/4 inches wide. Using this measurement, measure down from the top edge and draw a light pencil line across the shutter. You now will have a square on the top portion of the shutter.
- Lay a sheet of newspaper across the front of the shutter and below the drawn line. This will mask the rest of the shutter preventing paint from bleeding over when applied. Pounce blue house paint in the marked square and the side edges of the square. Remove the newspaper and allow the paint to dry.
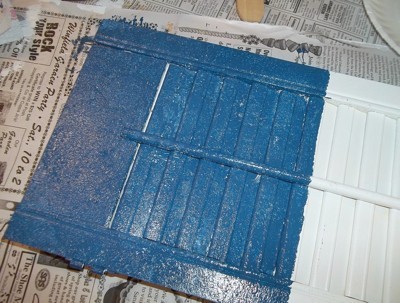
- Divide the width of your shutter by three. This is the width of your stripes. With a shutter width of 8 1/4 inches, my stripes were each 2 3/4 inches wide. Use masking tape to mask off the two red stripes below the blue field and beside the center white strip. Pounce red house paint on the masked areas for the outer stripes and the side edges of the stripes. Remove the masking tape and allow the paint to dry.
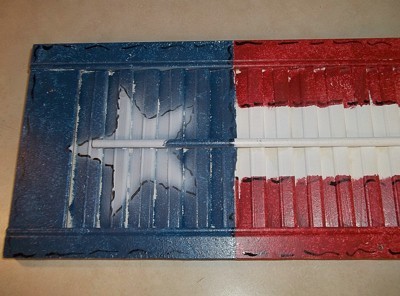
- Place a 5-inch star stencil in the center of the blue field. Because the spine of the shutter sticks up in the center, the stencil will not lay flat. Tape the stencil in place so that it will not shift. Place newspaper around the stencil to protect the rest of the flag from over spray. Spray paint the star using white spray paint. Remove the stencil. The edge of the star will look fuzzy and blurred.
- Mix black acrylic paint with water until the mixture is an inky consistency. Using a fine, liner brush, paint squiggly dashes around the star, the blue field, and the stripes. Allow the paint to dry.
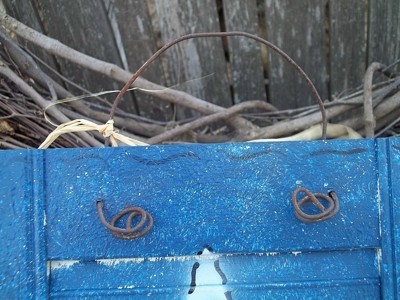
- Cut an 18-inch length of rusty baling wire using wire cutters. Note: A wire hanger could be substituted. Insert the ends of the wire through the drilled hanger holes, from the back of the shutter to the front. Pull 4 inches of each wire end to the front of the shutter. Fold the arching wire on the back of the shutter upward. This is the hanger. Grasp the wire ends on the front with the tip of needle nose pliers and twist to curl.

- Tie two or three strands of raffia around the wire to complete.
By Cyndee from Winfield, KS

Add your voice! Click below to comment. ThriftyFun is powered by your wisdom!

Keeper
Gold Feedback Medal for All Time! 690 Feedbacks May 22, 20110 found this helpful
I love this project. I have a list I keep in my pocketbook of things to look for at yard sales and such. Thanks for clear pictured directions and sharing this project.

June 3, 20110 found this helpful
Great craft. Thanks.

July 5, 20150 found this helpful
This is very creative and cute. Thanks for sharing!
Add your voice! Click below to comment. ThriftyFun is powered by your wisdom!


