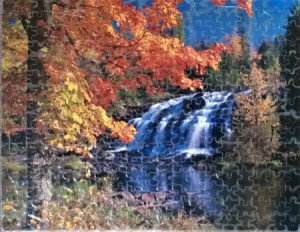
 I love to put together puzzles. I only buy what will be done and displayed on my walls. I used to seal the fronts with clear strapping tape and the back with duct tape thinking they would be on my walls forever. Well they lasted a long time but eventually they all began to yellow and crack. So today I had to give some of my favorites to the donation station in our community room.
But, I didn't want to lose the images I loved. So, I shot a good photo of them from right above and will be saving and editing them to print in smaller form. The puzzles were at the smallest 14" by 16" and the largest was 18" by 24". Now the images are just 8" by 10", ready to frame.
They print out pretty nice. Don't use photo paper if you have an ink jet printer. The ink will turn chalky and rub off. I can then frame and display even more in my home without taking up so much room.
N-JOY!
NOTE: I know the quality won't be as good but if they are images that are important, you may not mind.
This page contains the following solutions.
A fun and easy and cheap way to decorate your child's room (and get them involved) is to allow them to pick out a puzzle that they like from the store.
Here are the questions asked by community members. Read on to see the answers provided by the ThriftyFun community.
I like to work puzzles and then glue them. I'm wondering how I can frame them without spending a fortune?
By Michele
Cut a board about 2 inches bigger than the puzzle. Put the puzzle together on the side of the board. Take a ruler and draw the exact size of the puzzle on the board. Put white Elmer's glue on the board in the outline and slide the puzzle onto it. Let dry and spray with a light coat of clear coat paint in a can you can get at Walmart or the Dollar Store.
If you are good with wood, you can router an edge on the board. Put a hanger on the back by nailing a small nail in the circle top of the pop-top in the thick part of the top on the back of the board. Let dry and hang up.