social

How to Make a Colorful Summer Bleached Greeting Card


Silver Post Medal for All Time! 408 Posts
June 28, 2017

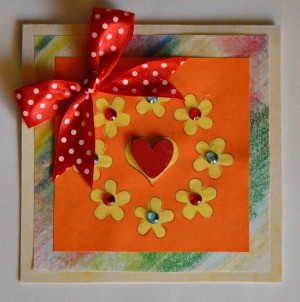
Colorful Summer Bleached Greeting Card - finished card with ribbon bow added to upper left of cardI recently learned that thick bleach can be a wonderful addition to a crafter's treasure trove. At first, working with bleach is not as easy as it sounds, but with some practice it becomes a great technique to use on cards and other designs.

Advertisement

Total Time: 15 minutes

Yield: one greeting card

Supplies:

  • 10 x 5 in light yellow marbled cardstock
  • A4 sheet white printer paper
  • A5 size of orange paper
  • 0.7 in high red wooden heart
  • 0.6 in wide red satin ribbon with white polka dots
  • 1 Tbsp thick bleach, added to a small jar
  • wax crayons: red, green, blue, orange, and yellow
  • quick-drying craft glue (such as Bostik Clear)
  • stencil with a heart and flower motif
  • standard scissors
  • ruler
  • pencil
  • thin paintbrush
  • hairdryer
  • newspaper to protect the working area
  • Optional: four 5mm red multifaceted rhinestones; four 5mm blue multifaceted rhinestones

Steps:

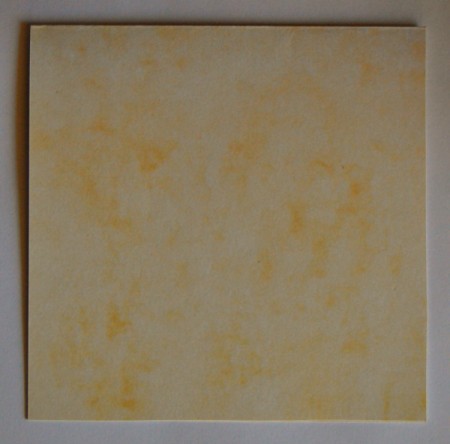
  1. Start by preparing the background paper. Heat small sections of the printer paper with the hairdryer and use the crayons to color the heated area. The heat of the hairdryer will make the crayons melt, so that will look as if you are painting with the crayons. Once completed, cut a piece sized 4.4" x 4.4" from the prepared background.
  2. Colorful Summer Bleached Greeting Card - color with crayons on small sections of heated paper
     
    Colorful Summer Bleached Greeting Card - melted crayon background paper for card
     
    Advertisement

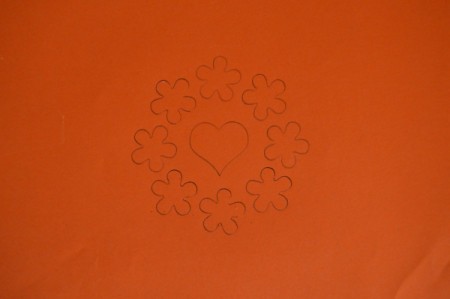
  3. Place the stencil on the orange paper and use the pencil to trace the motif on to the paper.
  4. Colorful Summer Bleached Greeting Card - place stencil on the orange paper and trace with pencil
     
  5. Paint the motif with the thick bleach, taking care not to mess bleach on other parts of the paper, or to paint beyond the pencil lines. Remember to work in a well ventilated area when using the bleach. Once done, allow the bleach to dry, and then cut the paper with the motif to a size 3.6" x 3.6". Add optional extras to highlight certain parts of the design, such as a rhinestone to the centre of each flower.
  6. Colorful Summer Bleached Greeting Card - bleached motif with rhinestones added to flower centers
     
    Advertisement

  7. Score the 10" x 5" light yellow marbled cardstock to create a card sized 5" x 5".
  8. Colorful Summer Bleached Greeting Card - score yellow cardstock to create the card
     
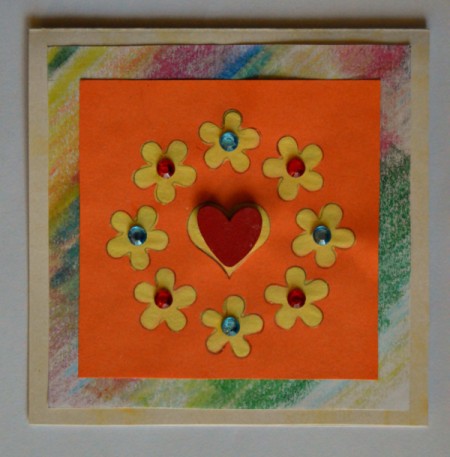
  9. With the fold at the top, centre and glue the piece cut from the background to the front of the card. Next, glue the design done in bleach to the card.
  10. Colorful Summer Bleached Greeting Card - with fold at top center the colored paper and glue in place then position the bleached motif piece on top and glue
     
  11. Glue the red wooden heart to the centre of the bleached heart.
  12. Colorful Summer Bleached Greeting Card - glue red heart to center over heart shaped area of bleached motif
     
  13. Make a bow with the ribbon and add it to the top left corner of the card.
  14. Advertisement

Comment Pin it! Was this helpful? 2
Categories
Crafts Paper CardsJuly 3, 2019
Pages
More
🍂
Thanksgiving Ideas!
🎃
Halloween Ideas!
Facebook
Pinterest
YouTube
Instagram
Contests!
Newsletters
Ask a Question
Share a Post
Categories
Better LivingBudget & FinanceBusiness and LegalComputersConsumer AdviceCoronavirusCraftsEducationEntertainmentFood and RecipesHealth & BeautyHolidays and PartiesHome and GardenMake Your OwnOrganizingParentingPetsPhotosTravel and RecreationWeddings
Published by ThriftyFun.
Desktop Page | View Mobile
Disclaimer | Privacy Policy | Contact Us
Generated 2022-10-25 09:27:23 in 3 secs. ⛅️️
© 1997-2022 by Cumuli, Inc. All Rights Reserved.
https://www.thriftyfun.com/How-to-Make-a-Colorful-Summer-Bleached-Greeting-Card.html