social

How to Make a Mini Easel with Wooden Clothespins


Diamond Post Medal for All Time! 1,298 Posts
June 19, 2018

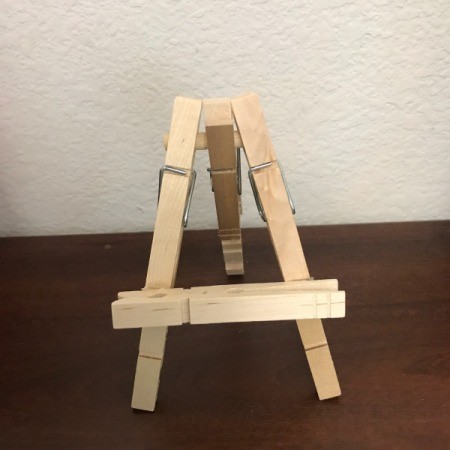
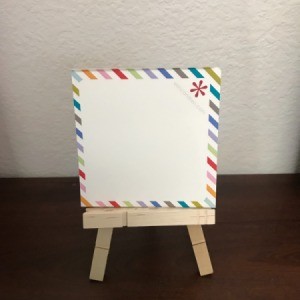
Mini Wooden Clothespin Easel - with Post-it padThis is the perfect easel to hold your Post-it notes or Polaroid photos. This cute little wooden easel is made from clothespins. You can also fit small artwork or 4 x 6 photos on it too. Options include painting or decorating, but I like the natural wood look.

Advertisement

Total Time: 25 minutes

Yield: 1 easel

Supplies:
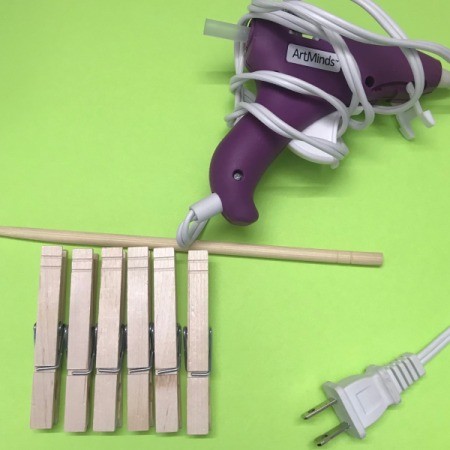
  • 6 clothespins
  • hot glue
  • 1 wooden dowel or round chopsticks
  • cutters/pliers
  • ruler
  • pen
Mini Wooden Clothespin Easel - supplies
 

Steps:

  1. Carefully remove the spring from 3 clothespins.
  2. Mini Wooden Clothespin Easel - separate 3 pins
     
    Mini Wooden Clothespin Easel - separated pin
     
    Mini Wooden Clothespin Easel - spring removed
     
    Mini Wooden Clothespin Easel - whole and separated pins
     
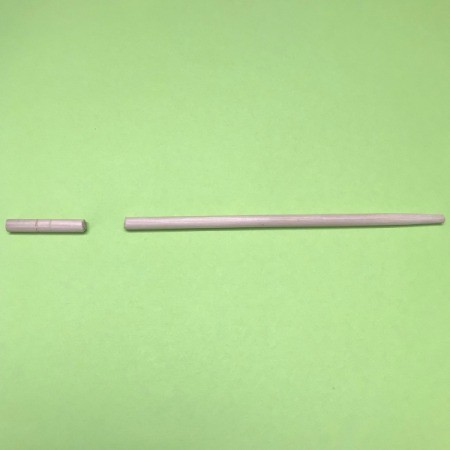
  3. Using sharp cutters or a pair of pliers cut 1.5" from the wooden dowel or chopsticks (I used rounded chopsticks). This piece should fit perfectly when clipped on the clothespin.
  4. Mini Wooden Clothespin Easel - cut 1.5" piece from dowel or chopstick
     
  5. Hot glue the half clothespin to full clothespin. Repeat this process two more times, total 3.
  6. Mini Wooden Clothespin Easel - half pin ready to glue
     
    Mini Wooden Clothespin Easel - slide half pin in between the open end of a clothespin and glue in place
     
    Mini Wooden Clothespin Easel - repeat two more times
     
    Advertisement

  7. Clip the 3 clothespins together as shown below.
  8. Mini Wooden Clothespin Easel - clip two of the pins to the dowel at the edges
     
    Mini Wooden Clothespin Easel - clip the third to the center of the dowel
     
  9. Now stretch the parallel clothespins wide.
  10. Hot glue two wooden pieces together to create the ledge.
  11. Mini Wooden Clothespin Easel - take two pieces of a separated pin
     
    Mini Wooden Clothespin Easel - glue together to make the easel ledge
     
  12. Secure onto your easel with hot glue. (You will be left with half a clothespin and 3 springs after completion of this project).
  13. Mini Wooden Clothespin Easel - glue in place - closeup
     
    Mini Wooden Clothespin Easel - ledge glued in place
     
  14. Twist down the center so the easel can stand. Ready to decorate with a photo or, notepad to put on the side of your desk, or any place you would like.
  15. Mini Wooden Clothespin Easel - twist the center pin down and back to allow easel to stand
     
    Advertisement

Comment Pin it! Was this helpful? 1

Comments


Bronze Feedback Medal for All Time! 121 Feedbacks
June 20, 20180 found this helpful

This would be great to put my business cards on at art shows

Reply Was this helpful? Yes

Diamond Post Medal for All Time! 1,298 Posts
June 20, 20180 found this helpful

That would be a wonderful idea. :) Very effortless and easy to make. Also adds a nice handmade charm.

Reply Was this helpful? Yes
Categories
Crafts Home Decor DecorationsJune 19, 2019
Pages
More
🎃
Halloween Ideas!
🍂
Thanksgiving Ideas!
Facebook
Pinterest
YouTube
Instagram
Contests!
Newsletters
Ask a Question
Share a Post
Categories
Better LivingBudget & FinanceBusiness and LegalComputersConsumer AdviceCoronavirusCraftsEducationEntertainmentFood and RecipesHealth & BeautyHolidays and PartiesHome and GardenMake Your OwnOrganizingParentingPetsPhotosTravel and RecreationWeddings
Published by ThriftyFun.
Desktop Page | View Mobile
Disclaimer | Privacy Policy | Contact Us
Generated 2022-10-25 09:20:44 in 3 secs. ⛅️️
© 1997-2022 by Cumuli, Inc. All Rights Reserved.
https://www.thriftyfun.com/How-to-Make-a-Mini-Easel-with-Wooden-Clothespins.html