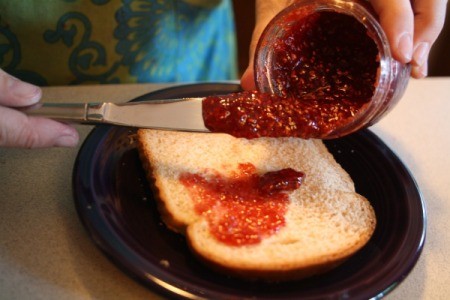
 It has become a tradition for my friend Stephanie and I to make jam during the height of summer heat. This year, we made three kinds: blackberry, raspberry, and strawberry. We also made a mixed berry syrup from the leftovers of each batch. We just followed the recipe inside the pectin box for canning cooked jam. The recipe I am listing is for raspberry jam but all three are practically the same.
We went and purchased the berries at the local farmer's market early that morning. We got a half flat of each kind, so 6 pints. This left us extra for the syrup or for snacking. We made each batch separately and the whole process took an afternoon. The guys barbecued while Stephanie and I were canning and it became an impromptu family party. And the best part is that we have enough jam to last us until next summer.
Start your water bath so it is ready when the jam is.
Measure your crushed raspberries into a large saucepan or stock pot. Tall sides will help prevent splattering (but don't wear anything you mind getting splashed).
Add in a packet of pectin (refer to your brand's own instructions if in doubt). If you wish to reduce the foam, add a little pat of butter (1/2 tsp.) to the mixture. The foam won't hurt you but it isn't as pretty. You can also skim it off before canning.
Heat the mixture to a full boil, stirring constantly. It is very easy to allow it to burn on the bottom, which will flavor the whole batch. If you do burn it accidentally, you can often save it by switching out to a new pan without scraping the bottom.
Premeasure your sugar into a separate bowl before adding to the saucepan. If you are in doubt, remeasure. It is easy to lose count and the wrong amount of sugar can ruin your jam. Better safe than sorry.
Add your sugar to the berry mixture. Return the mixture to a boil for one minute then remove from heat.
Using your canning funnel, ladle the mixture in the jars. Be careful, the mixture is very hot and sticky and can cause a bad burn. You want to leave a little room for headspace, so don't fill it right up to the top. When it is full, use a clean towel to remove any jam from the top of the jar (where it might touch the lid or ring). Place the lid on top and then tighten ring on each one.
Place in your water bath so that the jars are completely submerged. A rack is very useful for this, but the small jars will sometimes fall through.
Boil jars for 15 minutes then remove from water bath. The jars will be very hot, so be sure to use both your canning tongs and a potholder. Set aside to cool; we placed them on a clean kitchen towel.
As the jars cool, you will hear them "pop" occasionally. This is the the jar lid sealing to the glass. When they are cool enough, tighten the rings and push the center of each lid to make sure it is sealed. If you can push it, it is not sealed. You can try to re-can it in a water bath or you can just place this jar in the fridge to use first.
Be sure to label your jars with the date and type of jam. You can print pretty labels on the computer, use the ones that come with the canning jars and lids or just use a Sharpie on the top. The jam will still taste delicious.
By Jess
This video shows you how to make delicious berry jam using fresh picked berries.