social

Making Decoupage Christmas Plates


Gold Post Medal for All Time! 555 Posts
December 12, 2016

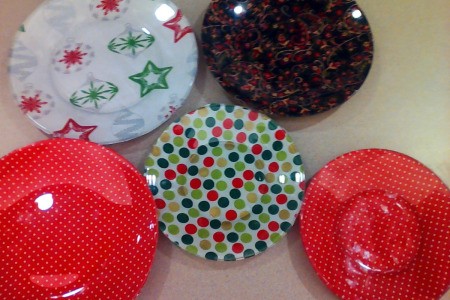
5 finished decorative Christmas PlatesIf you buy or have material of a particular pattern, photo, or even a special drawing of an adult or a child's (on material) that you would like to turn into a lovely dish, here's how!

Advertisement


Total Time: 1 1/2 hour

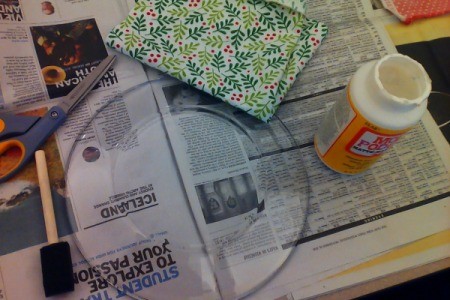
Supplies:

  • 1 a clear plate, dish, or platter ($1.00)
  • a colorful piece of material or drawing on material
  • modge podge or (Elmer's glue and water)
  • a sponge brush
  • clear spray sealant - I used Krylon acrylic crystal clear spray.
  • 1 sharp pair of scissors

Steps:

  1. Gather materials. I used newspapers underneath it all. (Spray isn't pictured here.)
  2. Decorative Christmas Plates
     
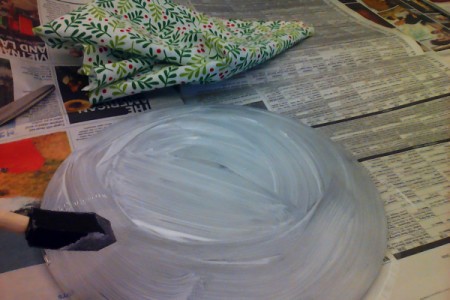
  3. Paint on the modge podge directly from the jar or wet your sponge brush and paint Elmer's white glue onto the BACK of the dish. Spread thinly and evenly all the way to the edge of the dish. Don't use so much glue that it has big opaque white areas or it will be too wet to adhere nicely.
  4. Decorative Christmas Plates
     
    Advertisement

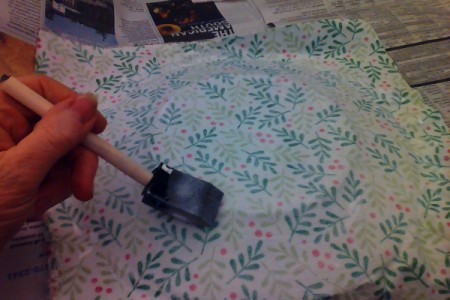
  5. Place material, "printed side down", onto the plate and gently press down the material all over the plate. Keep pressing it down and when you think you've gotten it all peek on the other side to make sure you didn't miss a spot. Leave it dry for about 5 minutes.
  6. Decorative Christmas Plates
     
    Decorative Christmas Plates
     
  7. Now paint your modge podge or glue on top of the material you just adhered to the plate. Don't flood it, just wet it down to make it all stick together. Make sure you don't miss any spots!
  8. Decorative Christmas Plates
     
  9. After about 10 minutes I picked up the plate and held it from the bottom while I snipped the excess material or stray threads away from the rim of the plate. Sometimes the material will pull away from the plate, so after you cut just use your brush to make sure it's pushed back onto the rim.
  10. Decorative Christmas Plates
     
    Decorative Christmas Plates
     
    Advertisement

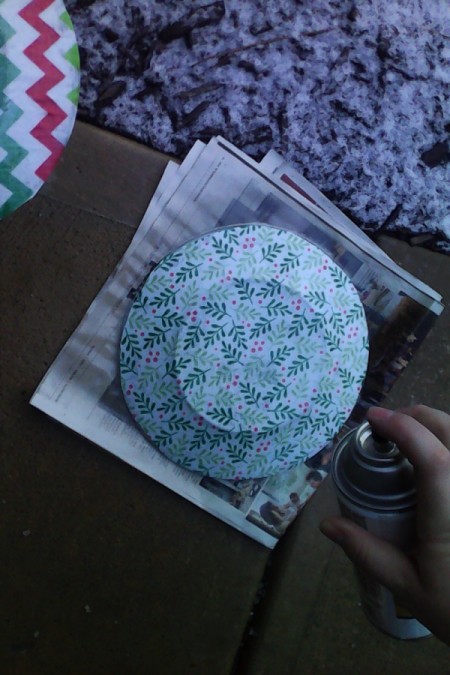
  11. Next I brought my plate outside to spray (where the material is on the back only) with a Krylon acrylic crystal clear spray. I sprayed it on and let it dry, then sprayed it again and again for a total of 6 times. This spray is moisture resistant and is said to be able to be used on plates, but I wouldn't expose the plate to a dishwasher.
  12. Decorative Christmas Plates
     
  13. I will only use it for decorative purposes or where a quick wipe up of the top of the plate only will be needed. Next time I want to try to add a copy of a special photo (or drawing on material) to a plate.
  14. Decorative Christmas Plates
     
    Advertisement

Comment Pin it! Was this helpful? 2

Comments

January 8, 20170 found this helpful

Very nice, your work looks lovely!I use to also from time to time I use to do these plates years ago and sell them in a craft store on commission, I use to do a variation at times by gluing a doily on the back, been so long I don`t recall if I painted the plate first or dabbed after the doily, anyway you sparked my interest that I am considering this a winter project to make some like you did as gifts next year, thanks for the inspiration....I just loved your plates! BTW the plate I made the most money from was a Elvis plate.

Reply Was this helpful? Yes
Categories
Crafts DecoupageMay 9, 2019
Pages
More
🎄
Christmas Ideas!
🎉
New Years Ideas!
Facebook
Pinterest
YouTube
Instagram
Contests!
Newsletters
Ask a Question
Share a Post
Categories
Better LivingBudget & FinanceBusiness and LegalComputersConsumer AdviceCoronavirusCraftsEducationEntertainmentFood and RecipesHealth & BeautyHolidays and PartiesHome and GardenMake Your OwnOrganizingParentingPetsPhotosTravel and RecreationWeddings
Published by ThriftyFun.
Desktop Page | View Mobile
Disclaimer | Privacy Policy | Contact Us
Generated 2022-12-22 10:11:05 in 3 secs. ⛅️️
© 1997-2022 by Cumuli, Inc. All Rights Reserved.
https://www.thriftyfun.com/Making-Decoupage-Christmas-Plates.html