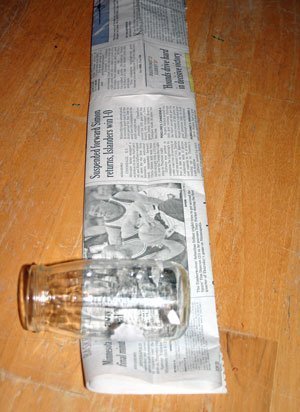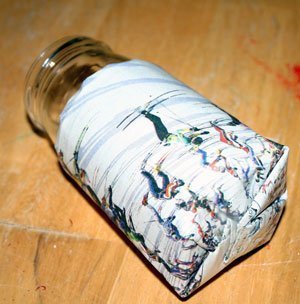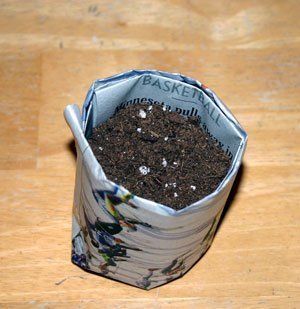
If you are like most gardeners, you probably have a mound of plastic multi-pack containers growing in the basement or piling up behind the garage. You know, the dirty, crumpled flats right next to all of those gallon pots you plan to reuse. Sure, you may be able to reuse them once or twice, but when they eventually break down, most will end up in a landfill. Here is an old idea for inexpensive, do-it-yourself seed starting pots made from newspaper. When your seedlings are ready for the garden, just pop them in the ground-pot and all.
A daily newspaper can be turned into dozens of customized, seed-starting pots. If you don't have a newspaper laying around the house, grab one from the office break room, stop by a coffee shop right before close, or look for free weeklies in the entry way of local restaurants and grocery stores. Avoid using newspaper printed with colored inks. Black and white ink is usually derived from soy-based products , which are better for the environment (and your seedlings). Brown paper shopping bags will also work well for this project.


Tips: Once you have filled your pots with soil and planted your seeds, it's a good idea to place the pots side by side in a large, waterproof tray (a cardboard flat lined with a garbage bag works well). Keep an eye on moisture levels. The newspaper will provide for some natural drainage, but thick pots will drain more slowly.
When seedlings are ready to transplant, either unroll the pots to gently remove seedlings or, carefully remove the tape and plop the entire pot directly into the ground. Because the newspaper is biodegradable, it will break down in the soil relatively quickly once it is surrounded by dirt and moisture. Again, keep an eye on moisture levels. If the pot was still in relatively good shape when you put it in the ground, it may act like a wick and soak up surrounding moisture.
Another genius idea and almost ready-made! When using toilet paper rolls for this, remember that cardboard is thicker than newspaper. It will hold up better to frequent watering, but break down more slowly once it is in the soil. As an alternative to planting the pot, simply cut the roll down the middle to free the seedlings for transplanting or tip it upside down and slide them out.
Directions: Cut 1/2" to 1" strips around one end of each roll, fold the strips under and secure with a piece of tape. You are done! Paper towel rolls can be cut down to make multiple seed pots. Set a covered basket in the bathroom to collect the rolls.
About The Author: Ellen Brown is an environmental writer and photographer and the owner of Sustainable Media, an environmental media company that specializes in helping businesses and organizations promote eco-friendly products and services. Contact her on the web at http://www.sustainable-media.com
Add your voice! Click below to comment. ThriftyFun is powered by your wisdom!
Now this IS really NEWS you can USE! ... WOW! one of the best posts I've seen in a LONG time! THANK YOU!
This is great! I made 2 dozen of them the other evening. I folded them a little differently but the results are the same. Just have fatter and shorter ones.
I wet the paper, this helps to form it and in the water I put liquid fertalizer, the type depends on what's going into it.
I knew I read about this but back to 2008? I wish it was closer to the "top" as we are very close to starting seeds. What a great idea. Thank you. Thank you.
Add your voice! Click below to comment. ThriftyFun is powered by your wisdom!