social

Making Wooden Bookends


Bronze Post Medal for All Time! 140 Posts
May 25, 2019

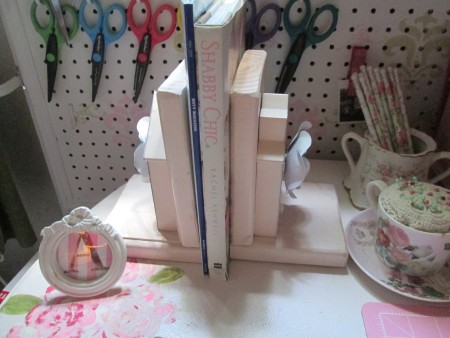
Making Super Easy Wooden Bookends - view of finished bookend with a pincushion in foregroundWith just a few pieces of wood to complete this project, you can have lovely bookends for any room at home or your office at work. This project also makes a lovely gift, that can be personalized for a child or adult. Here is how!

Advertisement

Total Time: 2 hrs.

Yield: 2

Supplies:

  • 2 5x6 pieces of wood
  • 2 7x6 pieces of wood
  • screws or nails
  • saw
  • drill
  • spray paint
  • 2 wood cut outs (optional)
  • card stock paper (optional)
Making Super Easy Wooden Bookends - paper flowers
 
Making Super Easy Wooden Bookends - house shapes
 

Steps:

  1. These book ends were cut from left over 6x1 wood. Cut 2 - 5 inch pieces and 2 - 7 inch pieces.
  2. Making Super Easy Wooden Bookends- measuring lengths of wood
     
    Making Super Easy Wooden Bookends - measuring the longer pieces and marking
     
    Making Super Easy Wooden Bookends - cutting using a power saw
     
  3. Place together using the smaller piece on the bottom, screwing or nailing together. Drill pilot holes and then assemble using screws. Optional: A countersink drill bit can be helpful in this project.
  4. Making Super Easy Wooden Bookends - pre-drilling holes to countersink screws
     
    Making Super Easy Wooden Bookends - screwing the pieces of the bookends together
     
    Making Super Easy Wooden Bookends - ready to paint
     
    Advertisement

  5. Lightly sand the edges.
  6. Spray paint. (The house shapes were added prior to painting.)
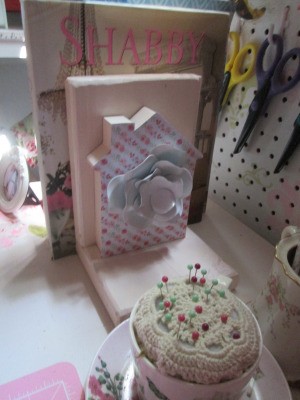
  7. Added embellishments (optional). I used these house shapes covered with cardstock paper and paper flowers. The cardstock and the paper flowers were added after the bookends, including the house shapes, were spray painted.
  8. Making Super Easy Wooden Book Ends - tracing house shape onto printed floral paper
     
    Making Super Easy Wooden Bookends - house screwed to upright piece of bookend prior to painting
     
    Making Super Easy Wooden Bookends - view of finished bookend
     
  9. Ready to gift or use yourself.
  10. View from the front with books in place
     
Comment Pin it! Was this helpful? 6

Comments


Silver Answer Medal for All Time! 425 Answers
May 21, 20210 found this helpful

Ana,
Nice project. The addition of something non-skid on the bottoms will be very useful for keeping them from sliding and books tipping over. I've used: those small silicone stick-on dots, a piece of inner tube glued on, and pieces of the anti-slip matting you can buy in rolls for under throw rugs, that have a mesh with rubber "blobs" all over the mesh.

Advertisement

Each of these three items work great. If using the bookends on slippery surfaces, some anti-slip "something" is very handy.

Reply Was this helpful? Yes
In This Page
Categories
Crafts Home Decor DecorationsFebruary 27, 2020
Pages
More
🎃
Halloween Ideas!
🍂
Thanksgiving Ideas!
Facebook
Pinterest
YouTube
Instagram
Contests!
Newsletters
Ask a Question
Share a Post
Categories
Better LivingBudget & FinanceBusiness and LegalComputersConsumer AdviceCoronavirusCraftsEducationEntertainmentFood and RecipesHealth & BeautyHolidays and PartiesHome and GardenMake Your OwnOrganizingParentingPetsPhotosTravel and RecreationWeddings
Published by ThriftyFun.
Desktop Page | View Mobile
Disclaimer | Privacy Policy | Contact Us
Generated 2022-10-25 14:20:12 in 3 secs. ⛅️️
© 1997-2022 by Cumuli, Inc. All Rights Reserved.
https://www.thriftyfun.com/Making-Wooden-Bookends.html