social

Making a Bejeweled Jewelry Box


Diamond Post Medal for All Time! 1,298 Posts
January 17, 2018

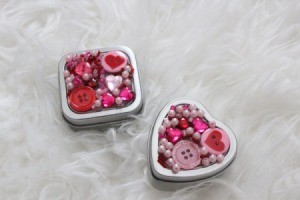
Bejeweled Jewelry Box - finished boxesThis is a cute bejeweled jewelry box perfect for little girls to gift. My niece liked the idea, so we made a couple for her to give to her best friends.

Advertisement

This craft is reasonable price wise. The tins we already had, but they are $15 for 30 tins (in your choice of heart, square, or circle) which comes out to be .50 cents each plus supplies. These little tins are useful for party favors, organizing storage, and crafts.

Total Time: 10-15 minutes per box

Supplies:

  • tin box (your desired shape)
  • buttons
  • assorted beads
  • hot glue
  • cotton stuffing
Bejeweled Jewelry Box - square and heart shaped boxed
 
Bejeweled Jewelry Box - bottles of beads and buttons
 

Steps:

  1. Using your choice of tin box (we used heart and square shaped tin boxes) gather the assorted big gems and buttons you have and lay them on top of the tin to get an idea before hot gluing them down.
  2. Bejeweled Jewelry Box - square and heart shaped covered boxes
     
    Bejeweled Jewelry Box - arranging buttons on lid of heart shaped box
     
  3. Once you like the position hot glue down to secure. Then as a filler, add smaller beads all around.
  4. Bejeweled Jewelry Box - larger button arrangement
     
    Bejeweled Jewelry Box - begin adding smaller buttons and beads to fill
     
    Bejeweled Jewelry Box - filled cover
     
    Advertisement

  5. Use the same concept with the square tin box. As a tip: When you're applying the filler beads leave your tin inside a small box so as you pour the beads on top of the hot glue, they won't spill everywhere.
  6. Bejeweled Jewelry Box - large buttons arranged one way
     
    Bejeweled Jewelry Box - final arrangement
     
    Bejeweled Jewelry Box - gift box sitting inside a cardboard box cover to catch smaller buttons and beads as they are added to hot bou
     
  7. Use any leftover cotton filling for the inside of the tin lining - cut into the shape of your box.
  8. Bejeweled Jewelry Box - use gift box or batting for lining
     
    Bejeweled Jewelry Box - cut filling to shape
     
  9. Allow the beads to set for a few minutes then shake off any excess beads that may fall off. Then you're ready to put your gift inside (small ring or necklace) and gift to your friends!
  10. Bejeweled Jewelry Box - finished empty box
     
    Bejeweled Jewelry Box
     
    Advertisement

Comment Pin it! Was this helpful? 2

Comments


Bronze Post Medal for All Time! 131 Posts
January 27, 20180 found this helpful

Aww...These are absolutely adorable! They are definitely the perfect craft and gift idea for any age!

Reply Was this helpful? Yes

Diamond Post Medal for All Time! 1,298 Posts
February 11, 20180 found this helpful

Thank you! :) I even saved one for myself.

Reply Was this helpful? Yes
Categories
Crafts MetalJune 10, 2019
Pages
More
🐰
Easter Ideas!
👒
Mother's Day Ideas!
🌻
Gardening
Facebook
Pinterest
YouTube
Instagram
Contests!
Newsletters
Ask a Question
Share a Post
Categories
Better LivingBudget & FinanceBusiness and LegalComputersConsumer AdviceCoronavirusCraftsEducationEntertainmentFood and RecipesHealth & BeautyHolidays and PartiesHome and GardenMake Your OwnOrganizingParentingPetsPhotosTravel and RecreationWeddings
Published by ThriftyFun.
Desktop Page | View Mobile
Disclaimer | Privacy Policy | Contact Us
Generated 2023-03-28 13:11:40 in 3 secs. ⛅️️
© 1997-2023 by Cumuli, Inc. All Rights Reserved.
https://www.thriftyfun.com/Making-a-Bejeweled-Jewelry-Box.html