social

Making a Child's Handle Pillow


Bronze Post Medal for All Time! 190 Posts
September 3, 2014

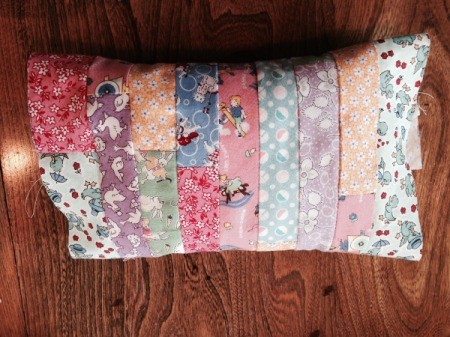
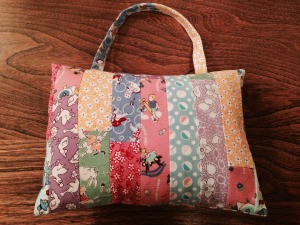
patchwork child's pillow with vertical one inch stripes of various 1930s reproduction fabricI wanted to make my own version of a craft posted here on Thriftyfun back in 2009, see the original project here: Handle Pillow

Rather than make a pillow form using the final fabric I chose to make a muslin form and then sew up a removable cover with the handle incorporated into the cover. Here is that project: Small Handmade Pillow Form. This is the result.

Advertisement

Supplies:

  • various cotton fabric scraps, I used left over 2 inch wide strips of 1930s reproduction fabric from the baby quilt I had made previously
  • paper or cardboard for making the templates
  • ruler
  • pencil
  • tape measure
  • pins
  • scissors
  • sewing machine
  • thread
  • pillow form

Steps:

  1. I first sewed together, end to end, a variety of the 2 inch wide strips.
  2. various fabric strips
     
    sewing strips together
     
    pieces sewn end to end
     
    pile of strips sewn end to end
     
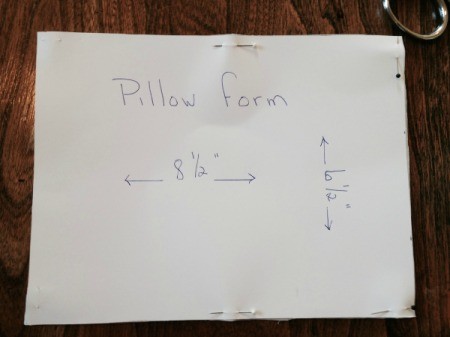
  3. Next I began cutting and piecing together a rough rectangle that would need to be 6.5 x 8.5 inches (including seam allowances). I wanted my strips to run top to bottom rather than side to side, so I sewed the strips together that way.
  4. building up the front cover piece by sewing together the strips
     
    pinning strips together
     
    sewing strips together on long edge
     
    strips sewn together
     
  5. Once I had finished sewing together enough strips to make the front of the pillow cover, I pressed the seams on the wrong side and right side of the piece in preparation for cutting out the block.
  6. pressing seams
     
    ironing seams on front piece
     
    ironing the front of strip piece
     
    Advertisement

  7. Make a paper template 6.5 x 8.5 inches. You will use this to cut out the front piece for the pillow cover. I reused the same one I had made for the pillow form.
  8. pattern for pillow case front
     
  9. I laid the pieced block over the pillow form to make sure I liked the arrangement of strips. This is a step you can skip if not piecing your cover front.
  10. check fitting
     
  11. Now pin the pattern/template on the block and cut out the pillow case front.
  12. case front pattern pinned to fabric strip piece
     
    cutting our front of case
     
    cut out front case piece
     
    Advertisement

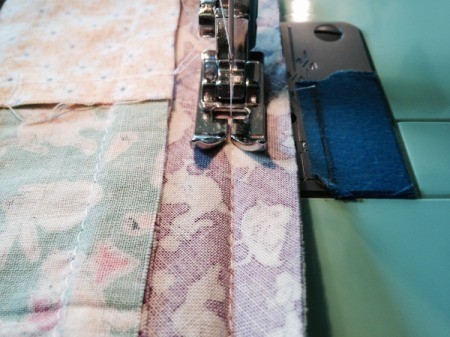
  13. At this point I decided to double stitch the strips together for greater strength.
  14. double stitching strips
     
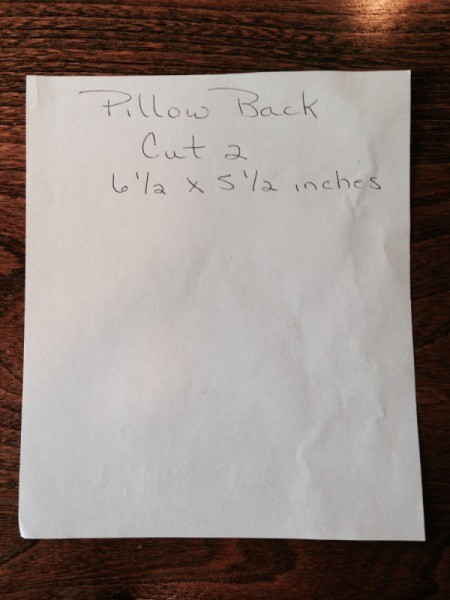
  15. Next make the template for your pillow back. I like the envelope style. I decided to have a 2 inch overlap and drew the pattern accordingly. Mine was 6.5 x 5.5.
  16. pillow back pattern
     
  17. Cut two pillow backs from your chosen fabric. I used two different fabrics to continue the patchy overall effect.
  18. second back piece
     
    pattern on blue fabric for one back piece
     
  19. Pin a 1/4 inch hem on one long side of each back piece. Sew.
  20. hems pinned on both back pieces
     
    hem on back piece
     
    sewing .25 inch hem on edge of back pieces
     
    Advertisement

  21. With right sides together pin and sew the two pillow back pieces to the ends of your pillow front along the 6.5 inch sides. Note: I double stitched these seams as well. They should overlap 2 inches in the center of the back.
  22. cover pieces sewn to front
     
    pinning on first back piece of cover
     
    pinning on second back piece
     
    front sewn to two back pieces along 6.5 inch sides
     
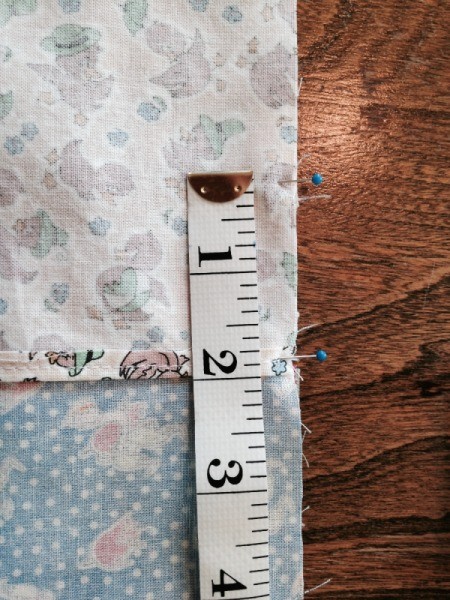
  23. Now with right sides together you will begin sewing the top and bottom edges of the pillow back to the front. I lined up the 2 inch overlap and pinned it at the top and bottom, to itself. Then I pinned and sewed the bottom edge taking a 1/4 inch seam (double stitched).
  24. measuring and pinning overlap of pillow case back
     
    Advertisement

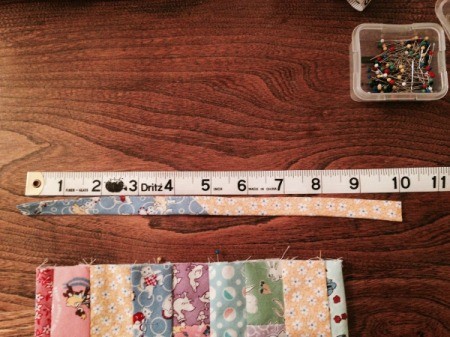
  25. Before sewing the top edge you will need to make and place your handle. For the handle, I used a left over piece of the bias quilt binding from a quilt I made for my most recent grandson. I stitched along the open edge of the binding and then chose the section of color that I liked the best and cut a 10 inch piece to use for the handle.
  26. measuring length of handle
     
  27. Turn the pillow cover right side out temporarily to place the handle. The ends of the handle will be sewn into the top seam, so for this step the handle loop will be away from the edge of the cover. I measured in from the sides 1.5 inches for the placement of the handle. Pin the handle ends in the seam allowance of the front piece only, being careful not to catch the pillow back in your stitching, and sew forward and in reverse to attach.
  28. placement of handle
     
    handle pinned in place
     
    Child's Patchwork Pillow With Handle
     
    handle machine basted on
     
    Advertisement

  29. Turn your cover inside out again. Making sure that the handle will not get caught in your final seam, pin and stitch the top edge of the cover. Clip the corners.
  30. pinned top edge
     
    stitching top edge of cover
     
    wrong side of stitched cover
     
    clipping corners
     
  31. Turn the cover right side out and put pillow form inside. Your child's pillow with its convenient carrying handle is done.
  32. finished cover, back
     
    Child's Patchwork Pillow With Handle
     
    finished cover, front
     
    putting form inside
     
    finished pillow
     

More Solutions

This page contains the following solutions.

September 15, 2008

A quick present to make is a "Handle Pillow" You can use whatever fabric you want, or recycle a favorite shirt or dress. Cut 2 pieces 6x 8 inches and another piece of fabric 3 x 6 inches, this will be the handle.

 
Read More...
In This Page
Categories
Crafts Sewing PatternsMarch 17, 2015
Pages
More
🎆
Fourth of July Ideas!
👔
Father's Day Ideas!
🌻
Gardening
Facebook
Pinterest
YouTube
Instagram
Categories
Better LivingBudget & FinanceBusiness and LegalComputersConsumer AdviceCoronavirusCraftsEducationEntertainmentFood and RecipesHealth & BeautyHolidays and PartiesHome and GardenMake Your OwnOrganizingParentingPetsPhotosTravel and RecreationWeddings
Published by ThriftyFun.
Desktop Page | View Mobile
Disclaimer | Privacy Policy | Contact Us
Generated 2024-05-21 09:31:14 in 5 secs. ⛅️️
© 1997-2024 by Cumuli, Inc. All Rights Reserved.
https://www.thriftyfun.com/Making-a-Childs-Handle-Pillow.html