social

Making a Red Floral Tin Can Teacher's Gift


Silver Post Medal for All Time! 408 Posts
August 14, 2014

finished craftThe new school year has started! Surprise your favorite teacher with this flower pot, made from an empty tin can. Decorate it according to the instructions given below, using red as the main color, or change the color to suit your teacher's mood. This pretty flower pot will sure make your teacher feels special. Fill it with a few red roses, or add some paper flowers to finish it off.

Advertisement

Total Time: 20 minutes

Yield: one gift

Supplies:

  • empty tin can
  • one ordinary sheet of printer paper
  • Jablo mini ivy leaves border stamp, B030 (see http://www.jabtex.co.za/stockists.html for international stockists)
  • flower sponge roller
  • acrylic paint in the following two colors: true red and lime green
  • red glitter
  • Royal Coat Dimensional Magic
  • Revlon Flex Flexi Natural Hold Hairspray
  • dark green and orange colored felt-tip pens
  • two paint brushes
  • pencil
  • ruler
  • ordinary scissors
  • clear drying craft glue (such as Bostik Clear)
  • red roses and fern leaves

Steps:

  1. Wash and clean the tin can and allow to dry thoroughly.
  2. Measure the size of the tin ~ this step should be done by an adult:
    Measure the distance between the upper and lower lips of the can. Also measure the can's circumference. Draw a strip matching the can's size on the printer paper.
  3. measuring can for paper decoration strip
     
    Advertisement

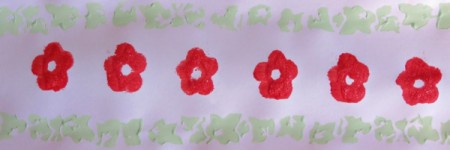
  4. Now use the Jablo border stamp. Use one paint brush to apply an even layer of the lime green paint onto the border stamp. Be careful not to apply too much or too little paint to the stamp, as you will end up with an uneven effect.
  5. Press the image onto the top side of the strip and then, carefully lift the stamp so as not to smudge the stamped border.
  6. Repeat steps 3 and 4 with the Jablo border stamp until the top and bottom sides of the strip of paper has a border pattern.
  7. green border
     
  8. Use the second paint brush and the true red paint. Apply paint to the flowers on the sponge roller. Roll the flowers over the middle of the strip of paper. Do not lift the roller before you reach the end of the strip of paper.
  9. adding red flowers
     
    Advertisement

  10. Allow to dry thoroughly and then cut out the strip.
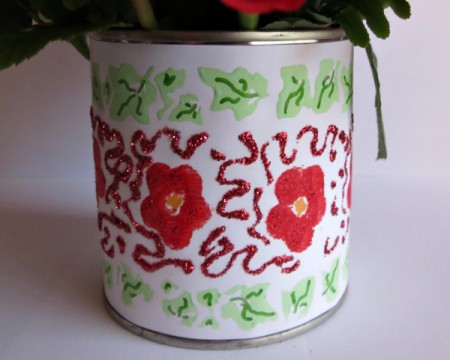
  11. Use the Royal Coat Dimensional Magic to draw squiggles between the flowers. Dust with red glitter while the Dimensional Magic is still wet and shake off excess glitter. Allow to dry thoroughly.
  12. finished paper strip
     
  13. Use the felt tip pens to add detail to the leaves and flowers.
  14. Spray one coat of hairspray over the strip to protect the paper.
  15. Add glue to the tin can and glue the strip in place. Add the roses and fern leaves and voila! You are ready to make your teacher happy!
  16. finished floral gift can closeup
     
    Advertisement

Comment Pin it! Was this helpful? 7

Comments

January 5, 20200 found this helpful

I have simplified this vase/flowerpot, using wrapping paper, etc. Or paint +decals.

Reply Was this helpful? Yes
In These Pages
Categories
Crafts FloralDecember 13, 2016
Pages
More
🌻
Gardening
🎆
Fourth of July Ideas!
👔
Father's Day Ideas!
Facebook
Pinterest
YouTube
Instagram
Contests!
Newsletters
Ask a Question
Share a Post
Categories
Better LivingBudget & FinanceBusiness and LegalComputersConsumer AdviceCoronavirusCraftsEducationEntertainmentFood and RecipesHealth & BeautyHolidays and PartiesHome and GardenMake Your OwnOrganizingParentingPetsPhotosTravel and RecreationWeddings
Published by ThriftyFun.
Desktop Page | View Mobile
Disclaimer | Privacy Policy | Contact Us
Generated 2023-06-13 05:10:00 in 4 secs. ⛅️️
© 1997-2023 by Cumuli, Inc. All Rights Reserved.
https://www.thriftyfun.com/Making-a-Red-Floral-Tin-Can-Teachers-Gift.html