social

Making a Shabby Chic Gift Tag


Bronze Post Medal for All Time! 239 Posts
January 11, 2016

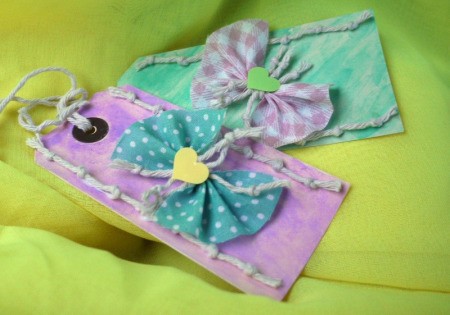
Shabby Chic Gift Tag - two gift tagsThis is such a pretty and fashionably messy gift tag. You don't have to make yours exactly the same. After making one, I hope I have encouraged you to design your own. Have a search around to see what bits and pieces you have to make one in your own unique style.

Advertisement

Supplies:

  • 1 paper luggage tag
  • string
  • 1 small square of fabric
  • pva glue
  • scissors
  • 1 small embellishment
  • watercolour paints
  • 1 small paintbrush
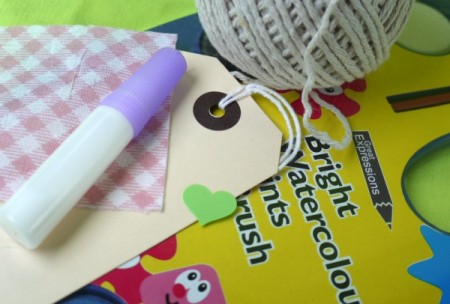
Shabby Chic Gift Tag - supplies
 

Steps:

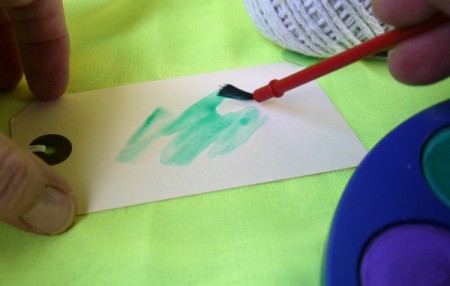
  1. Apply a wash of colour to your luggage tag. This will look better if it is done unevenly. Children's watercolour paints will do fine for this. Don't forget to remove the tie first. Allow the paint to dry before proceeding.
  2. Shabby Chic Gift Tag - Apply a wash of colour to your luggage tag.
     
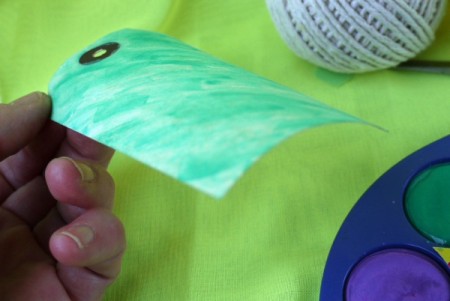
  3. Don't worry if the wet paint causes the tag to curl. It should flatten out again once dry.
  4. Shabby Chic Gift Tag - wet paint may cause tag to curl a bit
     
  5. Take three short pieces of string and tie a knot in each end.
  6. Shabby Chic Gift Tag - tie a knot in 3 short pieces of string
     
    Shabby Chic Gift Tag - string with knots
     
    Advertisement

  7. Concertina the fabric square in the middle and tie one of the pieces of string tightly around it with a single knot.
  8. Shabby Chic Gift Tag - concertina the fabric square in the middle and tie
     
    Shabby Chic Gift Tag - tying the knot
     
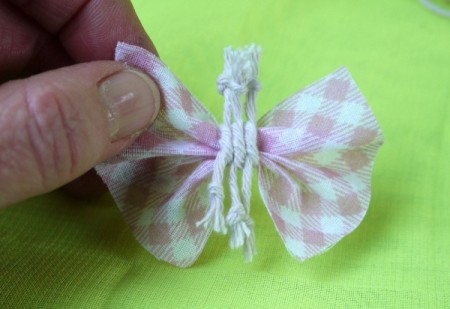
    Shabby Chic Gift Tag - bow with knot tied
     
  9. Repeat with the other two strings so they are tied side by side.
  10. Shabby Chic Gift Tag - tie other two strings next to first
     
  11. Cut two more pieces of string about twice the length of the tag and tie knots all along.
  12. Shabby Chic Gift Tag - Cut two more pieces of string about twice the length of the tag
     
    Shabby Chic Gift Tag - tie knots along the length of the string
     
  13. Trim to fit the tag and glue them in place.
  14. Shabby Chic Gift Tag - trim knot sting to fit the tag
     
    Shabby Chic Gift Tag - glue in place
     
    Advertisement

  15. Add an embellishment to the centre of the bow.
  16. Shabby Chic Gift Tag - adding glue for embellishment
     
    Shabby Chic Gift Tag - Add an embellishment to the centre of the bow.
     
  17. Glue the fabric bow in place too. Replace the tie or use string to match.
  18. Shabby Chic Gift Tag
     
Comment Pin it! Was this helpful? 3
In This Page
Categories
Crafts Gifts Gift TagsJanuary 11, 2017
Pages
More
🌻
Gardening
👔
Father's Day Ideas!
🎆
Fourth of July Ideas!
Facebook
Pinterest
YouTube
Instagram
Contests!
Newsletters
Ask a Question
Share a Post
Categories
Better LivingBudget & FinanceBusiness and LegalComputersConsumer AdviceCoronavirusCraftsEducationEntertainmentFood and RecipesHealth & BeautyHolidays and PartiesHome and GardenMake Your OwnOrganizingParentingPetsPhotosTravel and RecreationWeddings
Published by ThriftyFun.
Desktop Page | View Mobile
Disclaimer | Privacy Policy | Contact Us
Generated 2023-06-04 12:10:14 in 3 secs. ⛅️️
© 1997-2023 by Cumuli, Inc. All Rights Reserved.
https://www.thriftyfun.com/Making-a-Shabby-Chic-Gift-Tag.html