
Donna
Gold Post Medal for All Time! 555 Posts 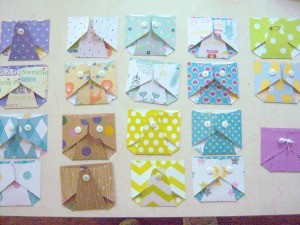 I am planning my daughter's baby shower - twins no less!! I wanted to make a special handmade invitation and saw this adorable design. It's a nappy - a modern day version of a diaper! There are many ways to personalize it and I'll show you a few as we go together, step by step!
Source: nowthatspeachy.com
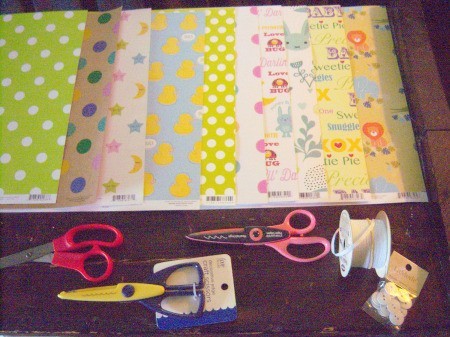
Supplies:
- 12" X 12" scrapbooking paper for 2 invites each
- scissors
- 10 4 1/2" X 5 1/2" envelopes
- optional: buttons, or ribbons, or real or decorative plastic diaper pins sold in craft stores. Also white paper if you want to print or write a separate invite insert (or just write on the inside of the invite if you prefer!) Scalloped scissors for edges
- envelopes
Steps:
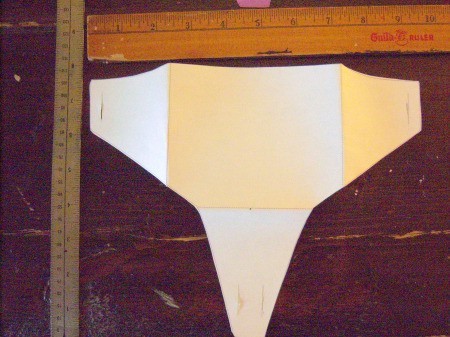
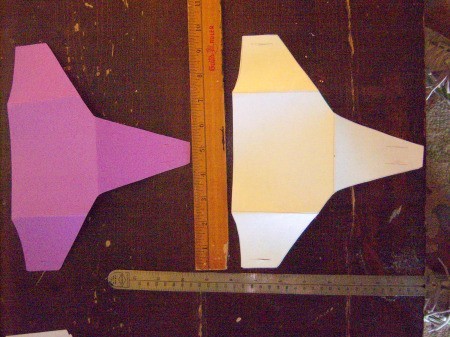
- Create this template pictured on a piece of plain paper, eyeballing it or folding your paper in half and duplicating half of the template picture using the measurements according to the ruler or checking out a pattern on Pinterest. Fold your finished template to make sure you are happy with a symmetry as a finished diaper.

- Trace and transfer it to a heavier piece of card stock or even cardboard. You will use the heavy cutout for individual tracing onto your paper and to score and fold the final invites.

- Trace the pattern onto each of your scrapbooking papers with a light touch pencil outline.

- You may use solids or colors to coordinate with your party. I chose two color/sided stock, but you need to realize that some prints will come out in reverse. If that would bother you, stick with random prints or white second sided paper. The diapers are reversible at the end, so if you end up preferring on side to another, use it! I am using multiple patterns since we don't know the twins genders yet! After making one diaper per sheet, I figured out how to fit two templates per sheet (sheets cost me .20 each at AC Moore and you can buy them individually!) I ultimately need to make 30 invites.
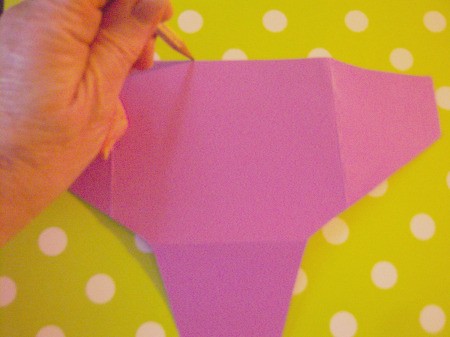
- Place the cardboard template over each cut out card again and trace the fold lines with a butter knife to score it enough to help you gently fold it, but not so hard as to rip the paper. This gives it nice crisp edges. We want it to look handmade, but polished!
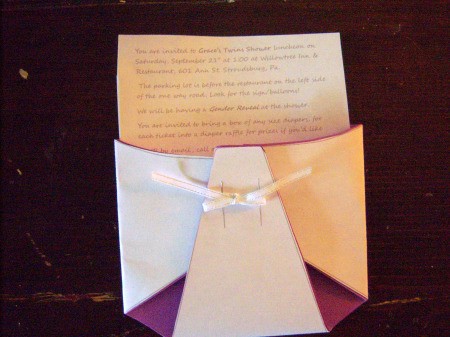
- It's your choice to hand write the who, what, when, and where right on the inside of the cards or to print the info on a separate slip of paper that can be slipped into the card slot on top, as shown.

- You also have a choice of how to close the flaps (see photos). The two sides over the center piece or the center piece over the two sides! You can then add cute, glued on decorative buttons, make a small slit (as shown) and add ribbons or even use a real or one of the cute fake plastic diaper pins that craft stores sell. (Disclaimer: the buttons aren't glued on these yet, still deciding! Remember your choices here may change your cost to mail if it gets bulky. I bought my thin white buttons (20 for $1) at AC MOORE. By adding a small incision in the flaps (see purple envelope) you can add a ribbon instead, if you'd like. Just lace as shown and tie it with a bow.
- It's a savings of over $150 for me to make these over buying imprinted invitations (which I looked at, but couldn't fit all my important info inside), but it's really more the fun and the adorableness factor that made me make them!
I hope you like them as much as we do!
Add your voice! Click below to comment. ThriftyFun is powered by your wisdom!

15mhhm15
Diamond Post Medal for All Time! 1,298 Posts July 27, 20192 found this helpful
I love it!!
Congratulations to your daughter and your family. Very exciting. :)

Donna
Gold Post Medal for All Time! 555 Posts July 27, 20190 found this helpful
Thanks!
So much fun too!

July 28, 20190 found this helpful
This is absolutely so adorable and creative!
Add your voice! Click below to comment. ThriftyFun is powered by your wisdom!
 I am planning my daughter's baby shower - twins no less!! I wanted to make a special handmade invitation and saw this adorable design. It's a nappy - a modern day version of a diaper! There are many ways to personalize it and I'll show you a few as we go together, step by step!
