I am repainting my laminate countertops. They were painted about 6-7 years ago, now they have a few more dings and scratches. I have sanded and primed with 2 coats of Gripper Grey primer and have applied my 2nd coat of high gloss enamel. It is not blending well, a lot of brush lines are showing through. Any suggestions?
By julie from GA
I want to say that this site is awesome. I don't know how to get more than one pic on at a time so I will do this in parts so you can see it all. I started by cleaning with vinegar and then lightly sanding all my work. I did 2 bathroom vanities and my kitchen. I will post my kitchen pics first then the bathrooms. I will also include pics of how I raised up my sinks. I didn't want a "lip" around them that you get even using tape. This was done by unscrewing from underneath then using 2 2x4's cut a little higher that the distance from the floor to the bottom of the sink and wedging them in. It didn't interfere with the plumbing at all and I could put the paint and sealer right under the sink. Much nicer look. The first bathroom vanity I just taped the sink and it has that "lip".
I used an oil based primer (Kilz) after cleaning and lightly sanding. When it dried I put a water based coat of paint on the whole thing then took 3 colors plus metallic gold craft paints with a sea sponge cut into different sizes and started patting away. When I got what I wanted I used water based Varithane for "floors" to seal it. I did 5 coats lightly sanding in between each application. It can be re-coated after 2 hours of drying time. I waited a week before I sat anything on them, but I don't think I would have had to. It says on the can that "normal walking" can be done after 3 days.
Remember, you can put water based stuff over oil, but you cannot put oil based over water. You will get bad results if you do. The pics I have don't really show how pretty they actually are. They shine beautifully and I am using them like I would normal counters. My friends love them and want me to do theirs.
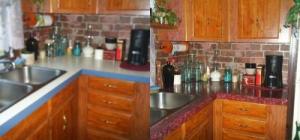
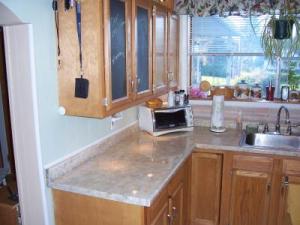
So here is the kitchen pics. Sorry if I do too many posts, but I tried to put them in a collage and it was way to small to see them. (07/16/2009)
By Dottie
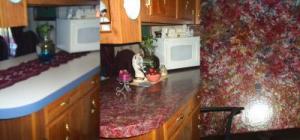
These are more kitchen. (07/16/2009)
By Dottie
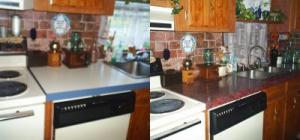
I didn't realize that everything I wrote to begin with would be on the "bottom" you'll have to scroll down and read up I guess. This is the end of kitchen pics. (07/16/2009)
By Dottie
This is the bathroom that ended up with the lip on the sink It's not bad, but I wish I would have thought to raise the sink first. (07/16/2009)
By Dottie
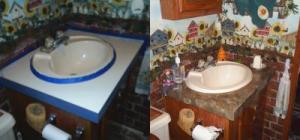
This is the second bathroom. (07/16/2009)
By Dottie
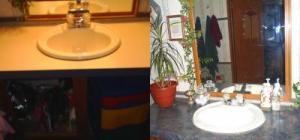
If you scroll down to where I started my first post this picture will make sense. I raised up the sinks so there wouldn't be any build up or lip left after painting. It's explained further down. (07/16/2009)
By Dottie
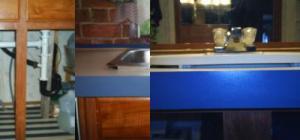
I really loved "Jesse's Five Colour Countertops", but since I'm in the U.S. I couldn't find the colors. I recently went to Canada and while I was there picked up the color swatches to get them color matched here. I really wanted Jesse's countertops. I took them to Lowe's and got them color matched. I just got the tiny sample cans. I figured I'd share the color recipes:
We ended up using the RustOleum Countertop Coating for our bathroom countertop, and are pretty well pleased with the results. The only problem that we encountered was that when using a foam roller, as suggested in the directions, we always ended up with slight roller marks on the top. I ended up putting a couple of coats on, but always ended up with these slight marks. Maybe it was just my technique, but I was not satisfied with the finish, so I ended up using a cheap HVLP sprayer, and sprayed the finish with a slight textured finish.
Here are the before and after photos of our countertop; we used the "Wheat" color and the RustOlem Countertop Coating as seen here: rustoleum.com.
It's only been on about a week, so we'll have to wait and see how it holds up, but right now we are very pleased with the results. (08/13/2009)
By DC84N
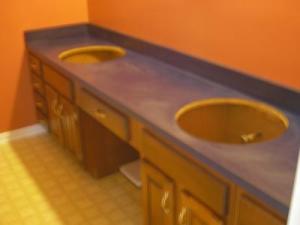
Here's the "After" photo. (08/13/2009)
By DC84N
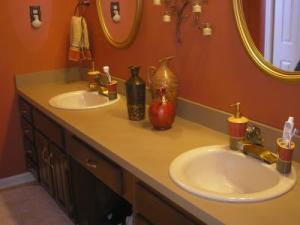
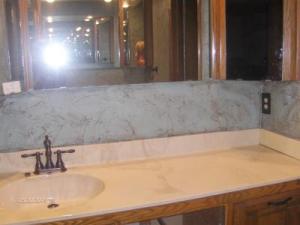
This is a picture before I started my painting. (08/24/2009)
By Judi Diel
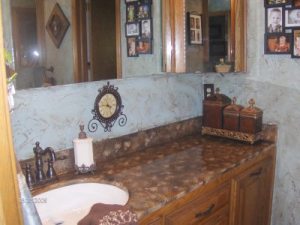
This is a picture after I finished my counter tops. (08/24/2009)
By Judi Diel
Thanks for all the great advice. I finally did my counters and they came out great. Will post a pic, but it looks better in person. Used Envirotex Lite to seal it and used 4-5 different good acrylics and sponge for paint. I primed the counter before sponging. (08/29/2009)
By Emily Erbig
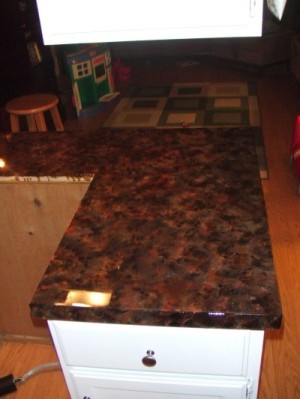
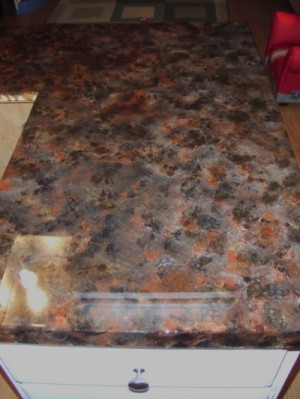
I forgot to take a before, but it was ugly pale blue laminate. Here is one more shot. Colors are a little off on this due to the flash. The first pic is more indicative of the real color. (08/29/2009)
By Emily Erbig
After reading all the helpful posts I decided to try painting my counter tops. They look amazing. I am so thrilled. I used the Envirotex to seal and had to do a second coat. You must make sure you do not put it on too thin. When I put on the second coat, I only did one side of the counter at a time. This prevented the Envirotex from setting up before I could complete. I purchased the Envirotex from Michael's and AC Moore and saved a lot of money when I used the store coupons. Thanks to everyone who posted. You were all my inspiration. (09/04/2009)
By soccermom34
Add your voice! Click below to comment. ThriftyFun is powered by your wisdom!