We recently updated our kitchen. Instead of replacing our old laminate countertop, I decided to try painting it, we were planning on replacing it anyway, so if I ruined it, no big deal.
I asked a salesperson at my local home improvement store what type paint to use. He said it couldn't be done. He had never heard of anyone painting a laminate countertop, he thought I was crazy. I did it anyway.
First I sanded the countertop with a fine 200 grit sandpaper. After sanding, I wiped it down with a damp cloth, making sure to remove all sanding residue.
Next I painted the counter with a latex interior satin paint, using a foam roller; covering the entire surface of countertop, and allowed it to dry overnight.
Apply second coat of base color, if needed, and allow to dry overnight. This will be the base color and will show through slightly when finished. You will need two to three different colors of paint or glaze to go on top of base color, depending on how many different colors you desire.
Using a damp sea sponge or a damp crumpled rag, dip into first color of paint or glaze, to go on top of base color. (I used Valspar translucent color glaze for the first color). Be careful not to overload your sponge or rag, dab sponge or rag randomly over entire surface of countertop, turning wrist in back and forth motion.
Cover lightly, don't overdo (the idea is for a speckled appearance like the original). You can also pick up a countertop sample in a local home improvement store. These are free and are great to go by when painting your countertop.
Allow first color to dry overnight. If using a second or third color, follow same steps as above, allowing each color to dry overnight.
After last color of paint has dried overnight, using a foam roller, finish with two coats of waterbase polyurethane, letting each coat dry overnight. Mine looks great and visitors can't believe it was painted.
Use countertop just like you did before painting, only use trivets or pot holders when putting hot containers on counter, also, don't use harsh chemicals for cleaning, such as bleach or harsh abrasives. Scratches can easily be removed with a light sanding and covering with one coat of polyurethane.
I painted ours three years ago and it still looks great. And what's so good about it, if you want to change the color later, just repeat steps above.
by Linda from Cohutta, GA
By shannon
We just did our cabinets this weekend using Rustoleum American Accents "stone" and Min-Wax Polycrylic. I love them they turned out great. Started Friday morning, finished Friday night started using Saturday night. The counters were already a white color so we did not use primer, just degreased tops then wiped good with alcohol and paper towels.
Once dried I sanded tops with 100 grit paper. Total time-13 hours (1 1/2 hours prep including taping off cabinets. 1/2 hour spraying with stone, 4 hours drying time prior to starting poly, 7 hours poly). Then the wait began, 24 hours dry time after last coat of poly. I was putting my things back by this evening (Saturday night). (01/02/2010)
By Lisa K
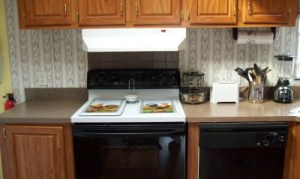
Here are the before pictures of my counters. (01/02/2010)
By Lisa K
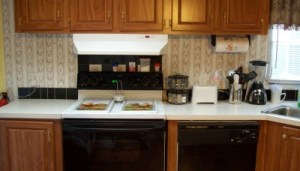
If you read down through the entire page, you'll find a variety of things were used by all of us for the sealant. However, I used Envirotex, and because of that only painted my island counter top. Although, we love the look, it does scratch easily. That said, the scratches are not very evident because of the pattern and colors of the paint. I do not regret doing it because the look is beautiful and we've gotten many compliments.
However, it's not durable enough for me to want to do all my countertops. It is water-proof, so that's not a factor. It is only heat resistant to 120 degrees, so for me, that is an issue. I personally don't like having to use hotpads under something I've taken out of the microwave, another reason for not doing all counters. Positives of Envirotex, waterproof, thick glass like finish, and food-safe. From what I've read, oil based poly will yellow, but be waterproof, and water based poly will leave white water marks for awhile until it evaporates, plus these two are not food-safe.
However, there seems to be many that are pleased with them. Hope this helps. Anymore questions, please feel free to ask. I really gained a lot of knowledge by reading all the posts on this page, and others. (01/12/2010)
By shannon
I looked through most of these they look great, when did my counter tops, I found a product called Giani's everything you need comes in one kit and its about $50-$60. It took me about two days with the drying time and no time at all to actually do the project. I will post pictures. the green is before and the brown is after. (02/14/2010)
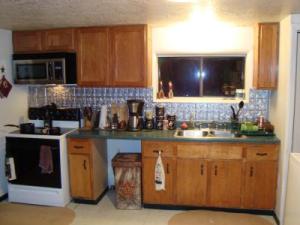
Here is the after. (02/14/2010)
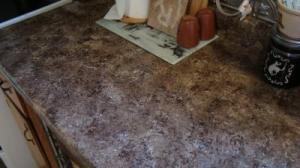
Well we did it. We went in head first and painted our laminate countertops. We were extremely nervous to try this, but were already considering replacing them with new ones. We thought, why not try it before we get new ones? Well after reading through several different ways of doing this, we decided to go with our own idea.
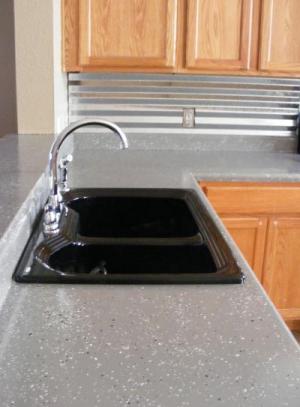
We have a black and silver theme in our kitchen, so decided to go with a greyish countertop to "match" the theme. We chose the epoxy concrete paint. The one that people use for their garage floors. We chose "greyling" as the color with black, grey, and white flakes. We got a small canister of the flakes and actually mashed the flakes down even smaller than they come.
We painted our countertops as directed for the floors. We did about 2 coats of the epoxy to make sure we covered every space. We made sure it was dried completely, over night. Then we applied a polycrylic clear coat in high gloss over it, 2 coats. This just gave it an extra shine and took away the little bit of roughness from the flakes. We let that dry over night as well. It feels so smooth now and it's super shiny. We're very pleased with the outcome of it all and glad we went this route.
We saved a ton of money by doing it this way and spent less than $100 on the whole thing, rather than $1,000 on new countertops. (02/18/2010)
By LucyG
Just thought I'd leave a few of my thoughts on the Giani process. First of all, I believe the "ideal" application for this process is old Formica countertops. As a person with sort of a utilitarian outlook, I would *never* use this product on Corian countertops as suggested, it would compromise the entire premise behind the Corian product. We decided to try this product on temporary housing in a mobile home we purchased to live in while we built our new house.
The old Formica countertops were just plain ugly, and this was a possible affordable solution to ripping the countertops out and starting over. I am not new to painting, but painting countertops is a new concept for me. I ordered the product straight from the manufacturer online and it promptly arrived on my front doorstep. My first suggestion is to not only clean and degrease the countertops well as directed, but to do it twice in more commonly "used" areas, such as around the sink and stove. Because I didn't do it twice, the primer did not take as well in those areas. I ended up sanding those areas and reapplying.
Our back splash is ceramic tile. They suggested a layer of primer on tile prior to priming. I would go one step further and suggest a light sanding after priming. It will stick better to the ceramic tile with a light sanding. It is very easy to get wrapped up in trying to make the pattern look random, as granite would normally appear. Definitely wear gloves. I also suggest having one small paintbrush and one tiny one for those little hard to reach areas.
Plan on allowing the process to dry overnight and plan on going back for random touch-ups before the final clear coat application. The instructions will tell you it's OK to do that, and it does help add depth to the look. One last suggestion is if you buy two kits, as I needed to do, designate one of the large sponge rollers for the primer and the other for the topcoat, instead of using the same roller for the two different applications.
Plan on spending an entire weekend on this project if you want it to look right. The instructions are pretty straightforward. We are giving the clear coat plenty of time to cure (as suggested) before using the countertops. The final look improved the appearance of the countertops, so now we'll have to see how they hold up over time. I can provide photos to anyone interested in seeing the results. (02/21/2010)
By Kate
You can buy paint specifically for use on counters. There are companies that will come in and do this for you as well. (02/21/2010)
By Gooby
Without looking at the can, I think I used Zinsser 123. I think I have the spelling wrong, but you'll see something similar to that name if you go to your hardware, home improvement store. It states on the can that it adheres to laminate without the need for sanding. I did not sand my countertops, and put this base coat on, and have had no problems whatsoever. I did make sure to clean the counters very well. I used Envirotex so I cannot recommend a sealer. Hopefully someone else can do that for you. I think oil based turns yellow.
(02/23/2010)
By shannon
We painted our old 1970's Melamine with Stone Effects spray paint after a good wash and primer. We top coated it with a sturdy epoxy called Envirotex Lite. (03/01/2010)
By Val
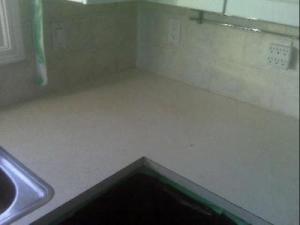
Below is the old 70's white with gold flecks counter. This is the brown Stone Effects spray that we eventually put 3 coats on. (03/01/2010)
By Val
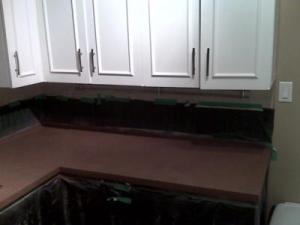
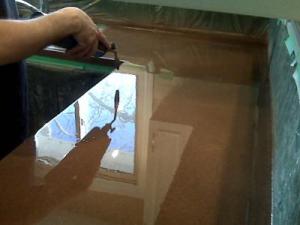
This is the reflection of the blow torch we used to get the bubbles out and even out rough patches of the epoxy. We put on 3 coats for a hard, durable finish. Over all it took a week from start to finish to ensure 24 hours between each application for drying time. Hard not having a working kitchen with small children. (03/01/2010)
By Val
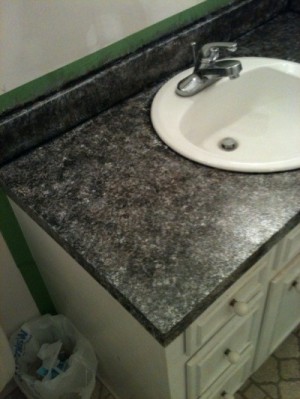
Okay, after reading through many, many of these experiences, I decided to try this on a few countertops in my home, and a home that I was flipping. This seems to be an economical way to spruce up homes without all of the demo, or expense of new countertops. The first one I tried was in a bath. I went with satin black as a base coat then used a sea sponge to sponge on a smoke grey, grey, white, hint of orange, and a metallic silver. I thought the countertop was a tad too light, so I went over it again with black and finally a touch of silver again. I then coated it with five coats of water based poly. Here is the before picture, with the after pic coming in my next post. (03/07/2010)
By Brian
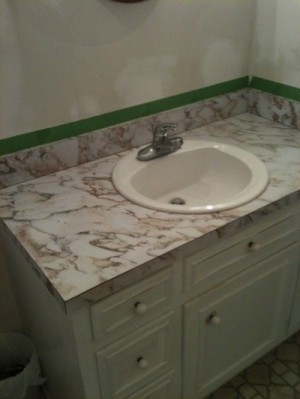
This is the bathroom after. (03/07/2010)
By Brian
After trying the the paint and poly method, I wanted to try the rock spray paint and Envirotex method next. This was an extremely simple process. I made a couple of errors that I will not make again, so future counters will look fantastic. I put three coats of rock spray, allowed to dry overnight, then put on the Envirotex the next day. The Envirotex was extremely easy to deal with, and I mean easy. No one should stress it. Here is the after picture, followed by a picture with it just sprayed, followed by the before picture. (03/07/2010)
By Brian
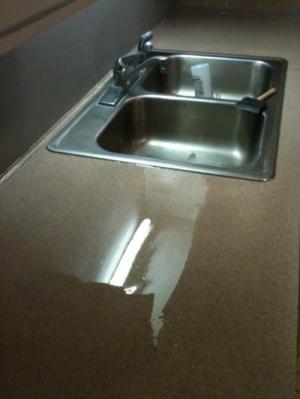
Spray. (03/07/2010)
By Brian
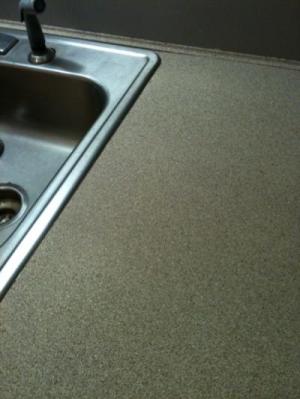
Before. (03/07/2010)
By Brian
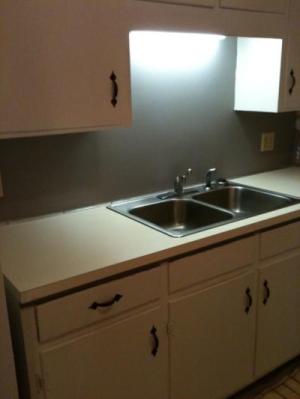
I have a question for anyone here who's has used the Envirotex and found that it scratches way too easily and picks up on fingerprints to an extreme? I must say, I love the way it looks, I just recently used the Bombay Black Giani Kit (keeping it mostly black) and then pour coated every inch of my 30ish linear feet of counter top. I'm at work right now, or I would post a picture. I'll do that later on.
First: what are you using to clean your Envirotex? Windex causes a removable haze, and Pledge causes greasy finger prints. Which I catch my 9 year old daughter using as a finger painting canvas all the time. Drawing hearts, flowers, and kitties. I'm afraid to use anything else till I'm sure like 409, or other cleaners.
Second: this scratches so easily. I moved a pizza box and got three scratches on my counter. I've put felt stickies under everything that moves and invested in several cutting boards with rubber feet and lots of place mats. But doesn't that defeat the purpose of improving your counters, just to cover them up? I won't even let my kids sit at the breakfast bar to do homework anymore because I'm afraid writing marks will press through the paper.
Is there anything that can be done to make it not do this? I wondered if I could put a coat of the clear coat that comes with the Giani kit over it? Or clear poly over it?
I have one section of my kitchen to do, and that's the part around my sink. I'm seriously wondering if I shouldn't poly that section instead? It's the most used spot in the kitchen, that makes me nervous.
Any thoughts? Thanks in advance. (04/12/2010)
Here's a few pictures. (04/12/2010)
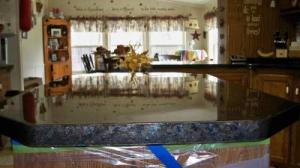
and another (04/12/2010)
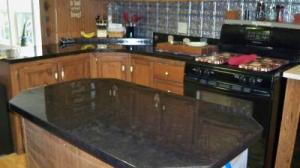
Thanks for the feedback. I had already chatted with Envirotex, they told me to use two coats of car wax to cover scratches. But it smells so bad. It's not an odor I want in my kitchen. I'm sure I'll get over the "newness of it" and stop babying it, and let life happen to it, eventually.
But for now, every time I look at it I smile like a proud parent. Thanks. (04/15/2010)
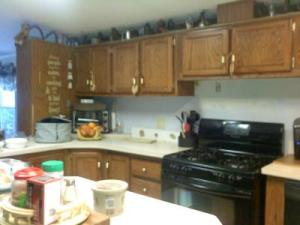
Look, I found my before picture. (04/15/2010)
Add your voice! Click below to comment. ThriftyFun is powered by your wisdom!