How can I paint laminate counters?
Diane from Cutler Bay. FL
Can anyone who has painted their countertops tell me how long they waited before applying the sealant. I am going to use Envirotex, as I have seen some of the pictures from people who have used it and I love the finish, but I have been getting conflicting answers from the paint stores as to how long to wait before you apply it. One lady told me you have to wait until the paint cures, which can be as long as 60 days depending on what kind of paint you use.
polishedbypam (04/24/2008)
By Pam Bexson
I waited about 6 hours (total drying time for the melamine paint I used) before applying the envirotex and it turned out great. (04/24/2008)
By Jesse
Jesse
Did you find the Envirotex hard to use. Some people said they had a hard time with it. I figure the only hard part would be the back splash and the edges. Wondering how to get the right thickness if I use a foam roller to spread it. Did you use a foam brush or roller or a plastic spatula like the instructions say to do? Thanks for your help.
Pam (04/24/2008)
By Pam Bexson
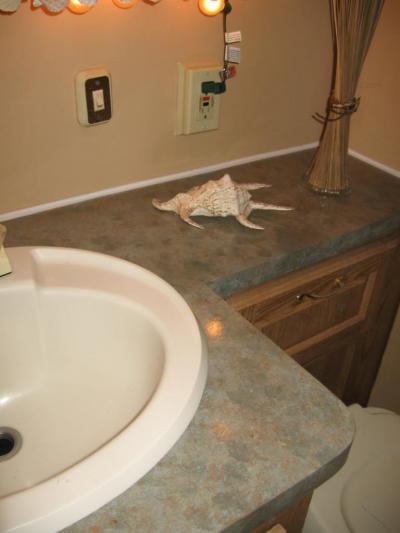
This is a great site. Thank you everyone for the information posted on painting laminate countertops. I painted the countertop in my bathroom. See Pic below. I want to now do the countertops in my kitchen. Will I not be able to use my stove for about a week until I am completely finished? (04/24/2008)
By Nikki
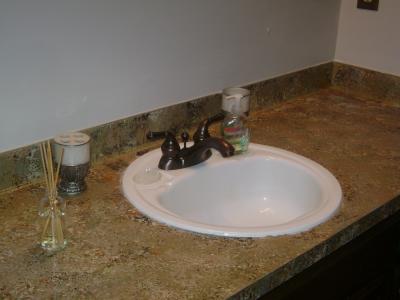
Lol, wow there was a lot of information that disappeared! Envirotex wasn't hard to use just make sure that you have the time to spend to watch it set/touch up any runs. The backsplash is the hardest part. Being a self leveling (pour on) product it's going to be difficult doing anything vertical. Here's another picture of my finished product for those who were going to refer to it.
(b)Editor's Note:(/b) Sorry that some posts went missing. We are trying to see if we can get them back but there was some sort of corruption on this page and we had to delete them to get it to load at all. Articles are safer than feedback. If you are interested, Jesse, please contact us directly. (04/28/2008)
By Jesse
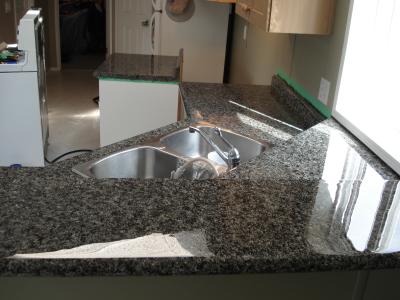
I decided to give this a try. Since I was to afraid to do my own countertop I did my mother-in-laws bathroom in her trailer. It turned out great. I looks like slate and very shiny. I sanded with 120 grit sand paper, used oil based Kilz primer, sponged acrylic craft paint and finished with oil based poly.
The kitchen is next, and I am going to use Envirotex. Hopefully mine will turn out as excellent as Jesse's! (04/29/2008)
By dFairchild
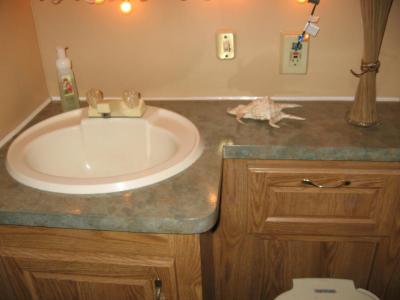
Here is a picture of the "before".
YUK! (04/29/2008)
By dFairchild
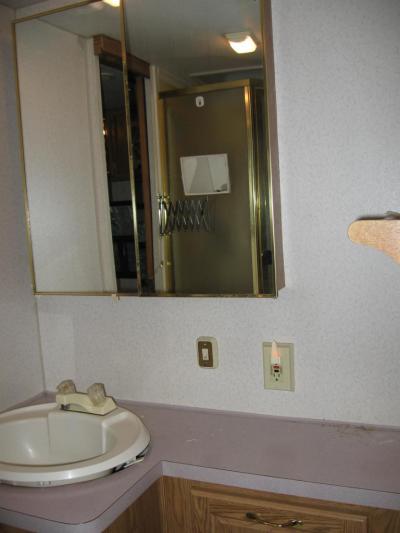
(04/29/2008)
By dFairchild
Jesse, Your countertops look AWESOME! I love the granite look you were able to get. What colors did you use? (04/30/2008)
By lynn wright
Jesse - thanks for responding. Again, the countertops look fabulous - I love the shine! I'm doing mine over and have the first coat of black on. I'll be applying dark chocolate and metallic silver and will be coating with a water based poly as I can't find the envirotex here in Atlanta. I heard that oil based poly yellows too much and changes the colors.
I will post pics when my job is completed. (05/01/2008)
By Linda
Jesse, Your countertops are exactly what I am looking for. They are absolutely beautiful. How difficult was this? You didn't mention that you sanded down your formica. Is that the first step? Also, could you tell me where you got the Debbie Travis paint? How much envirotex did you use?
By Tammy
I've justabout finished with the counter project. I have a couple more coats of poly to apply. I'm very pleased with the results.
(05/04/2008)
By Linda

Still curious on how to make sure the lip and backsplash gets coated right with the poly. I am going to paint my counters with acrylic craft paints and will probably use an oil poly since the Envirotex is going to cost me over $100 for the size of my counters. Any more insider tips is well appreciated. Thanks in advance! (05/04/2008)
By MICHELLE B
Hello Linda,
I think your counter top looks great! Do you have a close up pic? Also, did you use the craft paints also? If so, what colors did you mix and match. Thanks I REALLY want to do my countertops but I'm just scared it will look horrible! (05/07/2008)
Tammy,
I didn't sand first since the countertops already had texture. Sanding wasn't really needed. If your countertops are smooth you might want to sand but if you're using melamine paint it's not that big of deal if you don't. Debbie Travis paint won't be available in the States but you should still be able to match the colours (cross-refferance <----- don't know how to spell that!) I ordered the gallon kit of envirotex and put a good coat on. I only ended up using about half of it. I'll find a use for the rest I'm sure. Good luck to all! (05/07/2008)
<p class="art">By Jesse
I decided to try the envirotex. This is a side table in a travel trailer. The white thing is a plug so that the envirotex didnt run through the cable hole. I can say that the envirotex was a little intimidating at first. I mixed it well like the directions said. I wore a mask while applying it, and I had to use a piece of hard paper to distribute it all around in places where it needed filled in. It didnt run over the sides so I helped it a little with the piece of paper and then used the foam brush to coat the sides. Maybe if I had used more it would have ran over the sides? I did get bubbles, but I blew on them through a straw and they came right out. (05/08/2008)
By dFairchild

Here is a close up - if you want to see a before picture go to the little bathroom below under Dfairchild and you will see the pink countertops this trailer had. (05/08/2008)
By dFairchild

Mz - Thanks! I bought a couple packs of poster board to practice on before I actually painted the countertop. Find a pattern/color selection that you like before attempting on the real thing.
The colors I used and in this order are:
Black - base color
chocolate
metalic silver
metalic gold
charcoal
then the last coat was black sponged in over here and there.
But practice first, when you're confident move to the counters! Good Luck.
Let me know if you have other questions. (05/11/2008)
By Linda

Help! I painted my counters a solid navy blue, then coated with Envirotex Lite. Because of the solid color it shows every imperfection in the sealer. Is it possible to remove the Envirotex, repaint with marbling, then re-seal? (05/12/2008)
By Kim Pribyl
I was just wondering if anyone knows what you could use to make the countertop look like it has little confetti like flakes in it. I thought about solid black with copper confetti looking flakes, but not sure what to use. (05/13/2008)
By lynn wright
Question for DFairchild-- I am going to start painting my countertops and was sure I was not going to use poly until I saw your post. What about the yeloowing factor that is involved with oil poly and why didn't you use water-based poly. (05/14/2008)
Beth, the oil based poly turned my grey into green, but it looks good. I would say its going to change your colors and you wouldn't see yellow unless you are using a white or off white color. I didn't use water base poly because I was doing a counter in the bathroom and a person who posted on this sight mentioned problems with clouding around their sink with the water based poly.
I decided on the oil base poly because of that and also because the bathroom isnt a place you would prepare food so I didnt worry about the oil leaching into any food. The oil also seemed to put a higher gloss from what I could tell in the pictures on this sight. If I had another counter to do I would probably try the water base product and use the diamond one that was mentioned by one of the postings on this sight. I just got done with the envirotex on a kitchen dining table in the trailer and I am very disappointed with all the little flaws that you can see not to mention I dropped it and put a big chip in the side of it :(
Tomorrow I will have to sand down the counter that I messed up on earlier and continue with a thicker coat of the envirotex because I dont know how to remove it or I would. Its possible I may just rip it all out and have my father help me install some new laminate? Since this is my mother in laws trailer, I will let her decide if she likes it or not. She is not a perfectionist like I am and may be fine with the little flaws. (05/14/2008)
By Dfairchild
Ymmybunny, I would be careful with the oil-based poly and how you apply it. People seem to have good results, but mine were a disaster. I used oil-based since I had read where the water-based clouds. The counter was a light brown coloring. After I was done with the poly and it had dried, it turned yellow. The color was ruined. But worse yet, in the corners and where the backsplash met the counter (places it pooled while drying) it was a thick yellow, looking like grease buildup or something. Picture shows a practice piece that I didn't poly laying on the counter to show difference.
Not saying not to use it. I think they all have their own issues, but be careful with application and what color you are putting it on. (05/15/2008)
By Tanya

I think an oil based poly "yellows" with light colors. Of course, it would show more. With my black counter top, I don't see any yellow tint. I've had a very good experience with the oil poly.
From what I've been reading online, water based poly has come a long way and will stand head to head to the oil based, with the oil based being slightly stronger. The water poly takes longer to cure whereas the oil is cured when it's dry.
If I painted my counters with a light color, I would have no problem using the water poly. I would maybe increase the coats to 7, rather than 5 with the oil.
Just my 2 cents. Good luck everyone. The counters have made a huge difference in my kitchen and I'm very satisfied. (05/16/2008)
By Linda
I posted this on another thread....
I LOVE Varathane Diamond High-Gloss water-based poly. I used it on my kitchen counters. I have NOT had water spots, lifting, clouding. I tried Cabot and Minwax and DID NOT LIKE either the water-based or oil based. Varathane Diamond also has a spray poly that can be useful for putting the first coat on without "lifting" the design off with the brush.
I used an oil-based in my bathroom, and it turned my beautiful Aegean blue to a turquoise green. I had to sand it off and redo it. (05/16/2008)
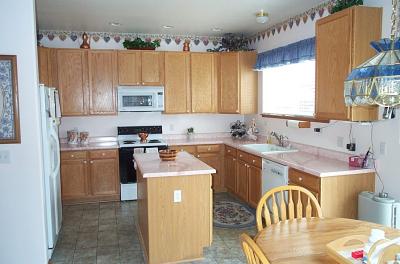
Here's a closer picture...you can see the unfinished counter on the other side of the stove. (05/16/2008)

Here is a picture of the Kitchen makeover. I like the Diamond Polyurathane (water base) the best. The table was done with envirotex and it has little flaws but looks good also. After all the testing with oil base poly, water base poly & envirotex. I think the water base poly looks more natural for a painted countertop and is easy to do. Not to mention the clean-up much easier too. I will send the before picture in a few.
(05/26/2008)
By dFairchild

Here is the before picture (05/26/2008)
By dFairchild

Here is a close up of the dining table (05/27/2008)
By dFairchild

And another of the kitchen counter. I think I am done with my sharing now. Best luck to everyone who ventures here! (05/27/2008)
By dFairchild

Hi greywulf,
We painted a bathtub before and they sell a special kit for that at Home Depot or Lowes. The results are great. We will paint our ugly green kitchen sink very soon using the same product. The paint is high gloss shiny white and very durable!
I am really happy to see everyone's fantastic results! Congratulations to all of you!
We are currently painting our second project and will use the Envirotex.
We tried oil based Poly and it changed to an ugly yellow color within a month, so we re-did the whole counter and used Benjamin Moore water based Poly. It's awesome and does not cloud, but the pictures here show even better results with the Envirotex, so we are trying this now.
Attached is a picture of our kitchen in our Mobile home in Florida. I'll post a before picture once I find it in the deep abyss of my hard drive. lol Good Luck to everyone! Bea (06/03/2008)
By

I found it :-) Here is our Before Pic, isn't it nice?
When we took possession of the Mobile Home we both looked at each other and said."What have we done?" lol
Thanks again for all your great ideas in this thread. Bea
(06/04/2008)
By Bea

I'm buying an old house and have decide to paint the counter tops instead of buying new ones after reading the posts. I do have one question that no one has addressed. Did you have to lift the sink up to paint? I have a cast iron sink and hoped that I didn't have to lift it. (06/09/2008)
By Renee
Hi Renee,
Welcome and Congratulations, you won't regret your decision to paint your countertops ;-)
We did not remove the sink, just tape off the edges with painters tape and you will be fine.
Good luck to you! It's a lot of fun!
Bea (06/10/2008)
By Bea
I'm going to start painting a small bathroom counter top tomorrow. I've read where people sand between each coat of poly, but should one also sand between each paint coat? I'm planning to use black Rustoleum as my base coat and then dab with acrylic leftover paints I have. Should that work OK? Also, I wanted to use the melamine paints I've seen discussed here, but so far haven't been able to find them in metro Atlanta. Does anyone know if they're available? That's not a brand name, is it, but just a KIND of paint? (06/14/2008)
By Louise
Hi Critter Mom,
We already painted several counter tops and never sand in between coats. When we did our first one we sanded but all it did was destroy our beautiful design.
If you use a good primer and the acrylic paints and most importantly a high quality finish it will come out great.
I think I read some place that the Melamine paint is not available in the US, only n Canada.
We just finished our 5th project today and it's the best ever.
The secret is we used the Envirotex Finish. Yes, it is expensive but the results are absolutely stunning.
I found it very easy to work with, you just pour it on the counter and spread it around with a foam brush. That's it.
I will post before and after pics as soon as I can.
I expected nice results from the Envirotex but I did not even hope in my wildest dreams how awesome and realistic it looks. Just like Granite...wohoooo!
Now we have a Million $$$ Countertop in a 30 year old kitchen....lol, so the Cabinets need a makeover now too!
All the best of luck to you!
Bea and Rob
PS: One more tip: The more layers you sponge on, the more depth you are going to get. I think we added about 10 layers of different shades of brown and we spread glitter all over it too. I can't wait to show off the picture :-)))
(06/15/2008)
By Bea
I've been thinking about this for awhile. My only concern is if I leave a glass on the counter for example, am I going to get a water ring like you would on a glossy coffee table? I know I will need to be careful with them but I don't want to be afraid of my counters either!
I planned to use oil based kilz, base coat of dark brown latex paint, craft paints for the accent colors (sponging it on) and then minwax polycrylic (water based).
We've also been toying with the idea of just laying new formica on top of what we have ourselves. My dad has done it before. I'm estimating $200-$500 depending on what kind of laminate we get. That includes all the tools and contact cement. However I already will have the kilz and brown base paint from another project so it's probably only going to cost me about $30 for the counters (craft paints, minwax and sponges).
I guess I could just buy the minwax and do it on a scrap piece of laminate flooring to test it out. (06/16/2008)
By Jill
Has anyone had issues with water marks? For example, if I put a glass on the counter will it leave a water ring?
I've been going back and forth on this idea. I actually just bought oil based Kilz and dark brown paint to paint some furniture. I'll have enough left, so all I'd need to do is spend about $30 on some craft paint for accent colors, sponges, and the poly. I planned to use Minwax Polycrylic.
On the other hand we have though about just buying laminate and going over what we have- doing it ourselves. That will be about $300-$400 for a middle grade laminate (ie not what's in stock but not that new HD stuff). That includes the tools and glue. That certainly is not alot of money but we do have other things around the house to do.
J (06/16/2008)
Hi all,
Here is a close-up of our newest counter top.
This one has been sealed with Envirotex Light Pour On Finish and the Shine is incredible. It's hard to photograph, the pictures don't really do it justice but I tried my best :-)
Have a great week.
Bea (06/16/2008)
By Bea

Bea I love your counter tops. They are exactly the color that I want mine. I saw where you used 10 different colors of brown and then added glitter. What kind of glitter did you use and also did you use acrylic paints? One more question did you paint them one color for the base and then add the others to it? I wish someone would post step by step instructions on how to prep them and then paint and seal. Lisa (06/18/2008)
By Lisa
Hi Lisa,
Thanks so much for the nice compliment. I'll be happy to post step by step directions.
Step 1: Clean the old countertop. No sanding is necessary, just a good cleaning will do it.
Step 2: Apply a Primer with a Paint Roller. I used a brownish tinted primer from Walmart.
I didn't like this color at all but it doesn't matter because after all the sponging you won't hardly see anything of the primer. You could also use white, but since I wanted brownish colors I asked them to tint it.
Step 3: The fun part: Take a sea sponge and dip it in several colors at the same time (I use a plastic paint tray to add paddles of Acrylic Craft Paint (from Michaels) The tray is big enough to have several colors in it at the same time and you can mix them together as you please.
I kept working on this counter for several days until I liked the result. If you mess up, just dip the sea sponge in black paint and sponge all over it again.
The Glitter is also Acrylic Craft Paint (Folk Art Brand Brush on Glitter Paint from Michaels)
I mixed this in a small cup with water, about 20% Glitter, 80% water and sponged it over everything else.
This gives it a really cool look, just like real stone.
Step 4: Let the counter dry for a day or so, (you won't believe this, but I actually had no time for TWO MONTHS to apply the final step and the counter was holding up fine,even without the finish. But I don't really recommend it....lol)
So if you can, add the finish the next day.
The finish I used is called Envirotex Pour On Finish which I ordered here
http://www.creative-wholesale.com/Envirotex%20Lite.htm
I ordered the 1 Gallon Kit and still have half left over which I will use for the counters in the bathroom.
Wow, I just noticed, they lowered their prices! The Gallon Kit is now $55 and worth every Penny!
Tip:
Make sure your cover your floors with a drop cloth because the product will drip over the edge.
I mixed 3 separate batches and applied the finish to 1/3 of the counter first, waited about 30 Minutes while frequently attending to the drips that run over the edge (Just wipe them off with a Clorox Wipe) until it stops dripping, then do the second part and then the third part.
I used a wide foam brush to spread the product around and also applied a very thin coat to the backsplash.
Again, attend to it frequently to make sure you won't have any runs.
People mentioned the bubbles that will rise to the top of the finish and they are really very, very tiny,
I tried the blow torch and almost burned the kitchen down, so be careful! I think a stick liter would be perfect, the blow torch is just overkill!
Just hold the flame over the bubble and it will go away.
The busier your design is, the better it is because you won't see tiny imperfections at the end.
I think that's about it. The finish is hard as Glass and very, very shiny. I just love it :-)))
Good Luck to you and have fun!
Bea
(06/18/2008)
By Bea
I tested this out on a piece of laminate flooring I had. Primed with oil based Kilz, painted, then sealed. Half I did with minwax oil based poly, half with their polycrylic with multiple coats.
Does it look good? Yes. Does it look like it will hold up? Somewhat. Is it going to hold up to my cat jumping on the counter and digging his claws in. NO!
I took a key and poked it, not even that hard, and it left a HUGE deep gauge. So just a word of warning to those of you with bad cats that jump on the counter.
As a side note I was at Lowes and they nice looking faux granite laminate sheeting for as little as $50 for a 4x8 sheet. This was the in stock stuff. They also have special order laminate sheeting that starts at $2 a square foot. With glue and some tools we need to get it is only going to cost $200 to do our kitchen. We are going to wait till we can afford a new sink too.
I attached a sample of my test board. The little chips are the laminate samples I like. (06/21/2008)

Anyone. I am still trying to figure out how to get the Envirotex or poly to stay on the vertical pieces of the backsplash. HELP!! Also, I am doing A LOT of kitchen counters and I will need about 3 of the gallon kits of Envirotex for it (getting expensive). Any advice on using oil based poly for the counters? I have heard about the clouding with the water based and would like to hear some comments from a few of you.
Thanks, Bunnie (06/21/2008)
By MICHELLE B
Hi everyone,
When I used the Envirotex it spread over the edge of the sink and I didn't know how to deal with it, so I left it on. It really doesn't bother me that the edge of the sink is sealed now too. I don't know, if painters tape would help because the product is so liquid and might still kreep under the tape. Next time I would try to spread the Envirotex just to the edge of the sink and make sure it does not run over (like I did at the edges of the counter)
On the back splash I applied only a very think coat with a foam roller and it looks fine.
About water based Poly: I used Benjamin Moore water based Poly to seal a desk and it is a great product. It does not cloud when water gets on it.
Jill, your sample looks amazing! Very nice! But you are probably right, a cat's claws might not be so good for your counter top ;-)
We are still putting towels on the counter to protect it for the first weeks, the Envirotex appears hard as Glass but you never know. Good luck everyone! Bea (06/22/2008)
By
When painting the counter tops (I'm starting with a small bathroom counter), what's the best thing to do with the caulking between the back splash and the wall? Should I paint it to make it look like the counter top? I was thinking of maybe painting it the wall color. But what have most others done? I don't want it to look odd. (06/25/2008)
By Critter Mom
I have a situation in my kitchen that I haven't seen discussed in this forum. My laminate countertops go right to the wall and then the same countertop material is used as the wall and goes all the way up to the cupboards and behind the stove etc. The corners where everthing meets has a skinny metal divider that takes the place of caulk. This same material has also been used to cover a shelf on the wall and the windowsill above the sink. I want to try this but I don't know how to proceed. I can't possibly have this entire area looking like granite! It is now avocado green, so you can see how long I have been avoiding it. Please- anyone have any ideas? (06/28/2008)
By joanne
AWESOME! I have just spent time reviewing the information on painiting over Formica. I have been working on upgrading my condo and have heard about this type of painting. I am excited to know this FAR LESS EXPENSIVE option really works. I will practice to make sure I have the patience and the know how.
Thanks to everyone who feels like a cheering squad for doing it myself. Beth in SW Florida (06/29/2008)
By Beth AT spk.org
I just finished painting my countertops and island in my kitchen. I had blue countertops and they showed every little speck of dirt. Based on info from some suggestions here, I am thrilled with the outcome. I began by cleaning the countertops and then wiping down with white vinegar. Then I followed with a coat of oil based primer. Next painted a solid latex base coat. I used a sea sponge roller for each of the next two coats in different shades. I used three beige type colors. I finished with three coats of glossy soap and water clean up polyurethane. I had about 12 people for lunch today and all thought I had installed new countertops. I have lots of countertops and probably did it for less than $200 with plastic drops cloths, brushes and all paints. Wish I had done this in several other houses I owned! (06/29/2008)
By Elizabeth
Thank you quizusa (Bea) for all of your help and to everyone else who posted about this. I just finished painting and sealing my counters and omg they look amazing. I love the effect that the evirotex gives to them. Here is a pic but believe me it does not do them justice. I LOVE THEM.
Lisa (06/30/2008)
By lisa colfer

I found this website a few months ago and I could NOT wait to do my countertops! The house is a 1898 farmhouse that has been badly renovated and every room needs A LOT of work, one at the time. We finally got to do the kitchen and OMG, I never thought the counters would trun out THAT great!
The counter on the island where the sink is was faux wood and the ones on each side of the stove were white. I did not prime but applied 2 coat of a very flat khaki latex paint then started with the acrylic paints. I had gone and got a few samples of laminates that i liked and went from there. I did not removed my sink, just put tape around it and it was fine. My husband did the varnish as I found out i was not as good at that then the sponging part. LOL so there are some light streak of varnish that you can see a little bit, this is my fault. :(
I guess since this is such an old house, imperfections just blend in better.
He ended up putting probably 5-6 coat of minwax oil varnish in semi gloss finish and he did sand with very fine steel wool in between.
We are so impressed with the results that we will keep them like that until they start showing some wear. We wanted to do a quick fix until we have extra funds to buy new counters but for 20-30$ that this cost us, we might just redo the same thing over again in a few years (depending how long it lasts)!
(07/01/2008)
By kansas canuck

I am not sure if we can attached more than one pic with a post so here is the "before" picture. LOL (07/01/2008)
By kansas canuck

ok last post. Here are the 2 samples I picked as guidelines. The small one is "oxide" by Wilsonart and when We put it on the counter, we can barely see it because the color and pattern is so close to it :) the bigger one is "deepstar fossil" by wilsonart again. This one help me with the pattern more than the color itself.
So for those of you who are not sure, DO IT! You can't go wrong, it is by far THE cheapest way to improve your countertops! (07/01/2008)
By kansas canuck

I also had the skinny metal strips and just painted over them. Hope it will last. So far it looks good! (07/01/2008)
By elizabeth
Here is a close up picture of the finished counter, my camera doesn't do justice to our hard work. LOL
(07/01/2008)
By kansas canuck

Thanks to Bea and everyone else for the inspiration. I only spent 2.15 for making this happen. I bought four bottles of acrylic paint at the flea market at .50 each. I already had the Kilz and poly for the base and finish. I looked at several models of granite and several of the finishes I saw here to get the "look" I wanted. I used white Kilz primer, forest green, burnt sienna, light gray, dark gray and black acrylic. I used a brush and sponge technique to achieve the desired look. It took less then 3 hours for the process minus the top coat. I still need to put on more poly, but I love the results. thanks to everyone. Oh. I started with the old white with gold and silver flakes. I have more pics, I'll upload later. THANKS AGAIN. Marty (07/06/2008)
By Marty

To Joanne of the guest post of 06/28/08. I have the same and did my wall in a solid color of forest green, after cleaning and priming. I haven't sealed it yet, but it seems to work just fine. Remember, I have the old white with gold and silver flakes on my counters and walls or I should say, I had! Thanks again to everyone. Marty (07/06/2008)
By Marty

I have to show a picture of the work in progress. I didn't want people to think I was making this up. Go figure. My mom thought I had bought new counters. She wants me to do hers now. So this is kind of what I started from. (07/06/2008)
By Marty

This was my model of painting. 2 coats of primer, then 1 coat of "free hand" forest green, 1 coat of "free hand" burnt sienna, then the sponging. I sponged light to dark then light to dark for a deeper variation. My poly isn't done yet, but I love the counters and my cat hasn't scratched them yet. To anyone with cats, keep your coats light (smoother finish, less drying time, easier to accomplish depths, just don't lag on the final finish. hint, hint, that's why mine isn't done yet. But poly seems to be holding up fine to the water, cats, and heat. 3 weeks later. Thanks again, Marty (07/06/2008)
By Marty

OK after lurking on this board for weeks, I did my countertops over the long weekend. I decided to go about it a different way than described here slightly. I used Valspar Granite Paint. My countertop is now blue with stone texture and I love it! (07/07/2008)
By Leanne

I saw another person ask this, I haven't seen an answer, maybe I just overlooked it?
I am looking to get rid of the sunshine yellow countertop we have, and make it a nice calm medium blue. It looks like it will be alot cheaper and faster to paint the yellow away instead of getting all new material.
After checking out the site here, I have seen some beautiful effects that I think I could do. (I'm also thinking that this may be where my kids get into the act and create their own art, but we'll see what my husband thinks :-)
But what I want to know is if the Envirotex is safe for food preperation? Can I still use the countertops to prepare my family meals without making us all sick?
The other thing I'd like to know is how long this finish is expected to last? Will I have to redo this in 2-3 years? or will it last longer?
Thanks for the information! (07/08/2008)
By Misha Burgundie
I found this about Envirotex:
<quote>Surface Care
Furniture polish will prolong the life of the surface and clean smudges, etc. If scratches occur that cannot be polished out, clean with acetone, then recoat with Envirotex Lite. This additional coat will remove all surface blemishes. Envirotex Lite is heat resistant, however, if should not be intentionally subjected to high temperatures such as cigarettes, cooking utensils, etc. Envirotex Lite is water and alcohol proof. Objects, when left on the surface for a period of time, may leave impressions on an Envirotex Lite surface (the coating is made tough, yet flexible so as to not be brittle and prone to shattering from impact). Impressions usually disappear in a few hours at normal 72° - 75°room temperatures. The warmer the environment, the more quickly impressions will appear and after items are removed, will disappear. This characteristic, coupled with outstanding moisture and chemical resistance, makes Envirotex Lite an ideal coating for bar tops, coffee tables and dining tables.</quote>
I haven't found anything that says that it is harmful once it has dried. (07/08/2008)
By ThriftyFun
Hi everyone,
I keep coming back here and am always stunned by the creativity of you guys! Raquel, Your counters look stunning! Thanks everyone for posting your pictures, please keep them coming :-)
After a couple of months I can report that the Envirotex is holding up very well and I believe, it will last for a very long time.
4th of July was the "Acid Test" with all the mess and tons of dirty dishes staying on the counter until the next morning (ahem....blush...well, there is better stuff to do on the 4th than washing dishes, right? lol)
There were a few impressions in the finish and I was disappointed but guess what, they all disappeared within about 12 hours and the finish is smooth as glass again. Cool Stuff!
Good luck to everyone and Have Fun!
Bea
(07/10/2008)
By Bea
I did it! Here is the before photos. (07/10/2008)
By Raquel

Another before. (07/10/2008)
By Raquel
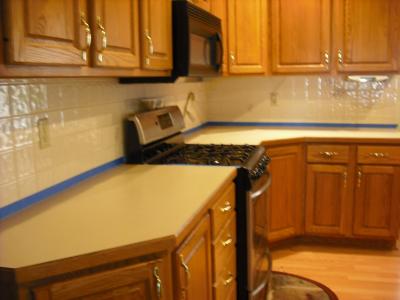
Finally the after photo. I used Bea's instructions and they were great. Here are a few more tips with what I encountered. I ordered the epoxy with the link that Bea had referenced and got it in 2 days. Also, I used regular acrylic paint from JoAnn's fabric (coffee bean & burnt umber browns, taupe white and black and orange mixed with the white).
1.Make sure you use alot of drop cloths around your working area when doing the epoxy. This gets sticky and messy if your not careful.
2. Try finding a painting guide - something that can help you spread the epoxy but make sure you use enough to keep it even and level. Don't forget the foam sponge.
3. Take off your painters tape when it is still wet, I waited until it dried and it was very difficult and hard and it stuck. I used a utility knife to get it off.
Good luck and email me with any questions! I have many more photos also.
Raquel (07/10/2008)
By Raquel
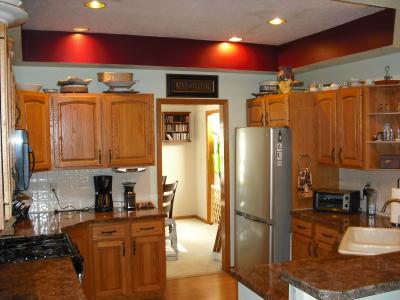
After reading all the posts here, I finally got brave enough to try this on my countertops. I'm really pleased with the results, although the finish still clouds a little when it gets wet (I think this may resolve over time as the finish "cures".) It only has 2 coats of water-based poly over it now, but I think I will eventually do more. (07/10/2008)
By Christina

Here is what they looked like before, the white laminate with gold flecks that so many unfortunate people on this site have had to deal with. (07/10/2008)
By Christina

Hi again,
Wow, another great photo! Congratulations Christina :-)
Great Job!
You inspired me to paint the backsplash in the same design as the countersl. I'll try it and will post pictures when it's done!
Bea (07/11/2008)
By Bea
Hello everyone, I've been reading the reviews for quite sometime and I finally took a leap and painted my counterops. I like them a lot, they were a bluish gray with mauve. I have before and after pics. It cost me less than $30.00. I wanted to say thanks to everyone for being so thougthful and including others on your home makeover secrets. I need new cabinets but maybe I'll get brave enough to do those myself as well. Thanks again.. (07/14/2008)
By SHORTCAKE

I like everyone else have read and reread the posts listed. I knew I wanted to redo my countertops and took the plunge last weekend. What I started to do and what I ended up with were completely different but I love my new look. I sanded, cleaned, and primed. I practiced on a board. However when I started (why I did this I don't know) I used a light brown glaze that I had bought for another project and put in on with crinkled plastic grocery bags. I just kept pouncing until I had the desired effect. I did that twice over the entire counter and loved the look with just that. It has highs and lows in the glaze color. The best way to describe is that it looks like a big slab of stone. I now have started to put on the Varthane Diamond Floor Finish Polyurethane (water based). So far so good. (07/17/2008)
First just let me say I am absolutely amazed by all the ideas and creativity. I have a question and it seems most of you at least have an idea about this so here it is. Can you use a paint with a faux stone finish (like valspar you know with the texture) then apply paint colors on top of that, and then the envirotex. If so would it look more authentic? (07/18/2008)
By chasey
Please help a 10 minute old "Newbie" to this website! I didn't see this addressed yet but if so, I apologize.
To be honest, I LOVE the color of my laminate countertops/backsplash as they are and from the granite I've seen in homes, I am TOTALLY convinced these colors would be PERFECT! So, I don't need to necessarily PAINT them, or especially WANT TO, before the rest of the process.
In a nutshell I want to transform my current laminate countertops/backsplash so the current colors remain but still appear as if they are granite. Does anyone know how, or even IF, this could be done? I guess the very first part in all the steps after thoroughly washing them is to sand them down. That is where my problem lies since I don't want to sand out any of the current color(s).
If anyone knows any possible solutions I would be very, very thankful. And I apologize if I made any newbie mistakes in this post!
Steve / "DoItMyself" (07/20/2008)
By Steve
This is for DoItMyself.
If I understand your question correctly you want to keep everything that you currently have but just get the shine of granite. From reading everyone else's posts, couldn't you just add a high gloss poly or the envirotec? I also saw a product at Lowe's that was a resin product (like envirotec) but cheaper. That would be unscientific approach. (07/20/2008)
I want to thank you all for your posts and the beautiful pictures I saw. It inspired me to do the same. The first one is a before picture. (07/20/2008)
By Stephanie

This is an after shot of the counters. (07/20/2008)
By Stephanie

In regards to the resin product at lowes it is called glaze coat. FYI if anyone has used this product cold, you let me know. Thank you (07/22/2008)
By chasey
Let me first say thank you to you all. I did it and love it. I recently bought an old 1920s home and am redoing it slowly, it is great. I am going to post a before and after, though the after is not through, just the counter tops, I am thinking of painting the cabinets black and putting the stainless steel backsplash. The kitchen is large with 4 windows and 3 doors so I don't think it will be to dark. (07/22/2008)
By Marcia

This is one of the finished countertops. (07/22/2008)
By Marcia

Marcia - great job! They look beautiful. What did you use as a top coat? I originally painted mine with a high gloss topcoat. The pics are posted in this thread. But, I really got sick of the shine and redid them with a satin topcoat and I really like them less shiny. (07/23/2008)
By
I just painted my laminate counters and ceramic tile backsplash. For the counters, I cleaned, sanded and primed (oil based) the counters. Then once, the primer was dry, I sponged (sea sponges) 5 different colors of acrylic craft paint on the tops to acheive a granite or stone look. Once the craft paints dried, I applied 5 coats of oil based poly and allowed the tops to dry/cure for a few days. It was relatively easy and I am very happy with the results. Here is the before.
(07/24/2008)
By Beth in NJ

Here is a close up of the painted counters. Good luck and have fun! (07/24/2008)
By Beth in NJ

I LOVE this site! I can't wait to try it, in fact I may start with the TSP tonight! I never thought of painting my counter top.
I really want a smooth black finish with no other colors, should I just roll out a single black paint or would this show way too may imperfections? For those of you that have done it do you think it would be difficult to make it very monotone?
What if I got a few different black paints and sponged them? Would that be better?
Gorgeous job everyone! LOVE IT!
Thanks! (07/24/2008)
By Joy
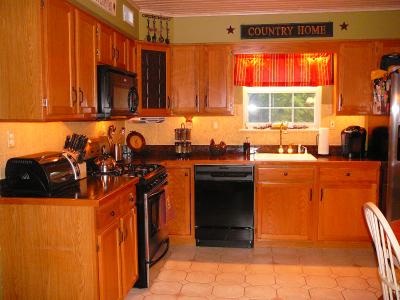
Here is the after pic of my kitchen - painted the counters, the back splash and the walls.
Joy - I think you could do just the straight black counters. I would prime first then maybe do two coats of the black paint. I think more than one coat of the black would hide imperfections. Sponging different blacks would give you a slight textured look (which could look great!) but I would try your straight black first for the monotone look you are looking for. Once your black paint has dried, you can begin adding poly to seal/finish the counter. I did 5 coats, sanding in between, which smoothed out my coats of paint and poly for a nice shine and smooth feel. Good luck and hopefully we will see pics of your new counters soon! (07/25/2008)
By Beth in NJ
Response to Chasey: I used the Glaze Coat that you found at Lowes. It is very thick and definitely requires a propane torch to air out any bubbles. I rolled it on with a small sponge roller and got some of the edges with a small paint brush. It's a self-leveling product, however, try to make sure that you've covered every area with the product with an equal amount of the resin, otherwise it will look patchy and unfinished. When all was said and done, I ended up using two batches of it, and created "two" coats to give it a nice even finish. Also, another warning, if you do decide to use this product, and purchase the propane torch, make sure you keep it at least 6 inches away from the resin, the resin can and will catch fire. It is in its base form a flammable chemical. Oh and one final note, make sure you have plenty of drop cloths down, because it will drip, especially when you're covering the edges. I hope this helped you some. I know it sounds complicated, but it was actually really easy to use and supposed to be more durable than just plain polyurethene. (07/26/2008)
By Stephanie
I used the envirotec? finish on them. I have now started the cabinets and am loving it and have ordered the stainless look tiles for the backsplash, but no idea what color to paint walls, want something light I think. Here is a picture of the progress. Ignore the mess in the cabinets lol, I have yet to straighten them out since I will be painting in there. Marcia (07/26/2008)
By Marcia
Hey Marcia,
Have you thought about a parchment color for your walls if you want the light? Also, I know you were thinking light for the walls, but have you also considered "red?" It would make a great accent piece to your cabinets, "brand-new" countertops and even your new stainless steel tiles. Just a suggestion. (07/26/2008)
By Stephanie
Boy, am I impressed. The Wilsonart laminate on either side of my kitchen sink is very easily stained - bleach does it -- all stains are absorbed easily.
I want to apply either a sealer or clear coat of poly to stop this. Should I just use a clear, light sheened poly? The finish is porous but the pattern is good. Thanks for any tips. (07/30/2008)
By Linda
These are amazing! My countertops are in dire need of help. I am currently paining my cabinets and will definitely do this next!
Does anyone know if you can buy a matte poly? I prefer a matte countertop. Also. instead of a sponge roller, could a reguler roller be used to give it a texture? Thanks (07/31/2008)
By lorretta
Popeye's Gal - I originally finished my counters with a high gloss poly and after a while I liked the gloss finish less and less. I refinished again with a satin poly and they look fabulous! They have the appearance of a stone finish.
One tip, when finishing with the satin poly, stir the can of poly continuously to not let it settle. If you let the particals settle, you will set more of a shine in various spots. (08/01/2008)
By Shahk
Add your voice! Click below to comment. ThriftyFun is powered by your wisdom!