 Plackets are used in shirt and blouse construction to create an opening either at the neckline or at the sleeve cuff. My tip will help you create the perfect opening by preventing 'over-stitching' the slash lines and also preventing cutting through the pivot point after stitching the slash line. And it is SOOO simple!
Total Time: Ten minutes, tops!
Yield: One perfectly prepared slashed placket opening
Supplies:
- 1 long, sharp pin-I like the ball topped quilting pins for all sewing projects ($free-should be in your sewing supplies already)
- 1 pair of dressmaker scissors ($free-should be in your sewing supplies already)
- 1 sleeve or neckline you need to create a slashed placket opening on ($cost will vary-depends on what you are using for your garment)
Steps:
- I'm using a sleeve I'm working on (husband's newest shirt) to illustrate this tip, but this will work the same way for neckline plackets as well.
Trace the stitching line as shown on your pattern piece-make sure the pivot point is clearly marked on the fabric.
Now take one of your pins and place it just ABOVE the marked pivot point.
Then take your marked fabric to the sewing machine and carefully stitch your first stitch line along the marked line right up to the pin.
Leaving the needle in the fabric, lift the presser foot and remove the pin from the fabric then turn (reposition) the fabric so that you can stitch the pivot point stitches.
Lower the presser foot and make your pivot by taking 1-2 stitches across then turning to stitch the other line by again leaving the needle in the fabric, lifting the presser foot and repositioning the fabric. Lower the presser foot and stitch the other marked line.
Lift the presser foot, cut your threads, and go to Step 2... - Lay your stitched fabric out on your working surface and replace that pin, this time placing it just BELOW the pivot point. (See the pivot stitches just above the pin in the first picture)
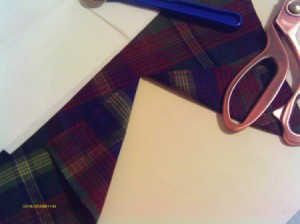
Cut confidently (but carefully)-because you have the pin effectively blocking the pivot point, you cannot cut through it!
To photograph the sleeve after I cut, I positioned the scissors in the slash with the tip right at the place where the pin stopped the cutting action. - Check the slash-you'll see that the cut stops precisely where it should:)
Add your voice! Click below to comment. ThriftyFun is powered by your wisdom!

 Plackets are used in shirt and blouse construction to create an opening either at the neckline or at the sleeve cuff. My tip will help you create the perfect opening by preventing 'over-stitching' the slash lines and also preventing cutting through the pivot point after stitching the slash line. And it is SOOO simple!