social

Replacement Magnetic Puzzle Piece


Gold Post Medal for All Time! 677 Posts

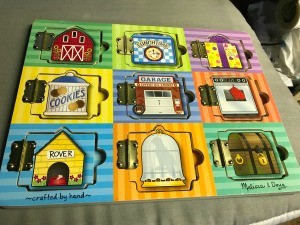
Replacement Magnetic Puzzle Piece - repaired puzzle with flaps closedI love getting quality toys for my granddaughter on Freecycle. I especially like the Melissa and Doug toys because they foster imagination and are high quality. I got a magnetic hide and seek puzzle that I know she will enjoy. I saw that this puzzle was missing two pieces. Unfortunately, Melissa and Doug does not sell replacement pieces. I was determined to save this puzzle from the landfill, and was pleased with the results.

Advertisement

I spent nothing on this project. I had the magnet and the cardboard already. Many businesses give the magnets out. My library gives free printing, and I printed what I needed out there, since I no longer own a color printer.

After I finished, I realized that this would be a great way to make a customized refrigerator magnet, too.

Total Time: 30 minutes at most

Yield: The refrigerator magnet I had was enough for 2 puzzle pieces.

Supplies:
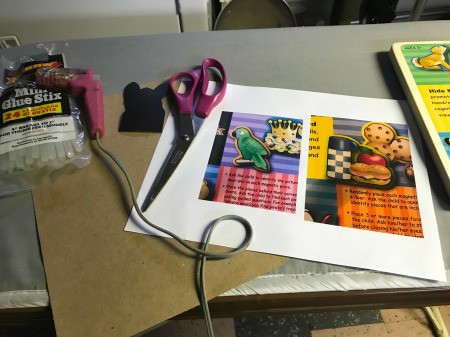
Replacement Magnetic Puzzle Piece - supplies
 

Steps:

  1. Photos of the pieces I needed were on the back of the puzzle. I took photos of them and printed them out in color. Otherwise, choose a picture from a magazine or a photo of your own.
  2. Replacement Magnetic Puzzle Piece - puzzle with 2 missing pieces
     
    Replacement Magnetic Puzzle Piece - photos of pieces
     
    Advertisement

  3. Cut out the photo. Place on the cardboard. Draw where you will have to cut to make layers of cardboard. It is easier to use a ruler and a pencil to draw gridlines so you will have pieces of cardboard large enough to accommodate the picture.
  4. Replacement Magnetic Puzzle Piece - copies of pieces
     
  5. Cut out the cardboard pieces.
  6. Replacement Magnetic Puzzle Piece - three pieces of cardboard for each piece
     
  7. Glue the pieces together to make a stack.
  8. Replacement Magnetic Puzzle Piece - glue the cardboard together in a stack
     
  9. Glue the picture on top.
  10. Replacement Magnetic Puzzle Piece - glue the image of the puzzle piece on top
     
    Advertisement

  11. Cut it out neatly.
  12. Replacement Magnetic Puzzle Piece - cut out
     
  13. Cut a piece of the magnet to fit the piece. Glue it on.
  14. Replacement Magnetic Puzzle Piece - cut a magnet to fit and glue in place
     
  15. The magnet is finished. Repeat for as many magnets as you want.
  16. Replacement Magnetic Puzzle Piece - new parrot piece made
     

Add your voice! Click below to comment. ThriftyFun is powered by your wisdom!

In This Page
Next >︎
Categories
Home and Garden Repair ToysJune 24, 2019
Pages
More
🍂
Thanksgiving Ideas!
🎃
Halloween Ideas!
Facebook
Pinterest
YouTube
Instagram
Contests!
Newsletters
Ask a Question
Share a Post
Categories
Better LivingBudget & FinanceBusiness and LegalComputersConsumer AdviceCoronavirusCraftsEducationEntertainmentFood and RecipesHealth & BeautyHolidays and PartiesHome and GardenMake Your OwnOrganizingParentingPetsPhotosTravel and RecreationWeddings
Published by ThriftyFun.
Desktop Page | View Mobile
Disclaimer | Privacy Policy | Contact Us
Generated 2022-10-25 09:22:46 in 2 secs. ⛅️️
© 1997-2022 by Cumuli, Inc. All Rights Reserved.
https://www.thriftyfun.com/Replacement-Magnetic-Puzzle-Piece.html