poehere
Bronze Post Medal for All Time! 105 Posts 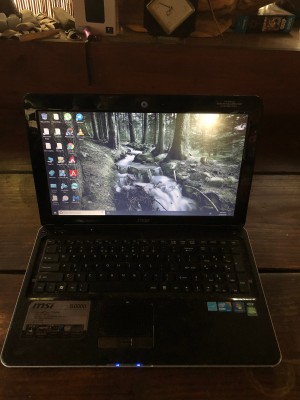 Has the hard drive in your laptop died? Do you want to replace your hard drive with a larger hard drive? Today replacing hard drives is a straight forward process. Laptop manufacturers place the hard drive in different locations depending on the make and model of your laptop.
Certain laptops have the hard drive on the side of your computer. While others mount the hard drive on the bottom of your computer. Then there are some who install the hard drive under your keyboard. This type of replacement becomes complicated when you have to remove the keyboard to find your hard drive. Lucky for you today manufacturers install hard drives on the bottom of your laptop. I have been a computer tech since 1976.
Total Time: 1.5 Hours
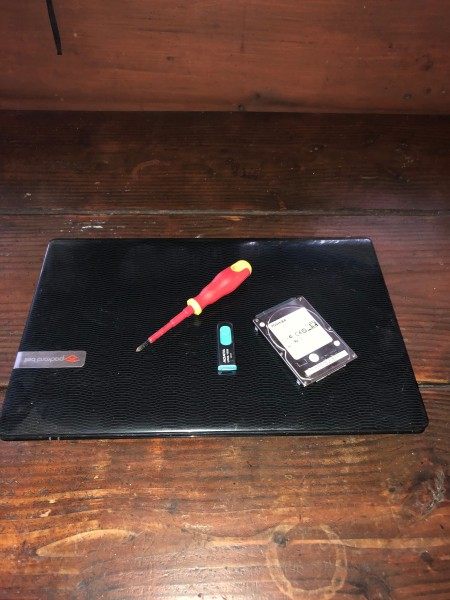
Supplies:
- laptop
- hard drive
- screwdriver
- USB device
Steps:
- Remove your battery - before getting started it is necessary to remove the battery from the laptop. The battery stores power to the laptop and can cause damage to your laptop if not removed. Note: Before swapping out your hard drive it is recommended that you do a complete backup of all your data. Store the data on another hard drive. If you do not have an extra hard drive it is still possible to get back your data. Remove the hard drive and install the hard drive in an external enclosure. Once the new hard drive is ready you can plug in the external hard drive and add back your data.
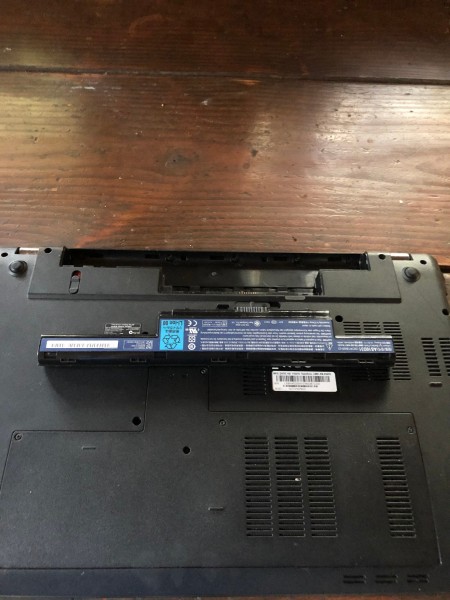
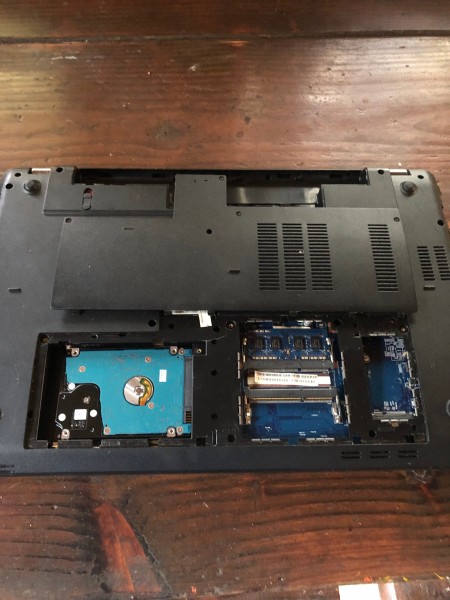
- Locate your hard drive - start by turning the laptop over and checking the bottom panel of your laptop. When locating the hard drive look for a rectangle shape cut out in the panel. There are 2 screws holding the panel in place. Remove the screws and gently pry open the panel. Note: some laptops store the hard drive under the larger panel there are no smaller panels on these laptops.

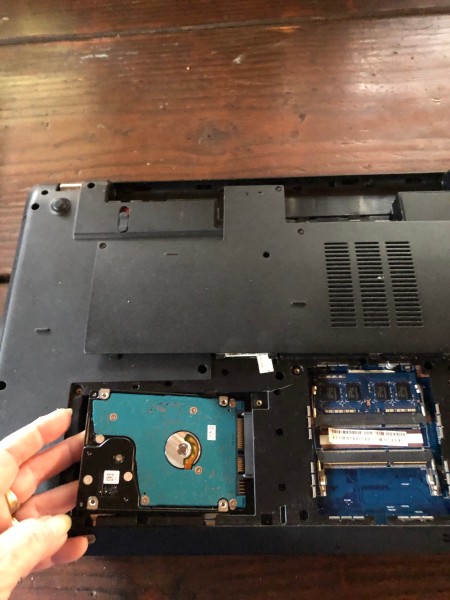
- Removing the hard drive from your laptop - Manufacturers secure the hard drive to the back panel of the laptop with two screws. Remove the two screws and find the black pull tab at the bottom of the hard drive. Gently pull the tab toward you, releasing the hard drive from the caddy. Lift the hard drive out of the caddy using the black pull tab.

- Change your hard drive - Remove the 4 screws from the side of the hard drive caddy releasing the hard drive. Put the new hard drive in the caddy and replace the 4 screws. Today manufacturers use SATA hard drives in laptops so there's no need to remove the IDE support and replace it on your new hard drive.
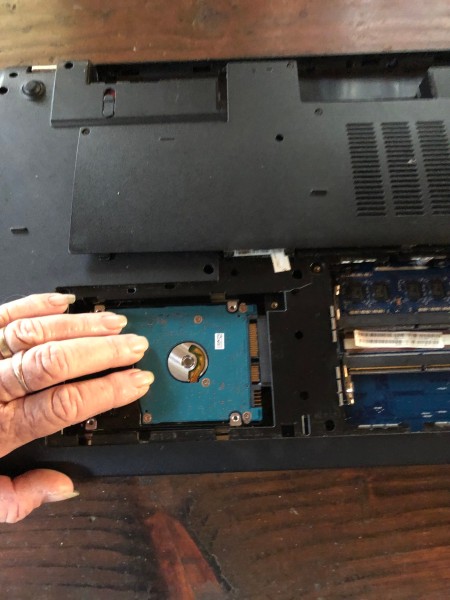
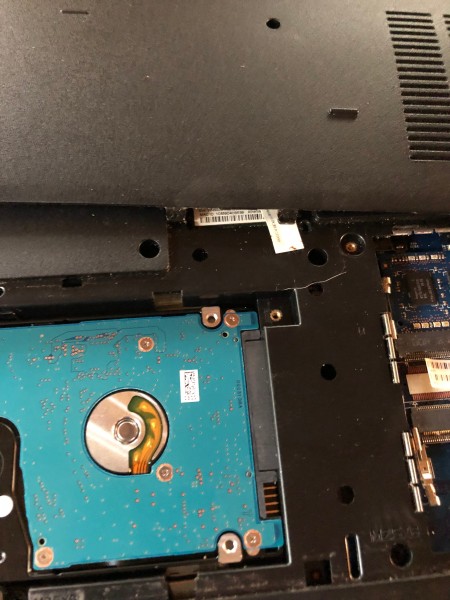
- Installing your hard drive back into your laptop - Gently place the caddy with the hard drive back into the laptop. Don't try and fit the SATA connectors into the laptop connector. Place the hard drive into the caddy and when the hard drive sits flat in the laptop gently push the bottom of the laptop and seat the connectors in place.

- Securing the hard drive in place - Replace the two screws securing your hard drive in place. The screws hold your hard drive in place and keep it from moving inside the caddy.

- Finishing the installation of your new hard drive - Replace the plastic panel on the back of your laptop and secure it in place with the two screws. Put your battery pack back in the laptop.
- Reinstalling your programs and operating system - Older laptops come with an installation disk. The newer laptops ask you to make a reinstall disk for your device. The reinstall disk normally has to be stored on a USB device. If you do not have either of these options, you'll need to visit Microsoft and download Windows 10 install disk. The program will need to run from a USB device. Plug the USB into the USB port on the laptop. Power on the machine and hit F10 or F11 to select your boot device. Select to boot from the USB drive. The drive will boot up and all you need to do is follow the instructions on your screen. Note: All USB devices need to be bootable devices. When you download Windows 10, you are downloading an IOS file. Use a program called Rufus to create your bootable USB drive.
Add your voice! Click below to comment. ThriftyFun is powered by your wisdom!

Myrna
Bronze Feedback Medal for All Time! 168 Feedbacks December 19, 20190 found this helpful
Love that photos were included with your demonstration/explanation. They help to figure out the directions better. I'm lost without a walkthrough.

poehere
Bronze Post Medal for All Time! 105 Posts December 20, 20190 found this helpful
You are welcome and I hope they do help out.
Add your voice! Click below to comment. ThriftyFun is powered by your wisdom!

 Has the hard drive in your laptop died? Do you want to replace your hard drive with a larger hard drive? Today replacing hard drives is a straight forward process. Laptop manufacturers place the hard drive in different locations depending on the make and model of your laptop.

