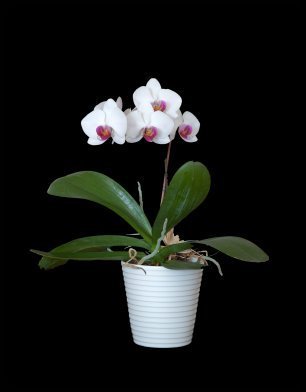
If you keep orchids, sooner or later they will need repotting. In most cases, repotting is necessary, not because the orchid has outgrown its container, but because the growing medium has started to decay and restrict the flow of air to the orchid's roots. In this scenario, the plant is usually repotted back into its original container with fresh growing medium. Occasionally a vigorous plant will simply outgrow its container and need to be moved to a larger pot. Repotting is also often the first step in nursing a sick or overwatered orchid back to health.
Unless you're trying to save an orchid that is sick or damaged, the best time to repot your orchid is after it finishes flowering. This is when most orchids start a new cycle of growth, so plants repotted at this stage are usually able to recover and settle in quickly.
Orchids have two basic growth patterns: monopodial, and sympodial. Knowing what type of orchid you have will help you identify when and how to repot it.
Sympodial: These types of orchids feature a stem, called a "rhizome," that grows horizontally across the growing medium, rooting as it goes along. Unless they are repotted into a larger container, the roots will eventually grow over the rim of the pot and dangle into thin air (hindering new growth). The new roots on sympodial orchids are usually obvious, appearing at the base of the new growth when the shoot is a couple of inches long, or emerging from the newest part of the plant before the new shoot appears.
Monopodial: A monopodial orchid grows predominantly upward. It has a main stem, which produces new leaves and flowers. New roots in monopodial orchids are not as easy to see, but usually begin growing after the plant is done flowering. Monopodial orchids should be repotted as soon as new shoots start to appear.
Before you begin working on each plant, sterilize all of your cutting tools by holding them over a flame for several seconds. This will help prevent the spread of viruses.
Sympodials: Select a pot large enough to accommodate the next two year's growth. Hold the orchid so that the oldest pseudobulbs are against the rim. Position the plant in the pot so that the base of the rhizome is about ½ inch below the rim. If the new growth is higher than the old pseudobulbs, reposition the plant at an angle so that it is growing parallel to the bottom of the pot. Fill in bark around the roots, firmly tamping it in with your fingers. After adding a few handfuls, tap the bottom of the pot against the table to settle the bark. Continue adding bark until it covers the side of the rhizome.
Monopodials: Select a pot just large enough to hold the roots without bending or breaking them. Center a monopodial orchid in the pot with the bottom of the lowest leaf at the bark surface, ½ inch below the pot's rim. If the lowest leaf does not have at least three healthy roots on the stem below it, strip off one or more of the bottom leaves until you expose enough healthy roots to anchor the plant in the bark.

Add your voice! Click below to comment. ThriftyFun is powered by your wisdom!