Becky Miles
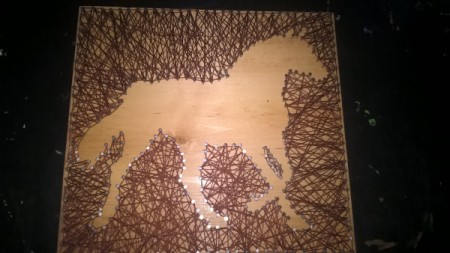
Bronze Feedback Medal for All Time! 158 Feedbacks 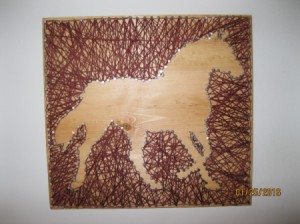 When I was a little girl, we had a piece of string art that I loved. I have no idea who made it or where it came from. I'd just sit and look at it. Lately, I've seen lots of different string art ideas on pinterest. I was excited, but nervous to try it. But, I'm very happy with how it turned out. I can't wait to try some other designs. The possibilities are endless!
Total Time: About 2 hours.
Yield: 1 piece of art
Source: pinterest
Supplies:
- piece of wood - I found a 4 foot by 1 foot wood board at Home Depot for $7. They cut it into 4 pieces for me, each one 1 foot by 1 foot. This was cheaper than buying 1 piece of wood at the craft store for $10. ($7)
- nails - I used wire nails, 3/4 inch. ($3)
- string or yarn, I used embroidery thread, 7 of them! ($3)
- hammer
- ruler
- pencil
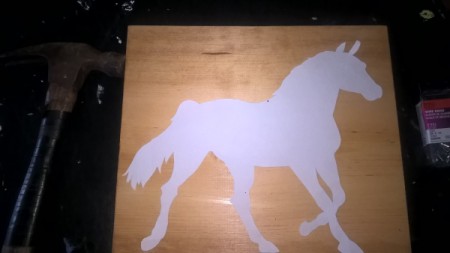
- picture to create your silhouette
Steps:
- Find a picture that you want to use. You could also print out your name, a phrase, etc. I've seen lots of simple designs, such as hearts and state shapes. Print out the picture and cut it out.
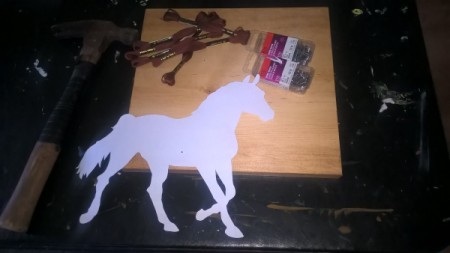
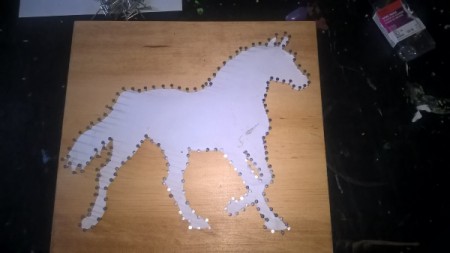
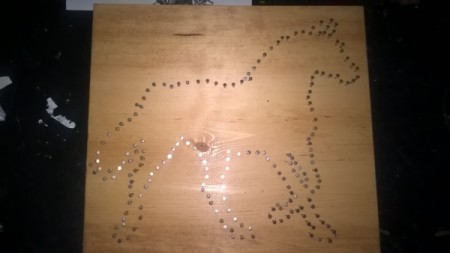
- Place your picture on the wood. Start hammering your nails. I kept mine really close around the outline of the horse. I wanted to make sure you could make out what it was! Try to keep your nails straight and sticking out the same length.
- Once finished, pull the picture up. If you got any nails into the picture, it's okay. It'll pull right up.

- Hammer your nails around the outside of the board. Don't get too close to the edge or the wood will splinter. Yes, I know from experience! Those nails were a little further apart. I marked them with a pencil to make them somewhat uniform in distance.
- Decide if you want the string to fill in the picture or outside of the picture, creating negative space. Either way looks really nice.
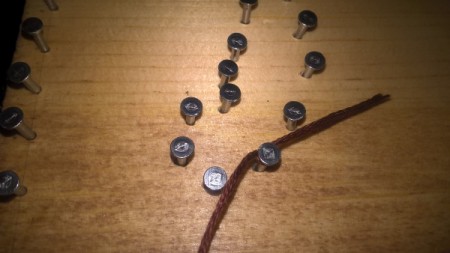
- Tie your string around the first nail. You can create a pattern or just go crazy and fill in the space with string. I went the 2nd route! Every 2 or 3 times, just wrap the string around the nail once. If you run out of string, tie on some more. Fill in the space as much as you would like. When finished, I tied the string around the nail, then applied a dot of super glue, just to make sure it stays!
- If you want to hang it up, apply a sawtooth picture hanger on the back. Hang up and enjoy!
Add your voice! Click below to comment. ThriftyFun is powered by your wisdom!
attosa
Diamond Post Medal for All Time! 1,246 Posts January 27, 20160 found this helpful
Very cute. Nice work:)
KIM HOGGAN
Bronze Post Medal for All Time! 114 Posts January 29, 20160 found this helpful
Very Beautiful ! Good job :)
January 31, 20160 found this helpful
Never be nervous again. You did an awesome job!!
Add your voice! Click below to comment. ThriftyFun is powered by your wisdom!