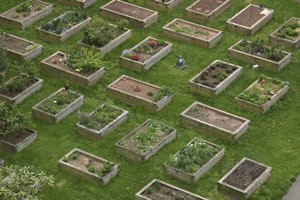
 Square foot gardening is a concept so easy, yet so overlooked in lieu of more traditional row or mound gardens. It is less time consuming, less physically demanding, and uses less space and water. About the only tools required are a pencil or small piece of dowel (for making seed holes), and a lightweight, inexpensive trowel. It's also the one gardening technique that allows those physically challenged and wheelchair bound the opportunity to garden independently - without help from others.
Using untreated lumber, build a frame; use deck screws to secure the sides together. If your garden will be located in your yard, start out with a 4 X 4 foot. This will give you a total of sixteen 1 X 1 foot squares of gardening space. Your garden frame will need no bottom if it is placed directly on the ground.
If you opt for a patio or balcony garden, a smaller, 2 X 2 foot frame may work best. This still offers 4 squares of gardening space. If you need more space, build two small frames instead of one large one so the garden(s) will be easy to maneuver around.
Add a bottom to your frame if necessary. Use 1/2 inch thick plywood and securely attach it to the frame from the bottom using deck screws. Important: Drill a 1/4 inch drainage hole in the center of each square foot; add an extra drainage hole in the corners of each square.
Again, using 1/2" thick plywood, secure a bottom to the frame and drill drainage holes using the same directions as those for a patio garden. Place the frame on a table that will bring the garden up to a convenient height so that bending is not necessary.
To complete the garden frame, place a grid made from twine on across the top of each frame that divides the box into 1-foot squares. If you prefer, small, foot square cardboard boxes can be inserted into the frame instead, or pieces of cardboard can be used to section off the inside of the frame.
Larger plants, such as cabbage and cauliflower, should be planted one plant to a garden square. Grow plants such as lettuce 3 or 4 to a square; beets 8 or 9 to a square; carrots and radishes up to 16 to a square.
Make a slight saucer shaped indention at each plant site; use a pencil or dowel to make a hole in the center for the seed; follow depth directions on the seed package for each plant. When transplanting seedlings, make a saucer-shaped indention for the plant; dig a hole for the plant in the center using a trowel.
The saucer-shaped indention around each plant will keep water at the plant itself when watering, instead of running off to the sides of the square. This helps conserve water and insures that the roots of plants get enough water.
Love this idea! My property has so much gravel that I can't get anything to grow well. Not much topsoil at all. This would work great for me.
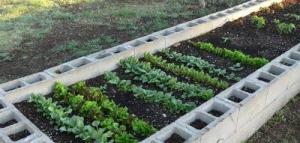
I put in one large raised bed garden and think it is a better use of resources - both space and supplies. It measures just less than 4 feet wide by about 24 feet long. I also filled the spaces in the concrete blocks with compost and soil and planted flowers and herbs.

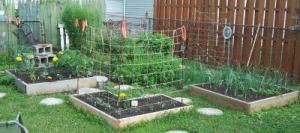
I'm love my raised beds. When you go to the lumber supplier like Lowe's or Homedepot, know before you go what size you want it to be, then pick out your piece of lumber, whether its 16ft x 8 in. to make a 4 x 4 bed or whatever shape & height you decide on and have them cut it, they will do it for free (in about 5 mins.) and it saves you a lot of time and blisters. These 3 beds are surrounding the 6 x 8 regular garden area. I measured space in between so the lawn mower would fit through. The one on the right is garlic, the middle is cucmbers and carrots and the left is tomatoes and peppers, also marigolds to help keep the bugs away. In the big part of the garden are the herbs, since herbs don't need as much water, the boxes make it so i only water the veggies when needed and I'm not drowning my herbs.

Thank You. I've been thinking about something like this. Thank You so much.