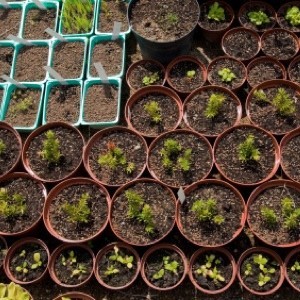
 Starting seeds indoors is relatively easy, provided you have access to a few basic tools. Here's a list of what you will need to get started.
Growing Space: You'll need an area of indoor space that you can dedicate to growing seedlings for as long as 6-8 weeks. Ideally, the space should be heated, yet still be cool (e.g. a heated basement). Use an old table or sheet of plywood laid across sturdy saw horses to hold seed trays. Inexpensive metal shelving units, like those designed for garages and workshops, are another good option. Dirt and water spills are inevitable, so if you're concerned about damaging work surfaces make sure you protect them with a cheap vinyl table cloth or plastic tarp.
A Strong Light Source: Although many seeds prefer to germinate in darkness, growing seedlings need a strong source of light. There's no need to purchase expensive "plant lights." Inexpensive fluorescent shop lights work just as well. Suspend the lights so they are not more than 2 - 4 inches above the leaves of the seedlings and gradually adjust their height as the plants grow. Seedlings need about 16 hours of bright light per day, which can be accomplished by connecting the lights to a small adjustable timer.
The Ability To Control Heat: Most seeds prefer warm soil to germinate, between 75-85 degrees F. Heat mats designed for germinating seedlings are an easy way to control soil temperatures. Because seedlings tend to be happiest growing in semi-cool temperatures, once seeds germinate, you can simply move them off the mats. During their growth, temperatures of between 60-70 degrees F are a good mid-range for most seedlings (10 degrees cooler at night).
Seeds: Not every type of seed grows best when started indoors. For example, certain vegetables like beets, beans, carrots, and corn, and salad greens are best sown directly into the garden. Check the back of your seed packets for specific growing information on how to start seeds indoors. Many include instructions on when to sow them, how far apart to space the seeds, and when to transplant the seedlings outdoors.
Seed-Starting Pots: These can be of any size, from a clean yogurt cup to a cottage-cheese container, to an ice cream pail. If you plan to use last year's pots, sterilize them with 1 part bleach to 9 parts water, rinse thoroughly, and let them air dry. You can also purchase peat pots or seed starting plugs from a garden center, but depending on what you are growing, you may end up having to move it to a larger pot (to prevent it from becoming root bound) before transferring it outdoors.
Seed-Starting Mix: Make your own, or purchase a ready-made soilless mix. There are dozens of home-made seed-starting recipes floating around, but most boil down to the same basic ingredients.
Soilless Seed Starting Mix
Modified Commercial Potting Soil
Ample Moisture: Water is essential for seedling growth, but over watering usually means certain death. Seedlings should be kept evenly moist, but never wet. The safest way to water them is from the bottom. One way to gauge whether or not it's time to water is by the weight of your seed trays. Fill your tray with seed starting mix and feel the weight of the tray before you water. Now moisten the seed starting mix and check the weight again. Notice how it feels heavier. Check the weight of the tray daily; when it starts to feel light, it is time to water.