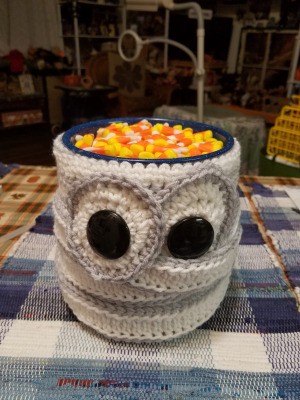
 This was so much fun, and I was able to do it while watching TV! It was made with a lot of white yarn, a little gray, and some black for the eyes. I loved the way it turned out!
Total Time: 4 hours
Yield: 1
Source: I saw a Halloween Bag made with this, but knew it would stretch. So I did it for a can.
Supplies:
- 6 oz white yarn
- 2 oz gray yarn
- 6 yd black yarn
- hot glue gun and 10 sticks
- scissors
- size J hook
- cloth or plastic measuring tape
- 2 blank buttons
Steps:
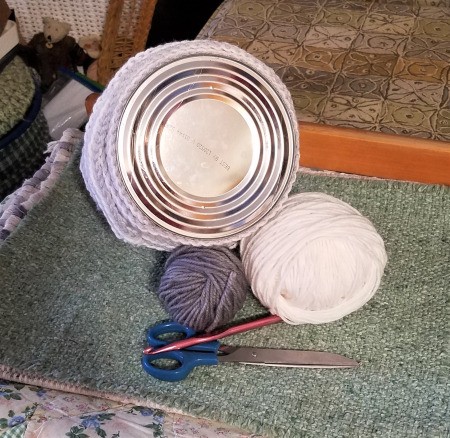
- I didn't make a supplies photo, so I actually faked one today using the only can I had to show you, the mummy "upside down"! Anyway, measure around the can once and then at an angle. Then, the height.

- Determine how many times you want to wrap around the can. If it's 12, you will need a chain of about 100' or 33 or so yards. If it's less, do the math accordingly. Your mummy wrap is going to be about 1.5" wide, so you can plan ahead. The gray you see here didn't last long enough, so I found another color. But I wanted to show you the chain done.

- Make your chain accordingly, then make a half double down one length, make 6 doubles in the end chain, then make them all the way to the beginning. Join with a slip stitch and work in tail.With your gray, connect to any stitch and make a slip stitch in each till the you reach around the beginning.
- When the edging color (gray) is done, set it aside. You are ready to make the eyes. With a chain 3, make 12 half doubles in the first chain. Slip stitch to join. The next row is 2 half doubles in each for 24. Slip stitch to join.
- The 3rd row of the eye is to make a single crochet in the first 6 stitches, then a half double in the next 12, then 6 in the last. It's basically making the eye wider and taller on the top half, leaving the bottom half narrower and shorter.

- Make a single crochet in the gray, around each of the eye edge. Now you are ready for the buttons. I chose two solid black with a shank, but you can use any kind you want. You can even glue felt or foam if you want these to be safer for the littles. I just glued mine on. Now you are ready to "wrap" your critter.

- Fire up the glue gun and have lots of sticks. This seriously eats them up. Begin where you want the back to be and carefully gluing the strips around, like you would wrap something with fabric. You want to kind of "waver" the glue back and forth to get the strip to lay down not just in the center, but all the way across the strip. You don't want them to be glued in the center and then have the edges curl up.
- With the first layer of the wrapping on, you want to begin wrapping the strips at an angle "here and there" like a mummy would be. So you want to place the eye, either one, so that a strip covers a bit of it, then the other eye will be placed on the outside of a strip. The photo will help. End your strips on the back.

- Find a bowl that fits inside, and display your candy. You can also crochet a chain with a slip stitch in each chain, as a handle. It would have to be glued on pretty good, perhaps the length of the can twice, then the strap and some to go down under the can. Or you could glue it on the inside of the can, as well. That way, a little can use it for trick or treating!
- NOTE: I would spray with a water proofing substance in case it's raining. N-JOY!!

November 4, 20190 found this helpful
Sandi, this is really neat and so appropriate without being obnoxious.
I wish I had your talent but I just happen to have a friend who has volunteered to make one for me.
I'll still use it this fall as she is going to change some 'colors' but then pack away for next year which is okay because it will take up so little room to store.
Thanks for your clever ideas.
Betty
 This was so much fun, and I was able to do it while watching TV! It was made with a lot of white yarn, a little gray, and some black for the eyes. I loved the way it turned out!


