 Over the years I have come to accept my flaws. I now call wrinkles my "smile grooves" and as far as body flaws, well, I have decided that God does have a sense of humor! But after looking at my garage walls for years, I knew it finally needed some form of cosmetic surgery.
My laundry room is located in the garage and we all know how often we have to do laundry. The structure itself was intact but what the eyes could see was just plain UGH-H-H! I couldn't afford to hire anyone. The house was built in 1970 with my husband's parents owning it for years before us. Needless to say, it had many years to acquire it's share of bumps, dings, scrapes, and just plain ol' ugly marks.
The paint, once white (I think), was now an atrocious gray. The entire garage is made of cinder blocks which are as substantial as my husband's stubbornness and both way-y-y too expensive to replace. My husband I can accept, it's just part of his endearing personality, but the garage wall HAD to go!
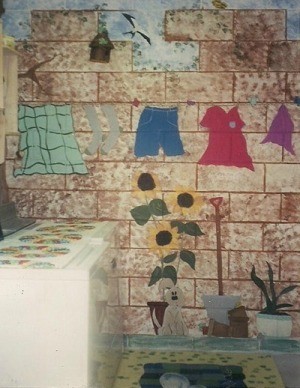
One day, as I was doing some wash with my eyes closed (I got good at that over the years), an idea hit me. If I can't fix the boo-boo's, I can try to hide them. We had several partial gallons of paint left over from other projects. After taking an inventory, I found that I had enough tan and brown to cover the blocks if I was thrifty about it. Hesitating no longer, I set off to perform surgery on the UGH-H-H walls.
I gathered up some sponges, mixed up some paint and started sponging the walls. I did not hesitate for a moment. Why, you ask? Just two reasons. 1) I already had the paint and 2) I knew it couldn't look worse than it already did! Enough logic and motivation for me!
The only hard part was choosing where to start. I have to say, there is no better medicine for the soul, than immersing one's self into a project. I didn't bang this out in a week. I did some here and there and while the laundry was washing and drying, I painted. A transformation started. The room began to look brighter and I found myself actually enjoying being out there.
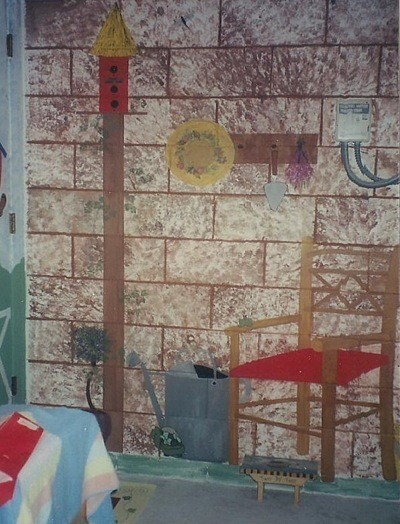
When I finished sponging the walls, all the imperfections seemed to disappear. I felt elated but yet a little sad. I was really enjoying myself and didn't want to stop. I was addicted! Well, I thought, if the walls look so much better at this point, they will look even better if I add some whimsy.

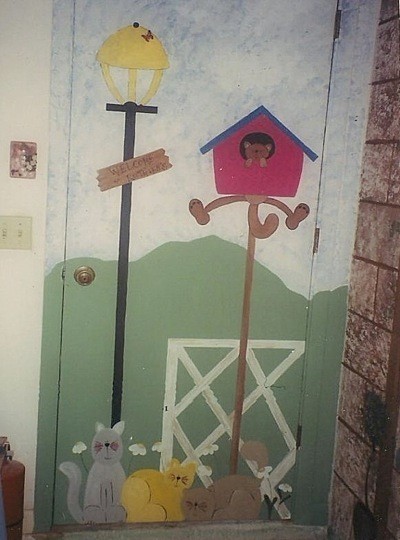
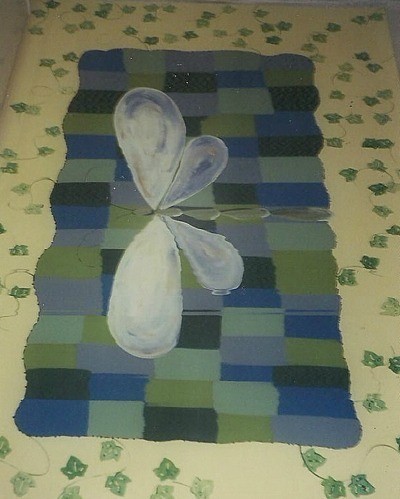
You got it! With no hesitation again, I dove right in. My first idea was a clothesline full of clothes. I painted that on the wall close to the washer and dryer. The ideas were just pouring into my head. No wall was safe after that and I ended up painting them all, including the back of the door leading into the house. I even painted a dragonfly rug onto the cement floor in front of the washer and dryer.


The entire project was so much fun. I only regret not thinking of it sooner. So, bring me your dirty clothes! I love my garage now. It makes me smile!
When you do it with heart - it's art!
By Mary from Palm Coast, FL
Do you have a frugal story to share with the ThriftyFun community? Submit your essay here: http://www.thriftyfun.com/post_myfrugallife.ldml
This page contains the following solutions.
I am content doing laundry because I now have cheery walls to look at. I have to tell you, I never thought there would be a part two to my previous story, but as I wash the paint off my brushes once again, I wanted to share my adventure.
After some irregular heart beats, shaky knees, and many brush strokes, a new and stronger me has emerged. I can see clearly now and a path has been paved.
This is the first mural I painted, on my bedroom in my old apartment. Sometimes I have trouble sleeping; so when I can't sleep, I paint. On my bedroom wall I decided to paint the ocean. It had fish jumping in the water, the sand was even textured.
This is a mural I painted on my garage door. I used just patio paints, freehand. The flowers are painted in Donna Dewberries "one stroke" technique.
I put this mural in my kitchen and it absolutely changed the entire look! My mural is Tatouage which is a rub on type transfer which when completed, looks and feels just like a painted mural.
Run out of ideas to decorate your child's room? Here's my tip. Find out what is their favorite show or book and paint a mural on the wall in their room. Super easy.
Here are the questions asked by community members. Read on to see the answers provided by the ThriftyFun community.
What kind of paint is best for painting a mural on a brick wall?
By D. Reese
Instead of using artist's paint, (would be very expencive) I would use a water based exterior flat paint. I have only painted murals inside and never on brick before but being that I have worked a paint department for thirty five years, I feel that would be the best paint to use on a masonry surface.
Any paint labelled as satisfactory for use on masonry or cement should work on brick. Make sure you use a good quality primer also labelled for use on masonry because the material is usually porous even if it's been exposed to weather. Not always, but why take the chance of your mural not looking right because of uneven paint absorption?
Read the labels and follow the directions to ensure your finished project is everything you want it to be-use the right paint for the conditions the mural will be under after the painting is done. There is a primer and paint for interior OR exterior masonry and using the wrong ones will ruin your project.