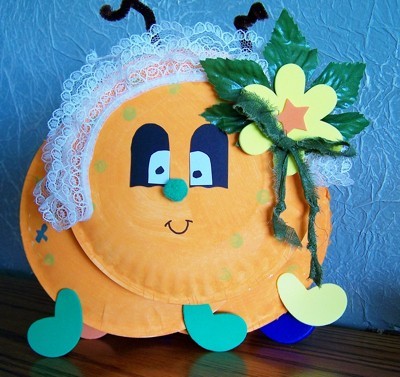
It won't be long until we will be seeing the critters of spring. Whether you make a boy or girl caterpillar, kids will have fun making this simple craft.
Approximate Time: 1 hour
Supplies:
- ten 6 inch paper plates (more if you want the caterpillar longer)
- scraps of cardstock or google eyes
- orange acrylic paint
- other paint or markers for decorating
- pipe cleaner for antenna
- small pom pom for nose
- 1 1/2 ft of lace
- decorations for hair
- permanent marker for mouth
- scissors
- hot glue
Instructions:
Note: You can make a longer caterpillar by adding two paper plates per joint.
- Paint the outside of the plates, let dry.
- While the plates dry, make your sets of legs. They are just a fat L shape with the bottom larger than the top.
- When the plates are dry, decorate them with the other colors of paint or markers.
- Glue two plates together with the painted side out, making 5 units.
- Now line up two units with one a couple of inches to one side from the other, using your hot glue secure them together.
- Add another unit to this one only slide it to the other side so they go back and forth making it look like the caterpillar is moving.
- You can also glue them in a straight line if you like.
- Continue until you get to the head, decorate the head before attaching it to the body.
- Cut antennas and glue them to the back top.
- Starting a little below mid-point on one side glue one end of your lace and follow the edge of the plates with the lace around to the mid-point on the other side, reverse and continue back to the starting point. Fold the ribbon back and match it into the starting end, glue it down.
- Cut out your eyes, glue them on, glue on the nose, draw on the mouth, add the hair decoration.
- Attach head to the body.
- Attach two feet to each section of the body, except for the head. Little Miss or Mr Caterpillar is ready for spring.
Note: For Mr Caterpillar you could cut out a hat shape and glue on instead of the lace, maybe a mustache under his nose also.

By Ann Winberg from Loup City, NE

