social

Ice Pack Cover

While making a cover for your ice packs may have already occurred to many of you, it hadn't for me. After constantly trying to wrap towels around packs over and over all day and night for hubby's leg after knee surgery, it finally occurred to me to just sew a cover for each pack out of an old, worn, and very soft towel, well duh! These can be made in about five minutes and cost nothing really, it's all recycled items. They'd make great gifts, too. Icepack Cover step 4
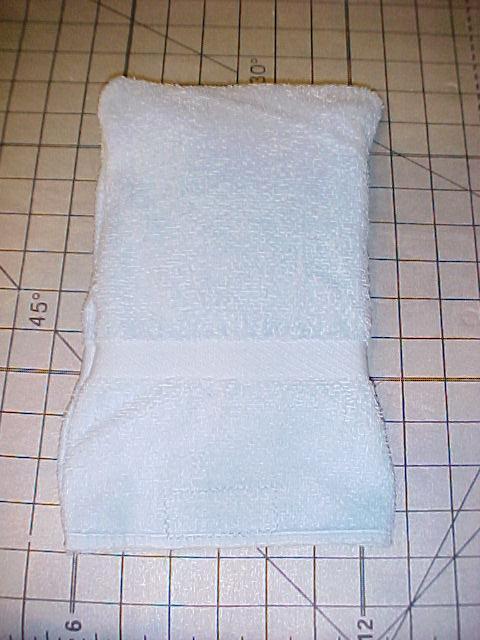
 

Approximate Time: Less than 5 minutes per cover.

Advertisement

Supplies:

  • towel
  • 2 1/4 inch of sew-on hook and loop tape (Velcro)
  • reusable ice pack

Instructions:

    My craft project here was utilitarian only, using what I already had on hand. My towel was a very old, soft, well-worn one. If you're making these for a gift then I suggest using pretty colors, maybe even sewing a bit of decorative satin ribbon on them. For a child, bright colors and some cartoon applique's would be fun. If you know someone about to have surgery, make them a set. They'd really appreciate your kindness. Ice becomes your new best friend after many kinds of surgeries or injuries.
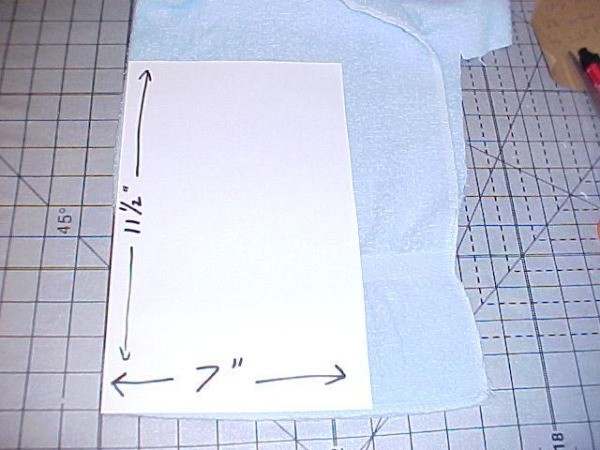
  1. Imagine this as a small pillowcase, with Velcro to close it. To make a pattern, use a sheet of standard printer paper, it's the perfect length; you only have to make it narrower so that it will measure 7 x 11 1/2 inches. (If your ice pack is a different size than my 6 x 8 inch one, just measure it's width and add an inch to make the pattern's width, and make the length about 3 1/2 inches longer than your pack, so it has room for the Velcro and it gives you some length to hold onto to carry it. You can carry several at once by holding just the toweling at the ends.) Icepack Cover Template
     

    Advertisement

  2. Using the woven edges and pre-made hems of the towel can save you having to sew a hem. Fold an edge over 7 inches, place your pattern along the fold so that the narrow end is along the pre-made towel edge. You'll only have to cut around the paper at one side and one end this way. Icepack Cover step 1
     

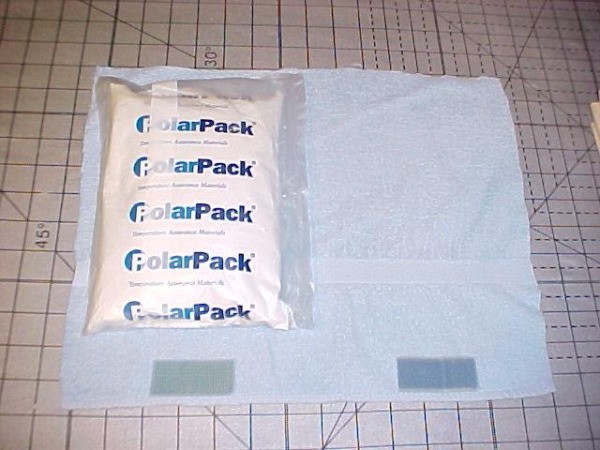
  3. Where to put the Velcro isn't critical, but I put mine about 2 1/2 inches from the sides, as seen in the photo with the ice-pack. Sew around the edges of each Velcro strip with wide zig-zag stitches. (I re-used some blue Velcro cut from a yard sale item, and my towel was blue, so that's what you see here. Use whatever color you have, no one will see it anyway.) Icepack Cover step 2
     

    Advertisement

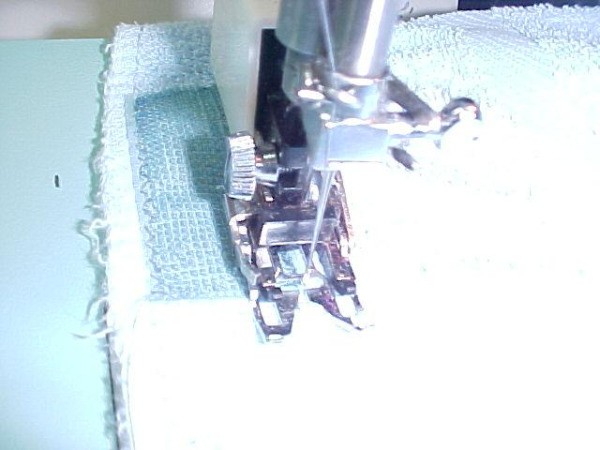
  4. Fold your towel rectangle in half, with the Velcro on the outside. Using wide zig-zag stitches again, sew down the side and across the bottom right up along the edges, letting the needle fall just off the edge as it swings to the right. Zig-zag stitches will keep the towel from raveling when you wash it. Icepack Cover step 3
     

  5. Turn it right side out (Velcro now on the inside) and you're ready to pop your ice pack inside it.

I made ten covers from one towel in under an hour, so go ahead and make yourself a lot of covers while you have everything out, you'll be glad you did. In my instance, ten wasn't as many as I'd need in a day because hubby always has several in use and several refreezing, and sometimes one or two may need the cover washed, or dried out if it gets wet.

Advertisement

You can, of course, freeze the ice packs bare and keep switching them out with just one or a few covers, but if you have someone in the house who's hurting, they really don't want to stand in front of the freezer trying to balance slippery cold ice packs falling all over the place, and neither do you! The toweling makes them very easy to handle.

By Mary LaCaze from Mountain Pine, AR

Add your voice! Click below to comment. ThriftyFun is powered by your wisdom!

 
In This Page
Categories
Crafts Sewing PatternsOctober 14, 2011
Pages
More
👔
Father's Day Ideas!
🌻
Gardening
👒
Mother's Day Ideas!
Facebook
Pinterest
YouTube
Instagram
Categories
Better LivingBudget & FinanceBusiness and LegalComputersConsumer AdviceCoronavirusCraftsEducationEntertainmentFood and RecipesHealth & BeautyHolidays and PartiesHome and GardenMake Your OwnOrganizingParentingPetsPhotosTravel and RecreationWeddings
Published by ThriftyFun.
Desktop Page | View Mobile
Disclaimer | Privacy Policy | Contact Us
Generated 2024-05-07 07:18:34 in 3 secs. ⛅️️
© 1997-2024 by Cumuli, Inc. All Rights Reserved.
https://www.thriftyfun.com/tf24557932.tip.html