social

Making Panoramic Sugar Easter Eggs

Harlean Greathouse
March 22, 2007

Here are some lovely instructions for making Panoramic Sugar Eggs sent in by long time reader Harlean. (originally published 3-21-2005) Homemade sugar eggs.
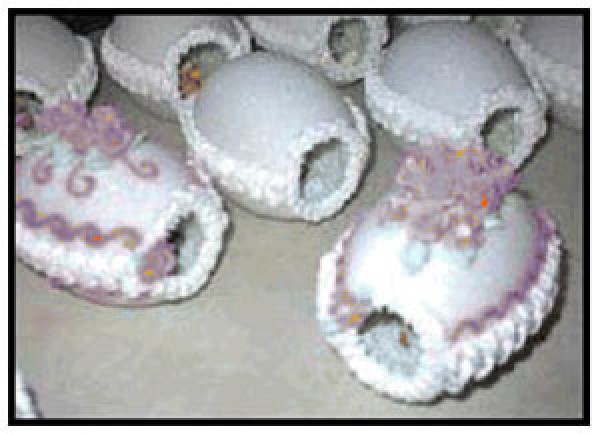
 

List of Supplies:

Instructions:

  1. Fill the mold halves with sugar to figure out how much you will need for each egg. You will need to mix with just enough water to make it like sand for sand castles . . . about 1 Tablespoon of water for each cup of sugar. Just sprinkle the water on a little at a time and mix with your hands. When you squeeze a handful and it clumps together, it's ready.
  2. Pack both halves of the egg firmly with damp sugar. Level off.
  3. Place your cardboard on top and invert the egg onto it. Place carefully on the cookie sheet, and slide the egg off the cardboard.
  4. Carefully lift the plastic mold off the sugar. Using a thin knife, make a cut down through the pointed end of the egg about 1/2 an inch from the end. Or if you would like a larger opening, make this 3/4 inch. Leave this piece in place for the time being, as it will keep the end from drying so you can scoop out the opening.
  5. Leave eggs to dry. This step will take several hours. Just wait until you can pick one up in your hand without it collapsing. You may lose a few at first, until you get the "feel" of it.
  6. When it is ready to handle, very carefully scoop out the sugar from inside leaving at least 1/4 inch of shell of a little more. You can use the sugar that you scoop out of your first egg to make another egg.
  7. Let the hollow shells sit overnight to let them get completely dry, then rub the inside with your fingers, to smooth the inside surface a little.
  8. Make your icing, divide it into small amounts and make several colors. Leave some white to "glue" the two halves of the egg together. The icing consists of powdered sugar and egg whites.
  9. Place a couple egg whites in your mixer bowl and blend enough powdered sugar to form peaks. If it is not still enough, your decorations will collapse, and if it is too stiff, you will not be able to squeeze it out of your decorator.
  10. You can spread a little green icing in the bottom half of the egg, set your little figurine inside, pressing it into the icing to secure it. Or you can pipe "grass" inside. This icing will dry very hard, and hold your bunny or whatever in place. These little figurines can be found at Hobby Lobby or other craft stores before Easter and are inexpensive. If you think ahead, you can get them at clearance prices after Easter for next year. I paid 50 cents each for the ones pictured here.
  11. After you secure the bunny (or figurine), spread white icing on top of the bottom half of the egg sparingly. I find this is most easily done with your finger. Match the edges, set the top half onto the bottom half. If the hole looks ragged, don't worry. Your icing trim will cover this.
  12. How elaborate you are with the finishing touches will be determined by your expertise with a cake decorator. The simplest, but still impressive, embellishment is to simply use a star tip to cover the seam around the egg, and to trim out the round hole at the pointed end. You can even make simple flowers with a star tip, if you are a beginner decorator. You can be creative here. You can personalize them, you can add ribbons. It is up to you. Just have fun with it.
  13. If stored properly, these will keep for years. Do not wrap them in paper, as they will draw moisture if you live in a humid climate. They can be just set on a shelf, or stored in a sealed Zip Lock bag. They can even be boxed and stored in the freezer. But they will be loved and cherished by anyone who receives them.

The instructions are also in a PDF file for which you may need Acrobat Reader to view. Download Acrobat Reader

download_in_pdf_format.

Read More Comments

Questions

Here are the questions asked by community members. Read on to see the answers provided by the ThriftyFun community.

April 15, 2019

I wanted to try making a panoramic Easter egg this year, my first time and while checking out different ways to make them I've come across some that use powdered sugar and egg whites and some are like yours that just need water and dye if your coloring the egg. So what's the difference between using just the water or using powdered sugar and egg whites? I'm not going to eat it, but do plan on sending some to my family, they're just going to be gifts. I would like to be able to keep them. I read if you do want to keep them, just wrap them carefully and put them in a box. I'd really appreciate your help with it comes to this project. Thank you in advance for your time and help.

Advertisement


Answers


Gold Post Medal for All Time! 677 Posts
April 15, 20190 found this helpful
Best Answer

This recipe uses both egg whites and powdered and regular sugar. It makes a stiffer mixture that holds up better and takes the dye better. www.favfamilyrecipes.com/.../

 
Answer this Question

March 2, 2011

Does anyone make and sell the sugar coated Easter eggs?

By donita

Answers


Bronze Post Medal for All Time! 148 Posts
March 3, 20110 found this helpful
Best Answer

Hello!
I have made them in the past, but have never tried shipping them. I do know that they are not as fragile as they appear. They are not as difficult to make as it would seem. I submitted a step by step instruction sheet with pictures a few years ago. Perhaps you might like to learn to make them, or have a crafty friend who could make them for you.

Advertisement

Or both of you work together to make them.

You will find a PDF copy that you can download using acrobat reader. You will find it here:
www.thriftyfun.com/.../PanoramicSugarEgg.pdf

Just copy and paste into your browser. Or you can type "Panoramic Sugar Egg" into Thrifty Fun Search at the top of the page to find it.

 
Answer this Question
In This Page
Categories
Holidays and Parties Easter EggsApril 17, 2019
Pages
More
🎆
Fourth of July Ideas!
😎
Summer Ideas!
🌻
Gardening
Facebook
Pinterest
YouTube
Instagram
Categories
Better LivingBudget & FinanceBusiness and LegalComputersConsumer AdviceCoronavirusCraftsEducationEntertainmentFood and RecipesHealth & BeautyHolidays and PartiesHome and GardenMake Your OwnOrganizingParentingPetsPhotosTravel and RecreationWeddings
Published by ThriftyFun.
Desktop Page | View Mobile
Disclaimer | Privacy Policy | Contact Us
Generated 2024-06-22 23:28:50 in 4 secs. ⛅️️
© 1997-2024 by Cumuli, Inc. All Rights Reserved.
https://www.thriftyfun.com/tf334674.tip.html