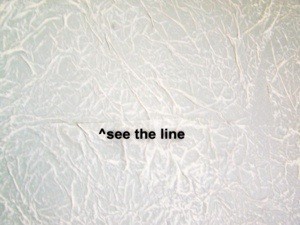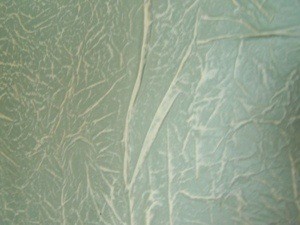
After putting up with dark paneled walls I busted loose and covered them with tissue paper. This is how I did it. It is a long process so I suggest you do one wall at a time.
You will need three different colors of paint, one flat dark base paint, one flat accent color and a lighter one for highlights, white tissue paper, sheetrock mud, one 3 to 4 inch soft bristled brush. Lots of rags if you are as sloppy as me. Water base paints are fine.
I filled the grooves with sheetrock mud, sanded it smooth, then wiped the dust off with a damp cloth. I then put a coat of Kilz Primer on and let it dry. Then I painted a 2 x 3 foot area with my chosen dark base color, keeping in mind I am aiming for an old world stucco look, with depth. I used a medium green that I had left over from my bedroom walls.
To get the rough wrinkled look, it takes a matter of experimenting. After several tries, I liked just putting the tissue paper on the wet paint and scrunching it up in areas with my hand. Sort of like you are starting to pick up a hand full of something. It will move on the paint as long as the paint is wet, but be careful it will tear easily. Don't worry if it does tear, just push the tear together and it won't show at all.
You will want to use a soft bristled brush to make the edges blend together. As long as the paper is wet they will blend so the edges don't show, just keep tapping with the brush. Turn your tissue paper with each new piece so you don't end up with the edges lined up one above or beside the other. You can tear the tissue paper in odd shapes to avoid the lines, but I didn't want to waste the paper or take the time to do it. Continue until the wall is covered.
After the paint is dry, Go back and make sure you don't have any edges loose. If you do take some of the paint and wet them, tap them down.
When all is dry, you will be doing a technique called dry brushing. Using your accent color (I used a yellowish beige) pour a small amount of the paint, maybe a tablespoon or so, on a lid or paper plate. Just barely touch your 3 or 4 inch soft bristled brush in the paint then wipe almost all of it off on another part of the plate. Start in an area that won't be seen, such as behind the TV.
After you get this layer done on the whole wall, You do the same with your accent color. I used an off white satin paint for this one to kick it up a little and catch some light.
This sounds difficult but it really isn't; it is time consuming, but I absolutely love the results.
Source: A friend who found it in a magazine.
By Ann Winberg from LC, NE

Add your voice! Click below to comment. ThriftyFun is powered by your wisdom!
It looks really, really pretty but I don't think I would have the patience to take on such a large project now days :-(
Looks great. Maybe try it on one wall and that way it won't take as long, but you'll still get the nice look.
Add your voice! Click below to comment. ThriftyFun is powered by your wisdom!