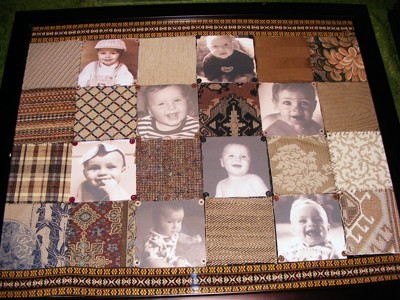
Using discarded upholstery fabric, a clearance sale frame, felt, and printer fabric, I created this quilt-inspired wall art.
Approximate Time: A weekend
Supplies:
- fabric of your choice (I chose fabric that had the colors of the room it goes in)
- frame (mine was 24x30 inches)
- felt (size of your frame)
- Inkjet fabric paper (in sewing stores)
- buttons (optional)
- needle/thread/pins
- sewing machine (optional)
- digital images
- photo program that makes sepia images
- printer
Instructions:
- Cut your felt to fit your frame. Set aside.
- Determine how many photos you want to use and the size of your squares (mine were 5"x5"). Using Photoshop or some other photo editing program, change your images to black and white with sepia tint (this part is optional; you can leave your pictures color or black and white depending on your fabric choices) and size them to your square size.
- Print them on the fabric paper and set aside.
- Begin cutting your fabric squares to your desired size and arrange to fill your frame. (I suggest having fabric under your photos so that each square has the same thickness; it makes the sewing part easier.
- There are fabric photo papers with adhesive backs to make the photo and fabric easier to handle. Cut your photos and decide where to place them in your fabric arrangement.
- Once you are happy with your arrangement, begin pinning squares to your felt. Be careful where you pin on the photo squares, as the pin holes will show. You can either sew your squares with a machine or by hand. I accented the photo squares with buttons in each corner.
- Once all squares are attached to your felt and accents are complete, insert into your frame and enjoy!
By jenn from Vineland, NJ
