I recently downloaded a beautiful photo from http://www.canstockphoto.com, a stock photo site that offers downloads at very affordable rates. It was a photo of a small kitten peeking out of a box. The photo was taken by a photographer called Bedaloga (you can see his profile at http://www.canstockphoto.com/Bedolaga/). This photo inspired me to make a birthday card that is a bit different.

Approximate Time: 45 minutes
Supplies:
- a suitable photo
If you want to use the same, download it for a small fee at http://www.canstockphoto.com//Bedolaga/.
- a photo editing program
I used PhotoScape version 3.5, which can be downloaded free of charge from http://www.photoscape.org/.
- 8.2" x 5.6" black-colored cardboard
- 8.27" × 11.69" light brown cardboard
- one fragile sticker
I got one free of charge at our local post office.
- 26 inches of 1 inch wide red organza ribbon
- one sheet of ordinary white printer paper
- pencil
- ruler
- pair of standard scissors
- quick-drying glue
- a few drops of strong bonding glue
- one light brown envelope
Instructions:
- Open the downloaded photo on your computer, and suitably resize it with the PhotoScape program.
- Click on the Object-button and choose "T", which allows you to insert a text box onto the photo. Write "Happy Birthday" as your message, choose Tahoma as text, red as the color, and 100 as the size. Then, use the on-screen arrows to correctly position the message over the photo.
- Now choose the Filter button and click on Region (Out of Focus). Choose the black Radial option, with the settings 90% for the Size and 35% for the Feather.
- Print the photo on ordinary white printer paper.
- Fold black cardboard in half to create a card 4.1" x 5.6" ~ use the ruler to make the fold neat and smooth.
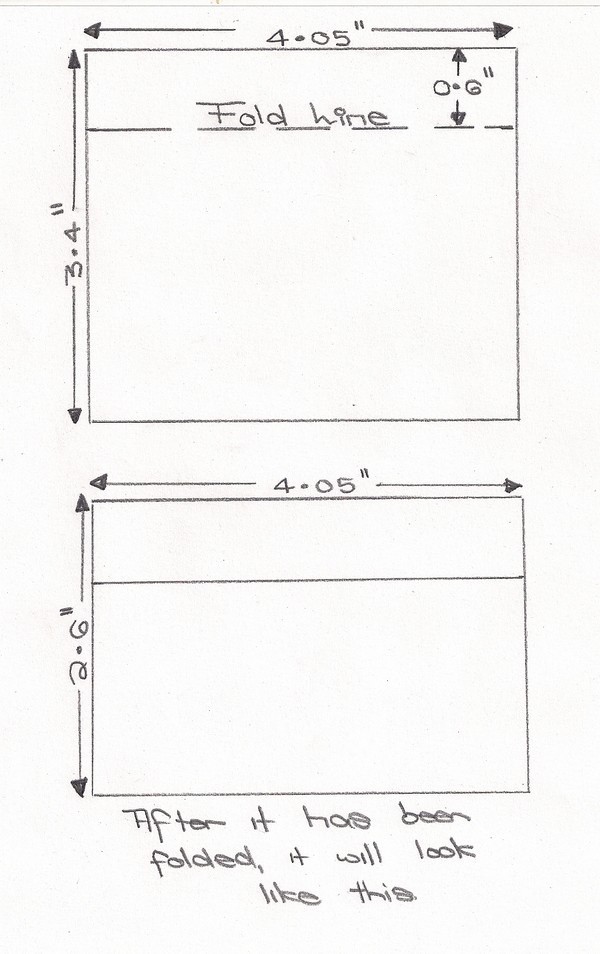
- From the light brown cardboard, cut the following four pieces of cardboard: Two pieces sized 2.6 x 5.4 inches and two pieces sized 3.4 x 4.05 inches. These four pieces of cardboard will become the flaps of a "packaging" box.
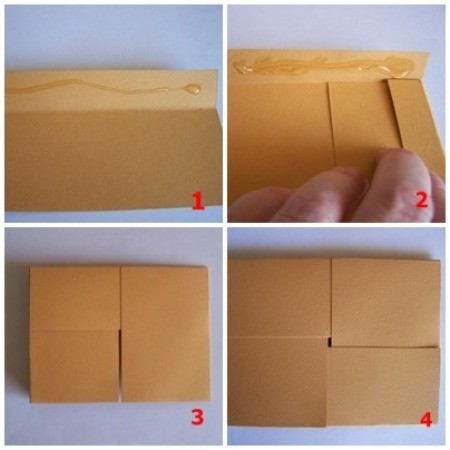
- Take the two 2.6 x 5.4 inch pieces, and fold both of them as illustrated in sketch 1.
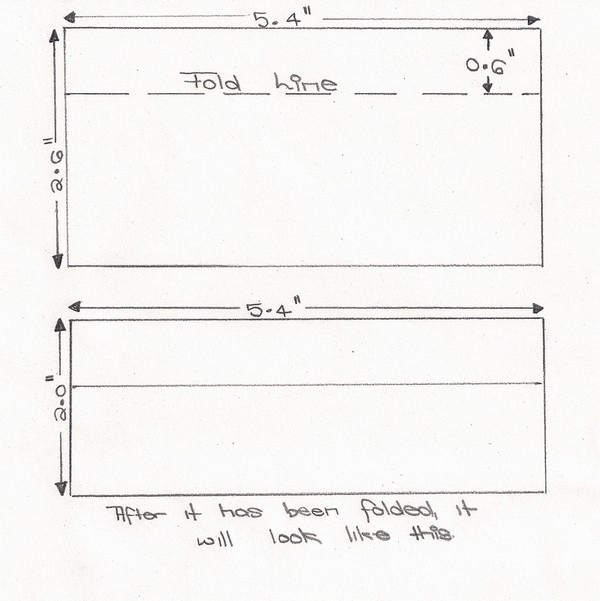
- Take the two 3.4 x 4.05 inch pieces, and fold both of them as illustrated in sketch 2.

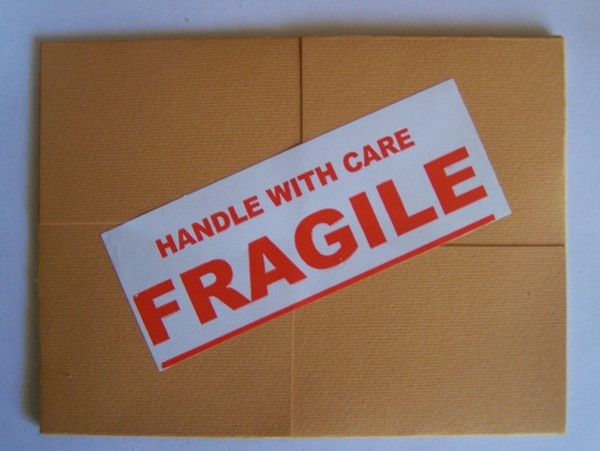
- Fold the four flaps into each other as you would expect to fold the flaps of a box when closing a packing box, and glue them together.
- Stick the fragile sticker diagonally over the folded flaps.

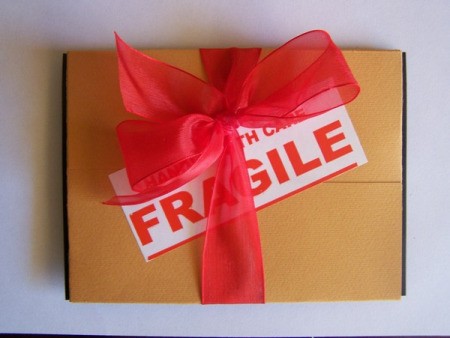
- Tie the ribbon around the "box" and make a bow.

- Add a few drops of strong bonding glue to the knot of the bow, so that the bow won't come loose.
- Glue the "box" to the front of the card, carefully ensuring that it is an equal distance from the edges.
- Cut out the printout from the photo and glue it to the inside of the card, carefully ensuring that it is an equal distance from the edges.
Note: If you download images from http://www.canstockphoto.com/, there will be no watermark on the images.
By Benetta from Pretoria, Gauteng


