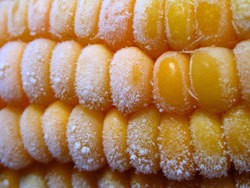
Corn should be harvested for freezing in the "milk stage" (as soon as the kernels are full of sweet, milky-colored juice). If the fluid in the kernels is clear, the corn is not ready yet. Try to process the corn a quickly as possible after harvest, before its natural sugars start turning to starch. Purchased corn should be kept refrigerated while being sold, if it's not, reduce storage time accordingly. Husks should be green, silks should be moist and gold and the kernels should be packed in tight, even rows.

Husk and trim the ears, remove silks and wash. Sort according to size. Cobs should be pierced lengthwise in the center with a sharp knife. If freezing kernels, remove them from cobs.
Freezer containers should be moisture and vapor resistant and should not be prone to cracking or breaking at low temperatures. Containers should provide protection against absorbing flavors or odors and should be easy to label. Suitable packaging for freezing corn includes freezer-grade plastic bags, rigid plastic containers or glass containers and heavy-duty aluminum foil.
10 to 12 months at 0ºF.
To remove frozen cobs with husks, run them under cold water.
To cook frozen cream-style corn, add a small amount of milk or light cream, salt, pepper and a 1/2 tablespoon of butter.
Keep corn in the refrigerator in perforated plastic bags for 1 to 2 days.

Add your voice! Click below to comment. ThriftyFun is powered by your wisdom!
IF I FREEZE CORN ON IT'S COB.HOW DO I COOK IT WANT WE WANT TO EAT IT?
The best and most success we've ever had with freezing good fresh sweet corn was to take it as quickly as possible and wrap each individual ear (do not shuck) in foil, and crimp tightly. Place as many of those wrapped ears as you think you'll want to cook at one time into a large Ziplock Freezer bag and freeze. When you're ready to cook the corn, remove from freezer, and place the wrapped in foil ears on a metal baking sheet and place in a cold oven. Set the oven's temperature to 400º and let the ears thaw and cook/bake in the oven for 1 hour.
Depending on your own oven, the corn should be done. Remove from the oven, and carefully using clean tea or dish towels, remove the shucks and you'll be amazed at how easily the silks all come off with the shucks. So easy. Your corn is ready to eat.
If you don't find the first ear as done as you want it to be, recover it and wrap back in foil...Return all corn back to the oven and continue baking for another 15-20 minutes. Test again. Keep doing this until you know the corn is done to suit you. Then be sure to note how long it took to both thaw and cook somewhere handy so that you have the exact time it took to bake it the way you like it.
You'll only have to do this one time. From then on, you'll know just how long it'll take with your particular oven.
Freezing and cooking corn-on-the cob this way will assure that you are getting the most flavor out of your good sweet corn. The shucks protect and keep the flavor locked in until you're ready to cook it.
Good luck and happy Summer. Having good fresh sweet corn is one of the best things about summer.
Enjoy it as often as you can.
Pookarina
Add your voice! Click below to comment. ThriftyFun is powered by your wisdom!