social

Old Clothing Rag Rug


Bronze Post Medal for All Time! 104 Posts

I crocheted this small rag rug out of 2 nighties, 2 tee shirts, and a pair of knit shorts. It measures 28 inches in diameter. I love working with old knit clothing because the edges do not fray.

Advertisement

Approximate Time: 5 hours (estimate)

Supplies:

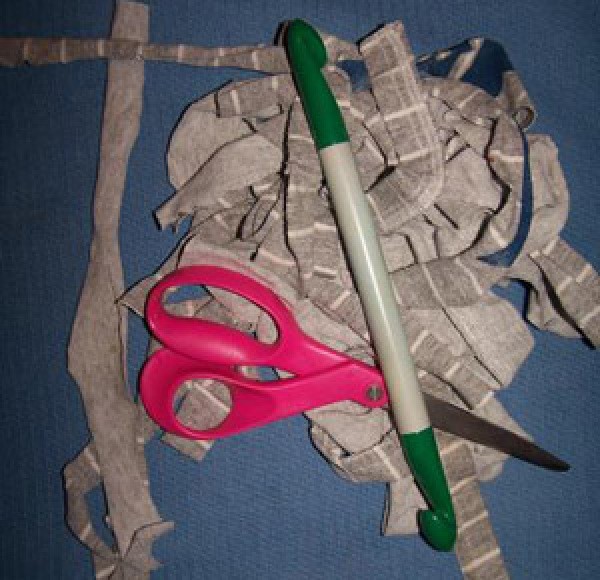
  • old clothing
  • size Q crochet hook
  • thread
  • shears
  • sewing machine

Supplies for rug.


Instructions:

  1. The most time consuming thing is cutting the clothing into 1 1/2 inch strips. Sewing them together. Rolling them up into a ball to use for crocheting. It is all an estimate as to how much you need.
  2. First I cut off the sleeves and any ribbing along the bottom or cuffs.
  3. I cut the strips from the bottom of the tee shirts and went around the shirt trying to keep the strip as one big long strip. That saves on sewing a lot of short strips together.
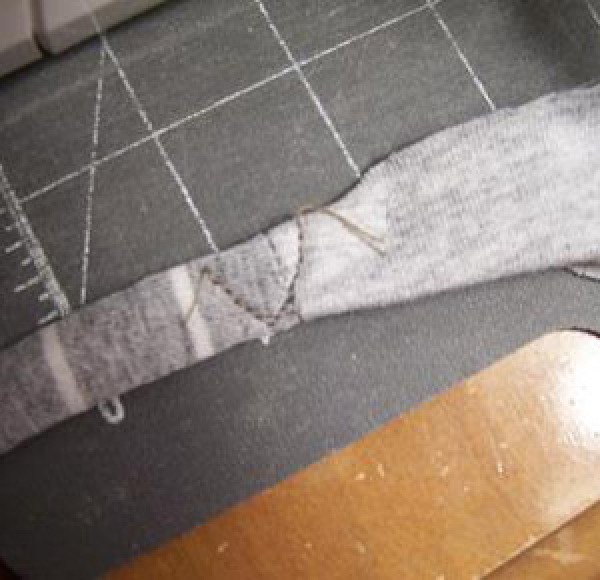
  4. When I sewed the strips together, I did it as you always do, right sides together. Back stitch in the beginning and at the end before you cut the thread. Open the seam. Fold the top part of strip down and fold the bottom part of strip up. Then I sew a "V" going across from the top to the bottom making it a strong seam and will never tear apart.
  5. Sewing strips of material together.
     

    Advertisement

  6. Roll into a big ball.
  7. Round 1: Chain 4, sl st to beg. ch to make a circle. Ch 1, 12 DC in circle, sl st in first DC,(ch 2 st is considered a DC st. Count as DC in each row). You now have 12 DC.
  8. Round 2: Ch 2, DC in same space as ch 2 (remember ch 2 is considered a DC st),2 DC in each DC around. Sl st in top of ch 2. You now should have 24 DC.
  9. Round 3:(Remember at the beginning of each row your ch 2 is the first DC st) Ch 2, (DC in the first DC, 2 DC in next DC) continue around, sl st in top of ch 2. You now have 35 DC.
  10. Round 4: Ch 2, (DC in first 2 DC, 2 DC in next DC) continue around, sl st in top of ch 2.
  11. Round 5: Ch 2, (DC in first 3 DC, 2 DC in next DC) continue around, sl st in top of ch 2.
  12. Round 6: Ch 2, (DC in first 4 DC, 2 DC in next DC) continue around, sl st in top of ch 2.

  13. Round 7: Ch 2, (DC in first 5 DC, 2 DC in next DC) continue around, sl st in top of ch 2.
  14. Advertisement

  15. Round 8: Ch 2, (DC in first 6 DC, 2 DC in next DC) continue around, sl st in top of ch 2.
  16. Follow this pattern, increasing at equal intervals for each row until you reach the size you want or run out of material. You can finish it off by SC in each stitch around and joining with a sl st. Fasten off and work the end back into your work. I like to hand stitch it with needle and thread so it does not work out.

If you increased correctly your rug will lay flat.

My rug was about 9 rows. You can make it using double crochets or single crochets.

By Little Suzy from Millbury, OH
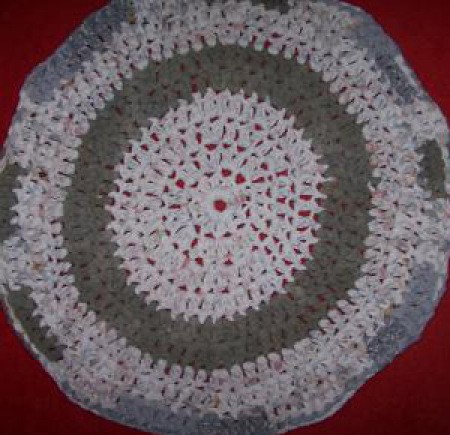
Finished rug.
 

Add your voice! Click below to comment. ThriftyFun is powered by your wisdom!


Silver Feedback Medal for All Time! 290 Feedbacks
April 22, 20090 found this helpful

You did a very nice job, I compliment you!
Years ago I made a similar rug out of old clothing, but crocheted it into a rectangle.

 
April 23, 20090 found this helpful

I am a quilter and have a ton of fabric left from quilting and other sewing. I decided to make a rug from my old quilting material and other cotton fabrics.

Advertisement

My rug is rectangular It's so much furn using old fabric and remembering the people I made the quilt for! and I'm still working on it.


Bronze Post Medal for All Time! 213 Posts
April 24, 20090 found this helpful

Thank you for posting this. I know from experience that the hardest thing is make the rug lay flat & not wavy or curled under. Yours turned out perfectly! I have a friend who makes rugs out of sheets she buys at the thrift store. I prefer using recycled plastic bags. Thanks again for taking the time to post this!s.

 
April 25, 20090 found this helpful

Totally Blown Away! This piece is wonderful! How Clever! I don't know how to do much more than sew on a button, darn a sock, or repair a hem! sigh.

 
August 27, 20130 found this helpful

This is the most clear instructions I have ever read. Thank you!

 
August 19, 20180 found this helpful

Loved this!! Really clear instruction that really work!!


Add your voice! Click below to comment. ThriftyFun is powered by your wisdom!

 
In This Page
Categories
Crafts RugsApril 22, 2009
Pages
More
🎂
Birthday Ideas!
🍀
St. Patrick's Ideas!
💘
Valentine's Ideas!
Facebook
Pinterest
YouTube
Instagram
Categories
Better LivingBudget & FinanceBusiness and LegalComputersConsumer AdviceCoronavirusCraftsEducationEntertainmentFood and RecipesHealth & BeautyHolidays and PartiesHome and GardenMake Your OwnOrganizingParentingPetsPhotosTravel and RecreationWeddings
Published by ThriftyFun.
Desktop Page | View Mobile
Disclaimer | Privacy Policy | Contact Us
Generated 2024-02-02 08:04:55 in 4 secs. ⛅️️
© 1997-2024 by Cumuli, Inc. All Rights Reserved.
https://www.thriftyfun.com/tf64922365.tip.html