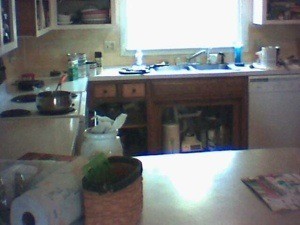
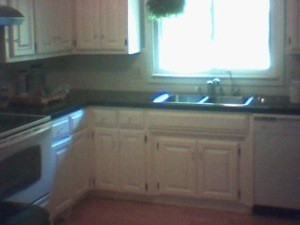
This budget remodel was the first project I have ever taken on and I couldn't be more pleased with the results. Using the tips I've found here, for just under $2,000 I have a marvelous fashionable new kitchen.
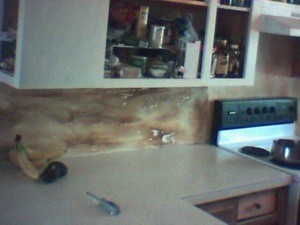
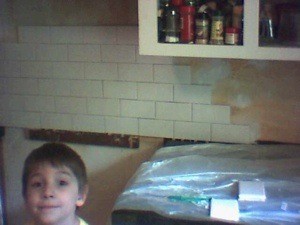
At first, all I intended to tackle was painting the dark oak kitchen cabinets. But then I got carried away and decided to tear down the the laminate backsplash, which I expected to be a horrible job, but it took me less than two hours to do it. I bought ceramic subway tiles from Menards and did the work myself. Of course, then my pock-marked white laminate cabinets were no longer good enough. I wish I would have taken this before I took down the cabinet doors. They were dark oak, making the kitchen look dreary.


I first joined TF when looking for an economical way to replace them. I was scared, but too the plunge, using the painting technique with the Enviro-Tex coating as per instructions from this website. With the painting and some new moulding, a new range to boot (which I wasn't planning on, but it broke), it's been a big project, taking me all summer, but the results make it worth it.

For the cabinet paint I used an oil/latex mix (because I hate working with pure oil paint). The color is called Sugared Almond. For the countertops I coated with the same primer I used on the cabinets just because it was already on hand. Then a rolled on a coat of black enamel, followed by Rustoleum Stone Accents spray (granite-look). After completely dry (very important), I sprinkled liberal amounts of silver gold glitter (yep, the same kind the kids use to sprinkle on glue and paper). Then I used the Enviro-Tex.
Unfortunately, though, I had to do two coats of the stuff because of a "glitter situation". I had both slivered glitter and square glitter. After apply the Enviro-Text, the square glitter stood on end in places. I had a problem when the glitter stood on end in the Enivro-Tex and left bumps after drying. I had to coat it twice with the Enviro-Tex. Also, be diligent with the Enviro-Tex. Unbeknownst to me, some dripped beneath the plastic I had on the floor and it died there. Now my engineered hardwood floor is ruined in a couple of places.
Part of the cost of the redo was the range hood, which was under $200 at Lowes, and a new kitchen sink and faucet. I bought them online and saved bookoo bucks! Same with the glass cabinet knobs. Much cheaper online than in the stores.
Subway Tile: I borrowed my brother-in-law's electric tile cutting saw. He also had a non-electric rail cutter and a hand snip, but I couldn't master either one. The electric one was messy, leaving my hair coated in tile dust, but much easier to use in my opinion. My son is standing where the range normally sits. They say tiling is easy, but I thought it was the toughest part.
I still marvel that I was able to pull this off with almost no help. My husband installed the sink and put in the new light fixture above it . . . and all the rest was done by lil' ole me with almost no carpenter experience whatsoever. Half the battle in budget home maintenance, I now realize, is not being afraid to try things for myself.
By Carol Verhoff from Ottawa, OH


Add your voice! Click below to comment. ThriftyFun is powered by your wisdom!
Believe it or not, I can top your $2000 remodel with a 50 buck rental re-do! Back in the early 1980's I was just divorced & very broke & had just moved into this old but cute little one bedroom house. The kitchen counter tops were so very badly beat up & I figured there was nothing I could do to fix them. I finally decided to just clean them well then I laid down a wood grain look contact paper. Yes, I know this isn't a great solution! But, hey, what the heck, it worked! I added a little paint & sewed a pair of curtains along with matching chair cushions, a large herbal poster on the wall above the table, some colorful glass jars in the window & *presto* for well under fifty bucks I ended up with a kitchen in a rental house I could live with!
Everyone marveled at the before & after. It was quite spectacular. That contact paper on the beat-up kitchen counter REALLY made the difference! Of course I had to be super-careful & always use a cutting board, but, what-the-heck, it worked & it looked good!
Oh, how I miss that little beat-up ranch house! It was one of those super-cheap-rent houses. What I miss is that it sat on what used to be an old dairy farm in the middle of the city. There was only one other house & a bunch of old out-buildings on the 40 acres. It came with huge garden, a fenced pasture for my 3 horses & they also boarded a bunch of horses there. It's too bad the developers came in & tore the 2 turn-of-the-century houses & the barn down & put up 200 or more huge houses in their place. It's now been 25 years & no one can even remember when there was a place where you could ride your horse in that part of town. Progress!
You did a lovely job and I give you a ton of credit for tackling this on your own. My husband recently passed away and he used to do everything. We never had to hire anyone. Now, it's up to me and I'm scared to death to even use his electric drill to hang something on the wall. Little by little I'm getting braver. I think I'm just afraid that I'll mess something up and have to call someone to fix it and I can't afford to do that.
This looks so nice! Congratulations!
Your new made over kitchen really looks professionally done. Good for you to tackle something new and broaden your horizons. What room do you have in mind next?
Wow! Looks great and what an accomplishment to know you did most of it yourself.
Thank you for all the positive feedback. Notice I didn't include a picture of the fridge. That side of the room had some major issues. There was a floor to ceiling shelf next to the fridge, which I've hated it since the day I moved here. I tore that down and my BIL built me a new one. I still need to paint it and order doors for it. Then I'll be done. My next room will be the great room and adjoining hall, but I'm only slapping on a coat of paint. I don't think I'll be ready to tackle such a big project for a long, long time.
It looks really great. Congratulations, the effort was surely worth the end result. You're much braver than I was, I just repainted our cabinet doors, wasn't game to attempt tiling so left that to hubby as he's had lots more practice. You've encouraged me to be braver :)
I love it! You did a great job. I find that when I go for it, I can do more than I ever imagined. It usually takes longer than I expected but it is such a rewarding feeling to do it yourself.
Thank you! My kitchen needs HELP..so maybe with your great advice, I will tackle it. Thank you!!
Add your voice! Click below to comment. ThriftyFun is powered by your wisdom!