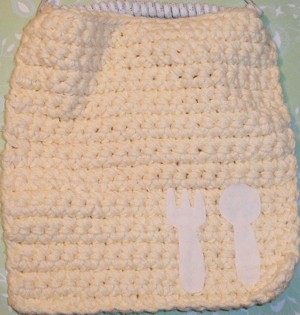
Handmade one-of-a-kind keep-on bib: cute and comfortable for a new little baby.
Approximate Time: 15 - 20 minutes
Supplies:
- 1 crochet washcloth
- 1 springy, no-tie shoe lace
- (Heat N Bond or other brand) iron-on adhesive
- fabric scraps for applique
- iron
- fabric scissors
Instructions:
- Gather materials. The springy, no-tie shoe laces can be purchased at Payless Shoe Source (a pair for about $2). Also, for the bib, I bought a soft, thick, light yellow crocheted washcloth from Goodwill for 50 cents.

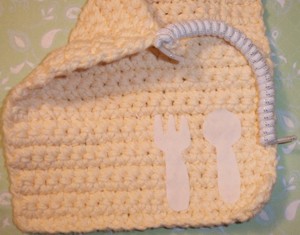
- Insert one end of the curly shoe lace into a corner hole of the crochet wash cloth. Knot the shoe lace twice over the crochet yarn or until secure.
- Leave the other end of the shoe lace free, or pull through the other side of the crochet washcloth, but "do not knot" this side. One end of the shoe lace should be able to be pulled out by an adult if and when the bib is to be removed, i.e. for big messes as to not get the child messy. (Leaving one side loose will stay put due to the coiling of the shoe lace. A couple of loops can serve as an extra anchor.)

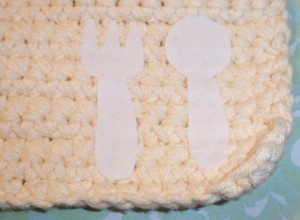
- For the homemade applique, decide on an original idea of your own, or a baby fork and spoon as pictured. This is the fun part, consider other shapes such as a bottle, plate, animal, monogram letter, etc.
- Follow simple directions on the iron-on adhesive package to quickly bond the back of your fabric, using as little as needed to conserve adhesive and fabric.

- Once bonded, use the scissors to cut your desired applique shape(s).
- Iron the applique, face-up onto the self-appointed front of the crochet bib in the area of your liking. (For my bib, I designated the front side of the bib based on having the knotted end of the shoe lace in the top left corner of the crochet wash cloth.)
Your handmade, one-of-a-kind Keep-On Bib is done and ready to be gift-wrapped for a special, new baby.
By Erin R. from Seffner, FL


