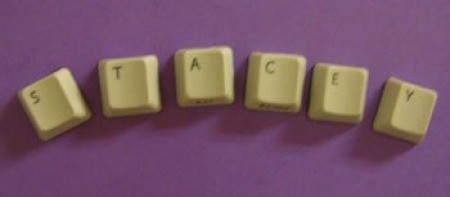
I have a unique and fun craft idea that's very fast and easy to do. They are alphabet magnets made from computer keyboard keys. First, visit a local thrift store and pick up an old computer keyboard - they're very cheap. You'll also want to go to a craft store and buy small (yet strong) magnets or a long magnetic strip. I also used Super glue for this project, to ensure that the magnet sticks really well to the keys.
Now, take a thin metal object - i.e. one of those metal fingernail files or a dull knife, and gently pop the letter keys off the keyboard. Once they're all removed, you're ready to start the fun stuff.
I put an old folded up rag/towel on the table, as super glue will seep through something like newspaper and get on the table. You might consider cleaning any dirt off the keys with a damp paper towel and make sure they are completely dry. Also, the back of the keys need to be cut down so there's an even back on them. That's the hardest part of this project. With a razor blade, (or dollar store scissors), carefully cut down the piece on the back of the keys so that the keys sit flat on the table.
Next, trace around the back of each key onto a part of the magnetic strip and cut it out. Super glue the back perimeter edge of the key and stick the square of magnet on. Continue with each key. Now you have a unique set of alpahbet letters for your fridge! See pictures! I hope my instructions were understandable.
By Stacey from Orem, UT

Add your voice! Click below to comment. ThriftyFun is powered by your wisdom!

What a good idea lots of stuff can be made from something that is often tossed out! Thank you, I have 2 old keyboards I was going to toss .
Wow Stacey! You are a smarty!! I wonder if we had enough letters, could we use them for scrabble tiles? See you Tuesday!
WOW!! What an awesome idea! Would be good idea for young kids to do. Fun to give as a gift too. I love making magnets!
I have for dozens of years popped the CAPS LOCK key off any new keyboard, clamped them with a vise or visegrips, filed their back flat and filled their back with liquid (2 hour) epoxy, so that there is a smooth, flat surface.
By the way, just snipping the back of the keys does not work well. You don't get enough surface to glue them properly. You have to fill the back with a liquid epoxy until it is flush and level. An extra drop of epoxy, so that it pillows (almost overflows) raises it a bit over whatever you glue it on and makes it look more realistic and easier to grab.
Have FUN!
DearWebby
Add your voice! Click below to comment. ThriftyFun is powered by your wisdom!