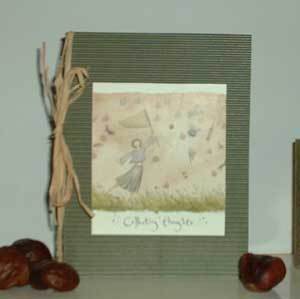
A handmade paper address book made of fine paper and a lovely greeting card. Perfect for your address book or to give to a friend.
Materials and Equipment:
- a large plastic bag or several sheets of newspaper
- a thick piece of cardboard or plywood to cut on
- a pretty greeting card, used
- an Xacto knife
- scissors
- raffia
- craft glue
- glue spreader or Q-tip
- a lid of a used plastic container (such as a yogurt container)
- a 30 inch long ruler with a hard edge
- a pencil
- an eraser
- a pen
- one sheet of corrugated cardboard, 8 x 12 inches or larger
- ten or more sheets of good quality white paper, 8 x12 inches or larger
- a long reach, heavy-duty stapler (like those used in schools)
OR
- a thin, plain paper journal (available at craft or stationery stores)
Instructions:
- Before starting, clear the table and cover it with newspaper or a large garbage bag to avoid getting glue on the table. Place a hard cutting surface such as thick cardboard or plywood on top of the table to protect it from cuts made with the Xacto knife.
- Place the piece of cardboard in front of you. This is going to be the cover of your address book. Using the pencil and ruler, measure off and lightly outline an area that is 6 x 9 inches. You will be folding this paper in half to create a 6 x 4 1/2 inch book. If you would like a different size, you need to adjust the measurements accordingly.
- Using the Xacto knife and the hard edge of your ruler, cut along the lines you have drawn.
- Place the pieces of white paper in front of you. These are going to be the pages of your book. Repeat steps two and three for this paper (you can usually cut three or more at a time), but this time cut the paper to slightly smaller measurements (about 1/4 inch smaller all around) so the paper will fit neatly within the cover.
- Fold the cover and each of the pages in half. Slip the pages inside the cover. They should just fit neatly inside. If they don't, re-cut them accordingly.
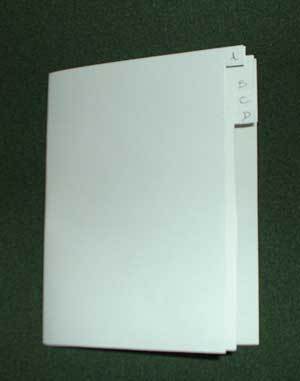
- Take the white pages out of the book. Separate the first two pieces of paper (four pages) and cut a 1/4 - 1/2 inch section out of the right hand side of the front two pages, stopping about a 1/2 inch from the top, creating a tab (see photo). Write the letter "A" on the tab with a pen.

- Repeat step six for each letter of the alphabet, just like in an address book. You may want to group some letters together such as "XYZ" so that you have enough pages in your book. With each cut, leave an extra 1/2 inch at the top so that the tab for each letter is visible (see photo). If you need more pages, cut more white paper.
- Slip the completed directory pages back into the cover. Open the book and staple length-wise along the crease. Three evenly divided staples should do it. If you can't find a heavy-duty stapler or are pressed for time, you can "cheat" on this craft and use a pre-made paper journal. If you do so, follow steps six and seven to create the directory, and then follow the next steps to personalize your journal.
- Place your greeting card in front of you. This card will be placed on the cover of your book. Decide how large you want the picture to be and outline these measurements on the back of the picture lightly in pencil. Using the Xacto knife and the hard edge of your ruler, cut along the lines you have drawn.
- Glue your picture onto the front cover using the glue spreader. Check the book for any stray pencil lines and erase these with the eraser.
- Tie a piece of raffia around the spine of the book in a decorative bow.

Add your voice! Click below to comment. ThriftyFun is powered by your wisdom!

Stacey Silva
Silver Feedback Medal for All Time! 453 Feedbacks April 1, 20060 found this helpful
Looks like a very cute idea! Might make a nice gift for Mother's day or something...thanks!
Add your voice! Click below to comment. ThriftyFun is powered by your wisdom!

